


you will see the “Clock Set” screen. Follow the directions on
pg. 6 (SETUP>Clock Set) to set the date and time. Pushing
the “Display” button will reactive the LCD. The camera is
ready to shoot, and considered to be in Capture mode.
To turn the unit off, press and hold the “ON /OFF” button
until you hear two beeps and the red light goes off. The camera
will turn itself off automatically to save batteries if none of the
buttons have been pressed for two minutes (this default time
may be changed, see “Changing Camera Settings”).
TAKING A PICTURE
With the camera turned on, just press the “SNAP” button and the image you are seeing in the binocular
or on the LCD will be stored in the camera’s memory. You will hear a single beep to confirm the photo
was taken. The LCD will momentarily black out while the photo is being stored, then display the photo
you have taken for a few seconds. The LCD then returns to showing a “live” image.
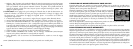
CHANGING CAMERA SETTINGS
While the camera is in Capture mode (LCD displays live image), press the “MENU” button in the
middle of the 5-way switch. This opens the menu that will allow you to change the settings of the
camera. Use the up/down arrows on the 5-way to step through the available menu items. To change the
value of a setting, press “MENU” again (the current value will be highlighted), then use the left/right
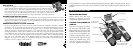
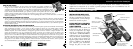
Pull Up
LCD Here
arrows to change the value as desired. Press “MENU” to confirm and return to the settings menu.
The following settings are provided:
1. EV (Exposure Value) lets you set desired amount of over (+) or under (-) exposure to override the
auto exposure. If you review a photo you just took, and it appears too dark or light, try adjusting the
EV setting and reshoot. For example, snow scenes may require a “+” EV setting if you want the snow
to be reproduced bright white as it appears to the eye.
• Settings: -2, -1.5, -1.0, -0.5,0, +0.5, +1, +1.5, +2
2.
RESOLUTION sets the desired quality of the pictures. Use the highest setting if you plan to enlarge
photos or will need the best quality. The lower settings are suitable for viewing on a PC. Use them if
quantity is a priority over quality, or you don’t wish to resize large photos later for email or web use.
• Settings (pixels): 2048×1536, 1600×1200, 1280×1024, 800×600
3. WHITE BAL (White Balance) sets correct rendition of colors under different types of lighting. “Auto”
usually works well, but if colors look unnatural, try setting this to match the source of light.
• Settings: Auto, Daylight, Cloudy, Fluorescent, Tungsten (incandescent bulbs)
4. METER allows you to set what part of the frame (image) the light meter analyzes to
determine exposure.
• Settings: Average (exposure based on entire frame), Weight (overall scene, but weighted to favor
exposure of a centered subject), Center (exposure based entirely on central subject, ignores rest of
frame-useful for strongly backlit subjects)
2 3