


4
5
varies in a pre-determined way and has three
options: Health = tness improvement, Slim
= weight control (HRC; requires heart-rate
measurement), Fit = prole designed for the
physically t. The level of difculty of the selected
prole can be scaled from 1 to 9. Level 1 is the
easiest and longest and level 9 the most challenging
and shortest. A full description of the proles is
given at the end of these instructions.
PRE-PROGRAMMED PROFILES
(HEALTH, SLIM, FIT)
1. Press PROG until the desired prole (Health,
Slim, Fit) appears on the display. Press OK to
conrm.
2. Use the - / + keys to select the level (Level 1-9).
Press OK to conrm.
3. Start pedaling to begin the workout.
DESIGNING YOUR OWN EXERCISE PROFILES
You can save three self-designed exercise proles.
Although the prole can be any of the MODE
programs (Resistance, Watt, Pulse), the program
cannot be changed during saving. A total of 30
changes can be saved in each prole. There is no
time limit in the proles.
1. Press REC to start saving your self-designed
workout. During saving the text REC is displayed.
Press OK after completing your prole. The text
REC on the display is cleared and replaced by
memory position “User 1”. The ashing numeric
value indicates that a prole has already been saved
in the memory position. Previous proles can be
replaced by new ones, or use the - / + keys to move
to other memory positions (User 1, 2, 3). Press OK
to save the prole in the desired memory position.
2. To use a self-designed exercise prole press
PROG until User appears on the display. Use the -
/ + keys to select a memory position (User 1, 2, 3).
If the memory position is empty the reading 0:00 is
displayed. Press OK to conrm your choice.
3. Start pedaling to begin the workout.
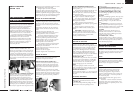
RECOVERY
Measure your recovery pulse rate at the end of
the workout. To measure recovery pulse rate press
PROG until the text “Recovery” appears on the
display. Press OK to conrm.
The measurement of recovery pulse takes
two minutes, during which time the current
heart rate is displayed. During measuring the text
“Recovery” ashes on the display. At the end of the
measurement period the recovery ratio percentage
is displayed. The smaller the reading the tter you
are. Note that results are individual and not directly
comparable with those of others. NOTE ! If there is
a problem in pulse measurement, the display will
show - - instead of the heart rate, and measurement
of recovery pulse will automatically restart when
the user interface once again receives a heart-rate
signal. Press OK to move from recovery pulse
measurement to the main display. The main
display will appear automatically 1 minute after the
measurement.
PAUSE
When the user interface has not been used for three
minutes (no heart rate registered, no keys pressed,
no pedaling), it automatically switches itself to
energy-saver state. The interface is returned to its
active state by pressing any key, starting to pedal or
sending heart-rate signals to the unit. The values in
a workout that has been interrupted are saved in
the memory of the user interface for 10 minutes,
after which they are reset. The values on the display
are always reset when the RESET key is pressed.
SET
1. To set the heart-rate limit press SET once. The
lower heart rate limit is indicated by the text LO
and the upper limit by HI. If desired, the user
interface indicates when your heart rate falls below
the lower limit or exceeds the upper limit with an
alarm. To set heart rate limits procede as follows:
The lower limit (LO) may be set between 50
and 220 beats per minute. Use the - or + keys to set
the value and press OK to conrm. Set the upper
heart-rate limit (max. 220) in the same way as for
the lower limit. Press OK to conrm.
To delete heart-rate limits use the - or + key
to move the values above the permitted upper or
lower limit. The value is then replaced by — on
the display.
2. To select the alarm press SET twice. The text
Ind OFF indicates that the alarms are switched off
and Ind ON that they are switched on. Use the -
or + keys to select OFF or ON and press OK to
conrm.
3. To set units of measurement press SET three
times.
Default units are rpm, km and kcal. To
change the units press the + or - key until the
desired units are displayed. To measure speed
you can set either revolutions per minute, (rpm),
kilometres per hour (km/h) or miles per hour
(mph). Energy consumption measurement can be
set for kilocalories (kcal) or kilojoules (kJ).
In addition to rpm you can also select either
kilometres (km) or miles as distance measures. If
km/h is selected as the unit to measure speed, km
will automatically be the unit for distance. The
same applies to the units mph and miles. Press OK
to conrm your selections, which are then saved
and indicated on the main display. Press the RESET
key to exit the setting function without saving the
adjustment. This resets the readings on the main
display.
M A I N T E N A N C E
In training, T.I.E. interface tolerates an
environment measuring +10°C to +35°C. A T.I.E.
interface can be stored in temperatures ranging
between -15°C and +40°C. Air humidity in the
T.I.E. interface training or storage environment
must never exceed 90 %.
NOTE! Never lean on the user interface!
Press the keys with the tip of the nger; your
nails may damage the key membrane.
Never lean on the T.I.E. interface!
Do not let the T.I.E. interface come into
contact with water. Always dry the surface of the
interface, if there are any drops of sweat on it. Use
a soft, absorbent cloth. Do not use solvents to clean
the user interface surface.
Protect the user interface from excess sunlight:
it may fade the colors of the user interface box and
surface membrane.
Please contact your dealer immediately if
you notice any defects or malfunctions while
using your T.I.E. interface. Please state the
nature of the problem, conditions of use,
purchase date and serial number of your T.I.E.
interface. The location of the serial number sticker
is shown on the inside cover.
At the end of this manual, you’ll nd a
diagram and list of spare parts for the Alpha 150.
T.I.E. user interfaces meet the requirements
of the EU’s EMC Directives on electromagnetic
compatibility (89/336/EEC) and electrical
equipment designed for use within certain voltage
limits (73/23/EEC). This product therefore carries
the CE label.
NOTE! The instructions must be followed
carefully in the assembly, use and maintenance
of your equipment. The warranty does not
cover damage due to negligence of the assembly,
adjustment and maintenance instructions described
herein. Changes or modications not expressly
approved by Tunturi Oy Ltd will void the user’s
authority to operate the equipment!
Due to our continuous policy of product
development, Tunturi reserves the right to change
specications without notice.
We wish you many enjoyable training
sessions with your new Tunturi training
partner!
B E T R I E B S A N L E I T U N G
A L P H A 1 5 O
H E R Z L I C H W I L L K O M M E N
I N D E R W E L T D E S
T R A I N I E R E N S M I T T U N T U R I !
Durch Ihren Kauf haben Sie bewiesen, dass Ihnen
Ihre Gesundheit und Ihre Kondition viel wert
sind; auch haben Sie gezeigt, dass Sie Qualität
zu schätzen wissen. Mit einem Tunturi-Fitnessgerät
haben Sie sich für ein hochwertiges, sicheres
und motivierendes Produkt als Trainingspartner
entschieden.
Dieses Handbuch ist ein wesentlicher
Bestandteil Ihrer Trainingsausrüstung. Machen Sie
sich mit der Welt der T.I.E.-Elektronik von
Tunturi vertraut, indem Sie dieses Handbuch
sorgfältig lesen. Es bietet Ihnen alle notwendigen
Informationen für den Gebrauch und die
Handhabung Ihres Trainingsgerätes. Bewahren Sie
das Handbuch bitte sorgfältig auf, da Sie es auch
später immer wieder benötigen werden.
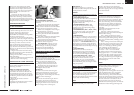
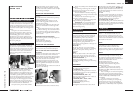
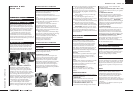
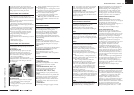
M O N TA G E
Bringen Sie das Alpha 150 sorgfältig oben auf dem
Stützrohr des Lenkers an. Die losen Schrauben,
die sich in der metallenen Befestigungsplatte
unter dem T.I.E.-Modul benden, müssen in die
Löcher oberhalb des Lenkers eingeführt werden.
Vergewissern Sie sich, dass das Modul korrekt
angebracht ist und ziehen Sie die Schrauben fest
an.
EIN- UND AUSSCHALTEN DES
BENUTZERINTERFACES
Das Benutzerinterface schaltet sich selbst ein,
wenn das Gerät mit dem Hauptstromkreis
verbunden ist. Wenn das Benutzerinterface für
fünf Minuten nicht benutzt wird (keine
Herzfrequenzimpulse registriert, keine Taste
gedrückt, keine Pedalbewegung), schaltet es
automatisch in den Energiesparmodus um. Durch
BE TRI EBS ANL EIT UNG • ALP HA 15O
D
OW NER 'S MAN UAL • ALP HA 15O