


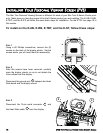
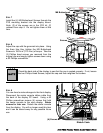
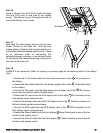
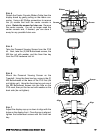
STEP 7
Install the (4) M8 Buttonhead Screws through the
PVS mounting bracket into the display mount.
Note: (2) of the screws are in the PVS kit, (2)
retained from step 5. Do not tighten them at this
time.
S
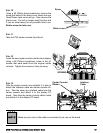
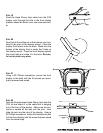
TEP 8
Adjust the cap with the grommet into place. Using
the 5mm Hex Key, tighten the M8 Buttonhead
Screws to 190 lb-in (21.5 N-m) of torque. Take the
(2) Phillips head screws you removed from the
original cap and snugly tighten screws down using
a #2 Phillips screwdriver.
Check the back side of the display to see that the cap is seated properly. If not, loosen
the two Phillips Head Screws, adjust the cap and then retighten the screws.
S
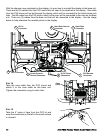
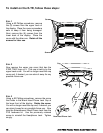
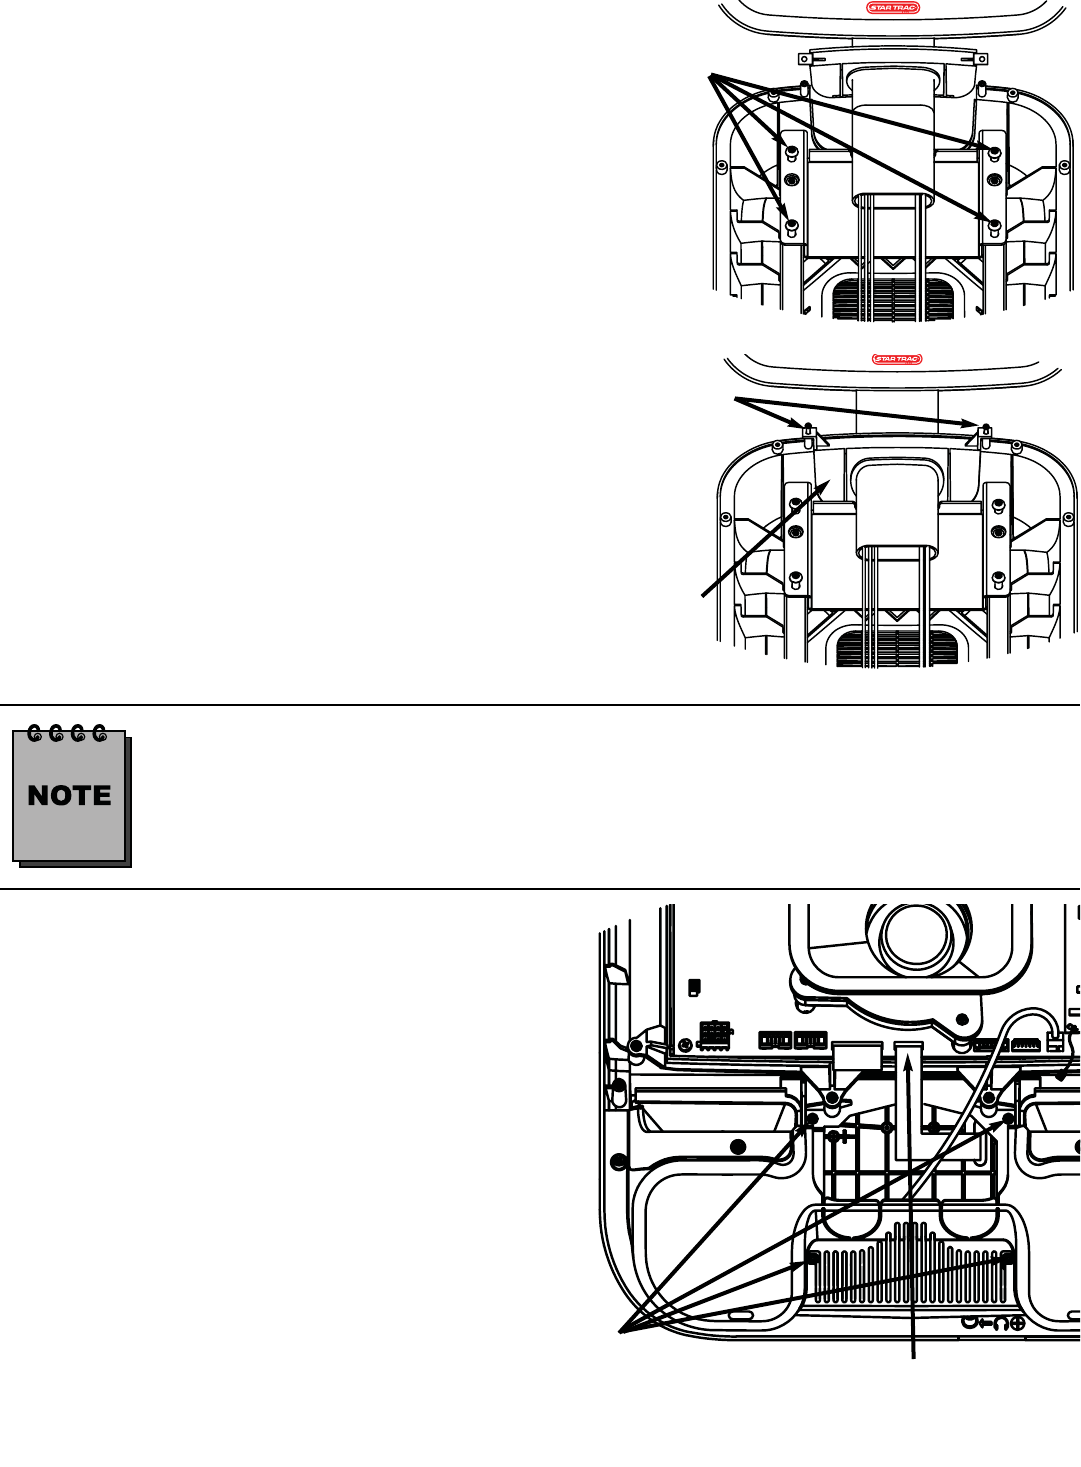
TEP 9
It is now time to make changes to the front display.
Disconnect the center console ribbon cable from
the back of the display PC board. Using a #2
Phillips screwdriver remove (4) screws that hold
the center console to the main display. Retain
screws for later use. Detach the center console
from the display. You will no longer need this item
and it can be stored away for any possible future
use.
12 STAR TRAC P
ERSONAL
V
IEWING
S
CREEN
O
WNER
’
S
G
UIDE
M8 Buttonhead
Screws
Cap
(4) Screws
Ribbon Cable