


W
AX BAG INSTRUCTIONS
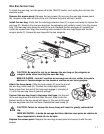
To install the wax bag, turn the power off at the ON/OFF switch, and unplug the unit from the
electrical outlet.
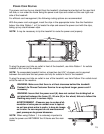
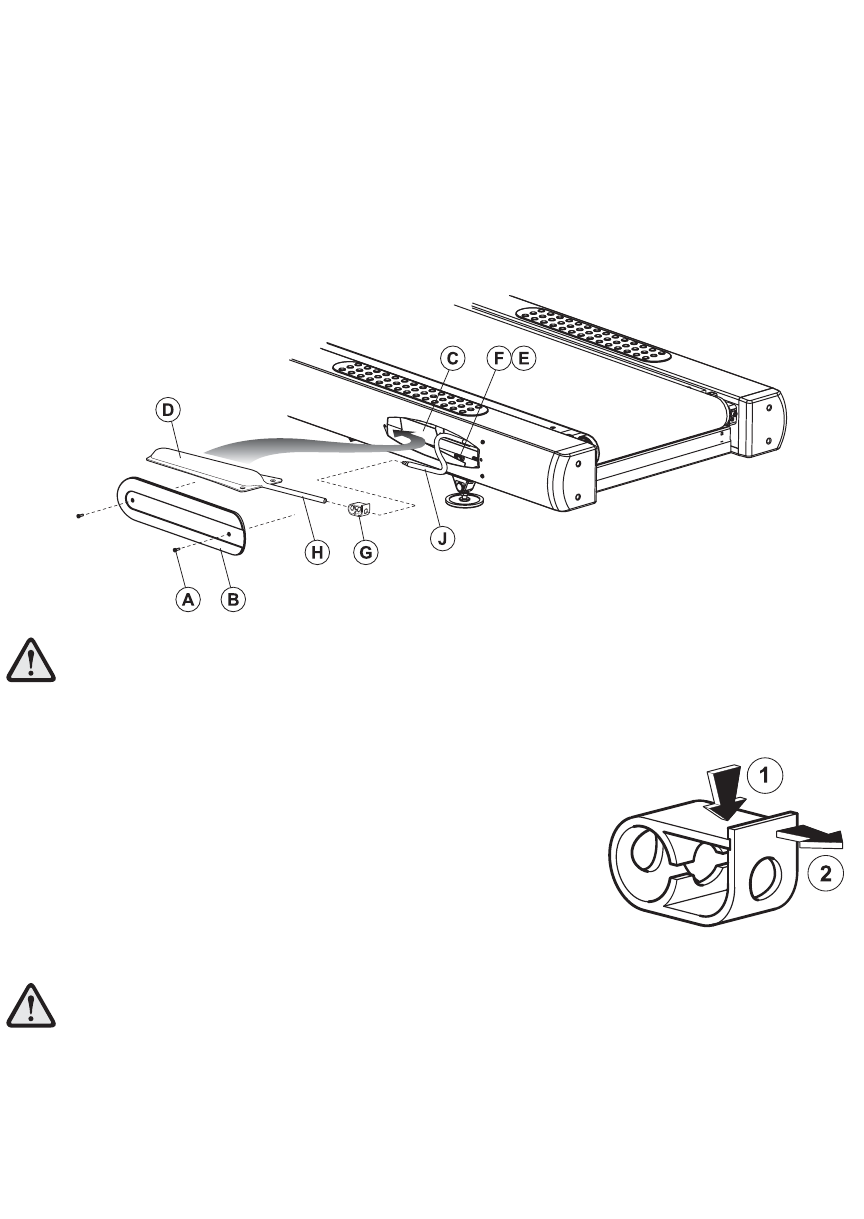
Remove the access panel. Remove the two screws (A) securing the wax bag access panel
(B), located on the user left side of the unit. Remove the panel and set it aside.
Install the wax bag. Verify that the wax bag protective liner (C) is open and ready to receive the
wax bag (D). Remove the new wax bag from its packaging and carefully insert it into the access
hole. The wax bag hose faces the rear of the unit. Remove the two wingnuts (E) located just
inside the access hole. Align the mounting holes located in the wax bag flange with the two
wingnut studs (F). Secure the wax bag with the two wingnuts.
CAUTION: Be careful to not rip or damage the wax bag on the wingnuts or
wingnut studs when inserting the new wax bag.
MISE EN GARDE : lors de l'insertion du nouveau sac de cire, veiller à ne pas le
déchirer ni l'endommager sur les écrous à oreilles ou sur leurs goujons.
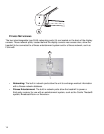
Attach the hose clamp. Slide the hose clamp (G) over the end of
the wax bag outlet hose (H). Position the clamp approximately
three inches from the end of the hose and engage it, clamping it
(1) onto the wax bag hose to prevent spillage.
Connect the wax bag hose to the pump inlet hose. Cut the end
of the wax bag hose one half-inch from the end. Slide it onto the
barbed nozzle on the wax pump inlet hose (J). Be sure to fully seat
the wax bag hose onto the inlet hose. Release the hose clamp (2).
CAUTION: Failure to release the hose clamp will result in greatly reduced belt
life.
MISE EN GARDE : la bride de serrage doit être relâchée sous peine de réduire de
façon importante la durée de vie du tapis.
Replace the access panel. Replace the wax bag access panel and secure it with the two
screws.
11