1190 Sr Owner’s Manual
7
Assembly Instructions
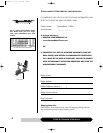
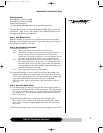
Tools Required:
5mm Allen key wrench (included)
6mm Allen key wrench (included)
Phillips head screwdriver
Two open-ended adjustable wrenches for seat slide adjustment.
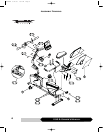
The assembly drawing on the preceding page highlights each step for easy
identification. Bolts, screws, and washers in the included hardware kit are
arranged according to each step below.
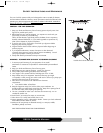
Step 1: Rear Stabilizer Bar
Place rear stabilizer bar onto the rear of the frame as illustrated and align the
bolt holes. Insert and tighten the two M8 x 25mm bolts, making sure to include a
flat and split lock washer on each bolt.
Step 2: Console Mast & Handlebar
2-1. Install the console mast:
2-1a. Slide console mast cover onto bottom of console mast.
2-1b. Connect both the main wire harness and the hand pulse harness in
the main frame to the two wire harnesses in the bottom of the
console mast. Each plug is keyed to fit in only one direction- do not
try to force the plugs into the sockets as this may bend the pins.
2-1c. Install the console mast by sliding it over the receptor in the main
frame while pulling on the wiring harness. This will keep the slack
out of the harness so the wires will not get pinched and damaged.
Insert and tighten the four flat head M8 x 16mm bolts (make sure to
use the flat head bolts for this step).
2-1d. Snap console mast cover into top of sidecase.
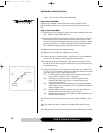
2-2. Fasten the handlebar on to the console mast by sliding the bracket in the
middle of the handlebar over the bolt holes in the console mast. Be careful
not to move the bracket around too much on the mast to avoid scratching the
mast. Secure the handlebar to the mast with the four r
ound head
M8 x 16mm bolts, making sure to include a flat and split lock washer on
each bolt
Step 3: Console & Bottle Holder
3-1. Connect the plugs from the main wiring harness and hand pulse harness to
the sockets on the backside of the console circuit board. Each plug is keyed
to fit in only one direction- do not try to force the plug into the socket as this
may bend the pins. Then, fasten the console to the console mast with four
M5 x 12mm screws.
3-2.Place the bottle holder on the console mast. Insert and tighten four
M5 x 12mm screws. Insert the water bottle into the bottle holder. (Note:
Some 1190Sr units have a different bottle holder design that requires only
two screws).
3-2.Place the bottle holder on the console mast. Insert and tighten two M5x12mm
1190SROM 9/22/06 1:51 PM Page 9


