


© Copyright, Alliance Laundry Systems LLC – DO NOT COPY or TRANSMIT
Operation
AJ0975
16
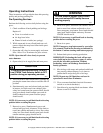
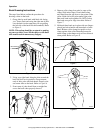
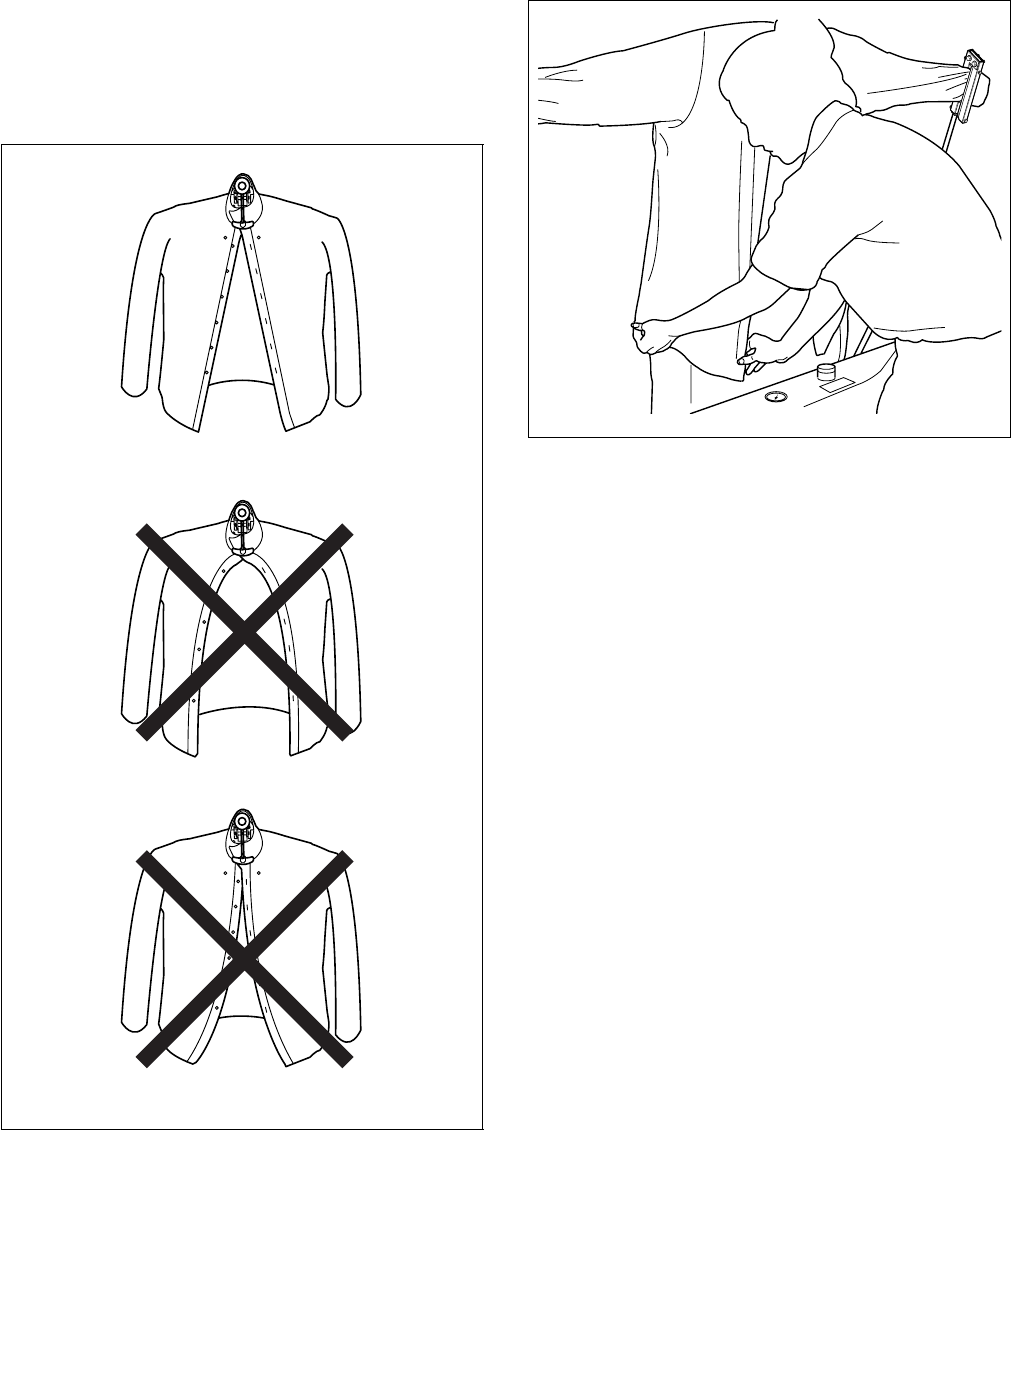
8. Press the left foot pedal to extend the sleeves and
turn the buck vacuum on.
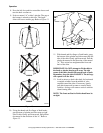
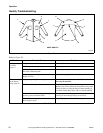
9. Notice a natural “A” at shirt’s placket. The gap at
the bottom is related to shirt size. The larger
shirts will have a smaller gap. Refer to
Figure 13.
Figure 13
10. Using the thumb and first finger of both hands,
grasp bottom of placket and side seam on right
side of shirt. Gently pull downward. Pull placket
downward in the direction of the “A.” Refer to
Figure 13.
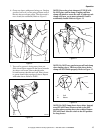
11. With thumb and first finger of both hands, grasp
the bottom of the placket and side seam at the left
side of the shirt. Gently pull downward. Pull the
placket downward in the direction of the natural
“A.” This action has straightened the front and
back of the shirt.
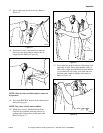
IMPORTANT: Do NOT attempt to fit the shirt to
the buck or placket bowing will occur. The side
seams of the shirt should roll toward back of buck.
Remember, dress the shirt LOOSELY. The air bags
will expand to fit the shirt.
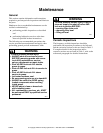
12. Look in mirror to check shirt back for horizontal
or angled wrinkles from the middle of yoke
outward toward the sides. If necessary, gently
pull shirt downward in center to remove these
wrinkles. Air bags will remove vertical wrinkles
when forming shirt.
NOTE: The front and back of shirt should now be
straight.
CAB254N
WRONG
WRONG
CORRECT
CAB423N
Figure 14