


© Copyright, Alliance Laundry Systems LLC – DO NOT COPY or TRANSMIT
Operation
AJ0975
14
Buck Dressing Instructions
The steps listed below outline the procedure for
dressing a shirt on the buck.
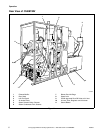
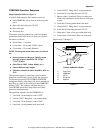
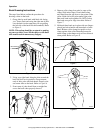
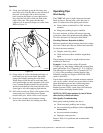
1. Grasp shirt by neck band with label side facing
you. Turn to buck and swing the right arm of shirt
over the buck (at the same time you are guiding
the left side so the buck fills shirt armhole). Refer
to
Figure 5.
NOTE: This action should be as natural as putting
on your own shirt. Never lift the shirt over the buck
(this would result in unnecessary fatigue).
Figure 5
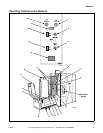
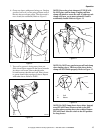
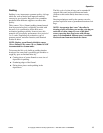
2. Using your right hand, bring the shirt around the
buck and let it rest in position. Grasp extreme
ends of shirt yoke with both hands. Stretch yoke
and center shirt on the buck. Refer to
Figure 6.
3. Front seam of yoke should form a straight line
across the buck when properly dressed.
Figure 6
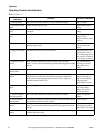
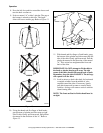
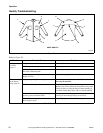
4. Depress collar clamp foot pedal to open collar
clamp. Slide index finger of each hand along
neck band from the top down to the points of the
collar. Guide left collar point under right point.
Butt neck band ends together. Do NOT overlap
band ends except for large size shirts. Refer to
Figure 7.
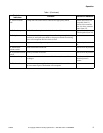
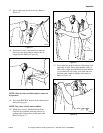
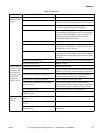
5. Hold neck band ends up in place with two fingers
placed just below button and buttonhole of neck
band. Release collar clamp foot pedal to close
clamp against shirt collar. Buttonhole must be
under clamp so that button strip will not distort it
when pulled. Refer to
Figure 8.
Figure 7
Figure 8
CAB417N
CAB418N
CAB419N
CAB420N