


CC-TR100
1110
CC-TR100
MENU
RESTART
RESTART
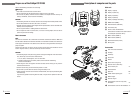
Main unit set-up
To use the CC-TR100, follow the steps below to set up the main unit.
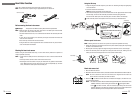
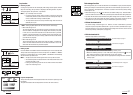
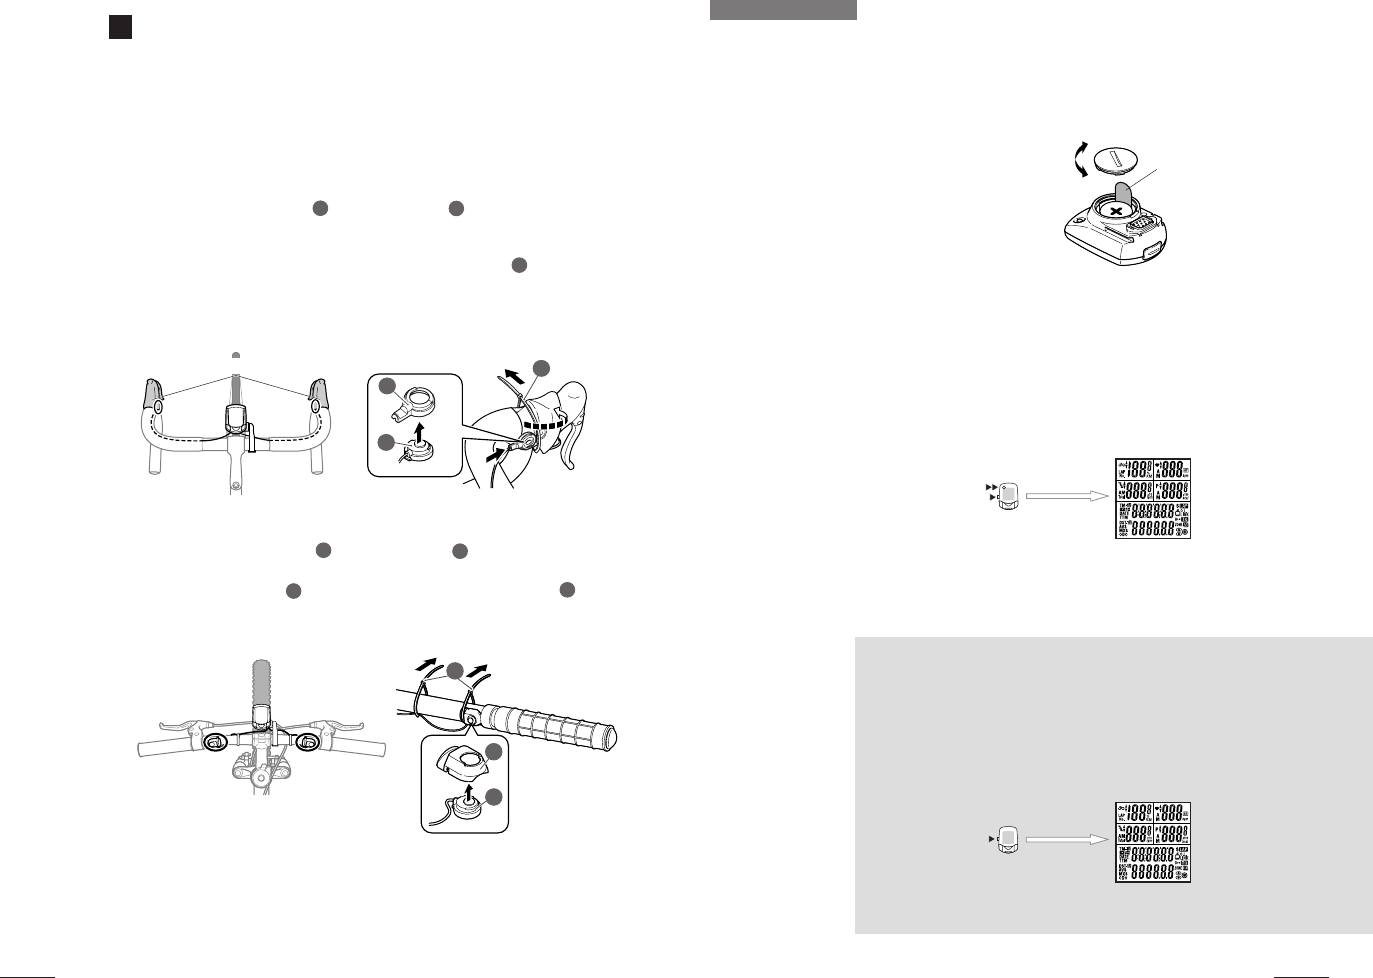
1. Pull out battery insulation sheet
Using a coin, open the battery cover of the main unit and pull out the insulation sheet, then
close the battery cover.
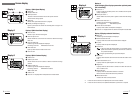
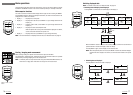
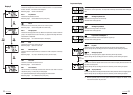
2. Formatting / restarting operations
Formatting is required during the initial set- up, and when all items of data are to be reset to
zero.
NOTE: Formatting operation initializes all of the data in the memory. Be absolutely certain
that you want to initialize all of the data.
When all items light up for a few seconds and formatting is completed, proceed to the heart
rate sensor ID check screen.
NOTE: If there is little memory available, all screen items may remain on for approximately
one minute.
Restarting operation
You must restart the computer when you replace the batteries, or when an error has been
displayed.
When the RESTART button is pressed, all of the items light up for one second. You will then
proceed to the heart rate sensor ID check screen.
NOTE: In the restart operation the date, total time, and total distance are retained, but the
heart rate sensor ID check and time settings must be performed again.
Press the RESTART button
while pressing and holding the
MENU button; then release the
RESTART button only.
When a beep sounds, release
the MENU button.
All items displayed
After a few seconds have
elapsed, proceed to the heart
rate sensor ID check.
Press the RESTART button
All items displayed
(for 1 sec.)
To heart rate sensor ID check
Insulation sheet
Close
Open
5
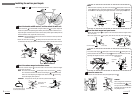
Installing the remote buttons
Select the positions to mount the remote buttons according to your bicycle type.
CAUTION ! : • Install the remote button so that it does not interfere with shift or brake
operation.
• On road bikes, be sure to wrap the handle bar tape over the button wires
to prevent wire damage.
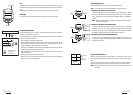
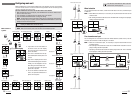
When installing the remote button onto road bicycles
• Peel back the brake lever hoods as shown in the figure below.
• Fit the road bike button cover
N
to the remote button
I
, and stick the button to the
inside of the brake lever.
• Replace the brake hood cover and then adjust the button position.
• Firmly secure the button and cable to the handlebar with a nylon tie
J
before wrapping
the bar with handlebar tape.
J
N
I
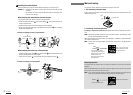
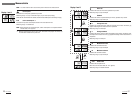
When installing the button onto a flat handle bar
• Install the proper button cover
O
on the remote button
I
, and stick the button on an
easily accessible position on the handlebar.
• Firmly secure the button
O
to the handlebar using the supplied nylon ties
J
.
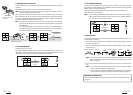
Example of installing onto drop (road) handlebars
Example of installing onto flat handlebar
J
I
O
Brake lever hood