Using the Operation Panel
58
7
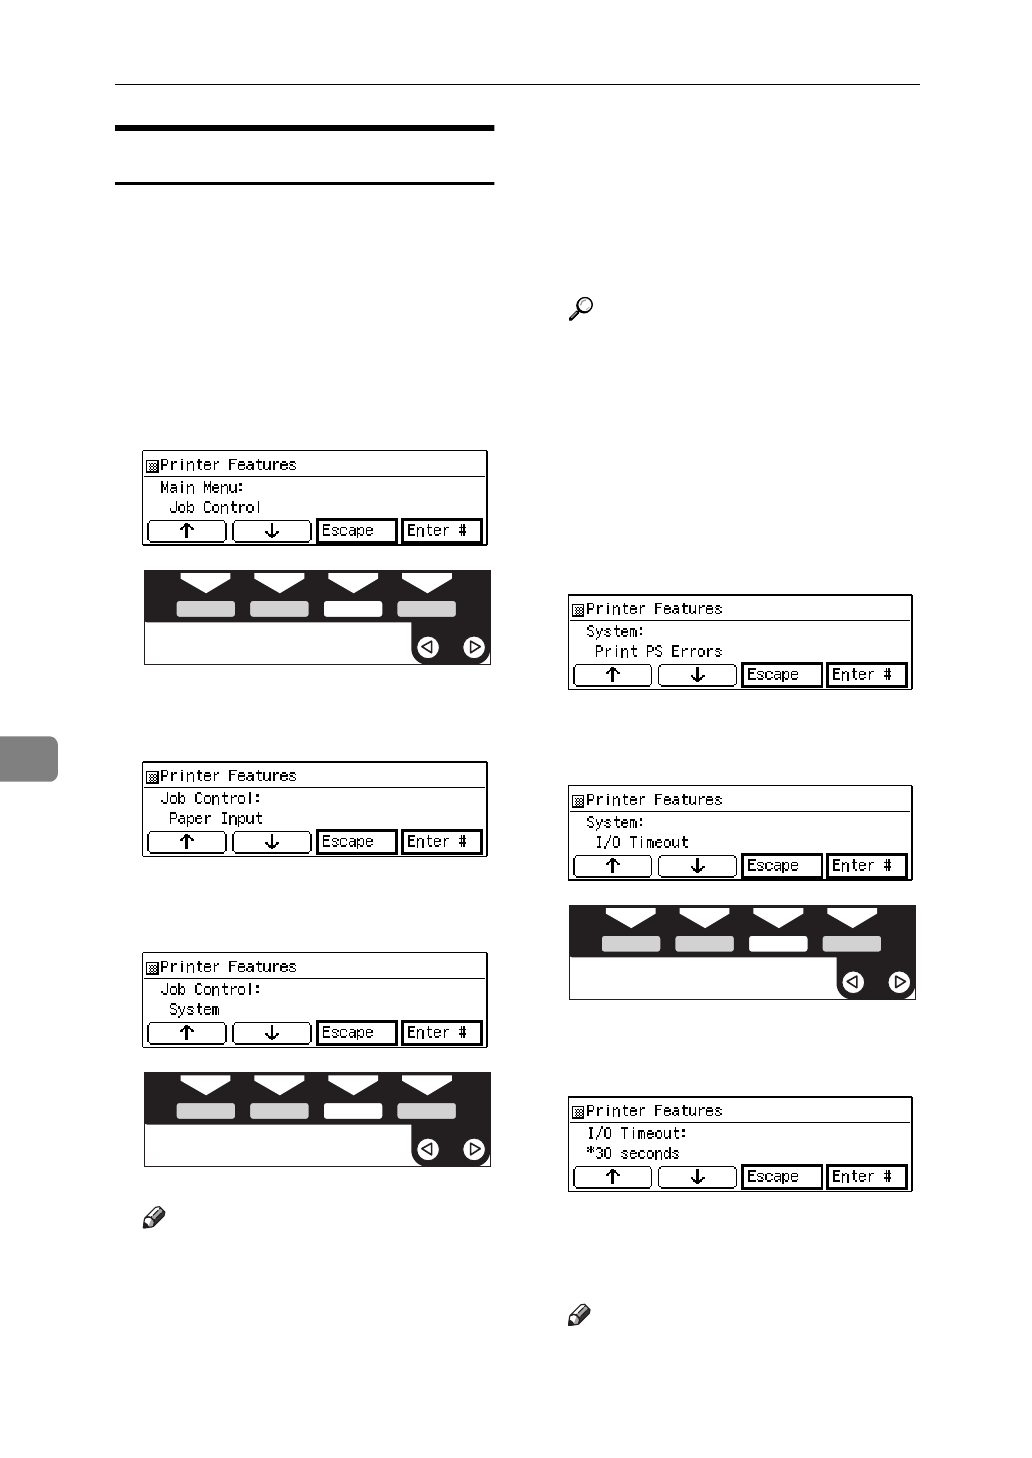
Accessing Printer Features
Follow these steps to setting the "I/O
Timeout" in the "Job Control" as an
example.
A Press
{
User Tools
}
.
B Press
{
4
}
on the number keys.
C Press
[
↑
][
↓
]
to display “Job Con-
trol”, and then press
[
Enter #
]
.
The following message appears on
the panel display.
D Press
[
↑
][
↓
]
to display “System”,
and then press
[
Enter #
]
.
Note
❒ If you specify the "Proof Print"
and "Maintenance", change the
setting by following the instruc-
tions on the panel display.
❒
[
Enter #
]
: Press to apply the new
settings and return to the previ-
ous menu.
❒
[
Escape
]
: Press to return to the
previous menu without chang-
ing any settings.
Reference
For information on the Net-
work Setup, see P.11 “Configur-
ing the Printer for the Network
with the Operation Panel”.
For information on setting the
List Print, see P.66 “Printer Con-
dition”.
The following message appears on
the panel display.
E Press
[
↑
][
↓
]
to display “I/O Time-
out”, and then press
[
Enter #
]
.
The following message appears on
the panel display.
The numerical value appears on
the display panel and you can
specify it with step G.
Note
❒ "*"(asterisk) is displayed with
the current setting.
THYS851E
THYS851E
THYS851E


