a
• We recommend using a smooth, board type screen without any
unevenness. If the projection screen is uneven, there may be
distortions in the projected image.
• Distortions may occur in the projected image depending on the
material of the screen and the installation method.
• When installing the projector on a wall or on the ceiling, make sure
you use the correct tools for the installation method.
s "Optional Accessories" p.172
• The default Projection setting is Front. You can change from Front
to Rear from the Configuration menu.
s Extended - Projection p.120
• You can change the Projection mode as follows by pressing down
the [A/V Mute] button on the remote control for about five seconds.
FrontWFront/Ceiling
RearWRear/Ceiling
Installation Methods
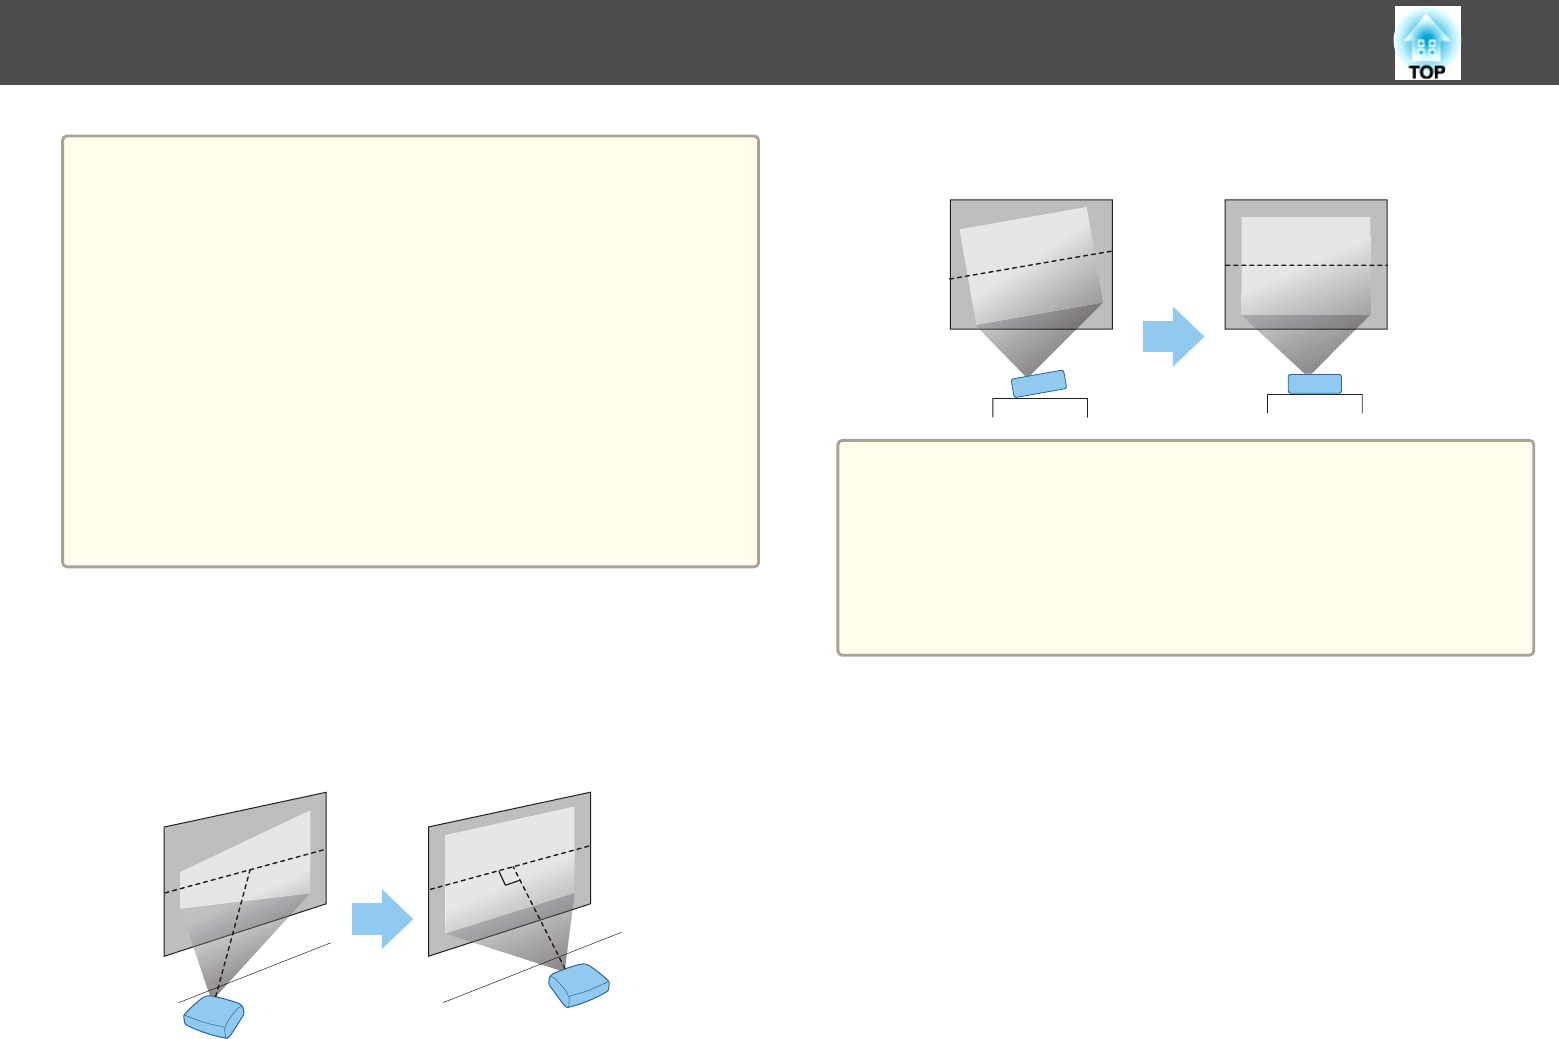
Install the projector as follows.
• Install the projector so that it is parallel to the screen.
If the projector is installed at an angle to the screen, keystone distortion
occurs in the projected image.
• Place the projector on a level surface.
If the projector is tilted the projected image is also tilted.
a
• See the following if you cannot install the projector parallel to the
screen.
s "Correcting Keystone Distortion" p.48
• See the following if you cannot install the projector on a level
surface.
s "Adjusting the Horizontal Tilt" p.52
s "Correcting Keystone Distortion" p.48
When Using the Interactive Features (EB-536Wi only)
Project from in front of the screen when using the interactive features. Set
the Projection mode to Front or Front/Ceiling.
Install the projector so that the angle of tilt is ±7° vertically and ±5°
horizontally against the projection side.
Installing the Projector
24
