


7
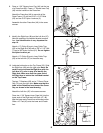
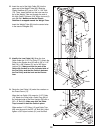
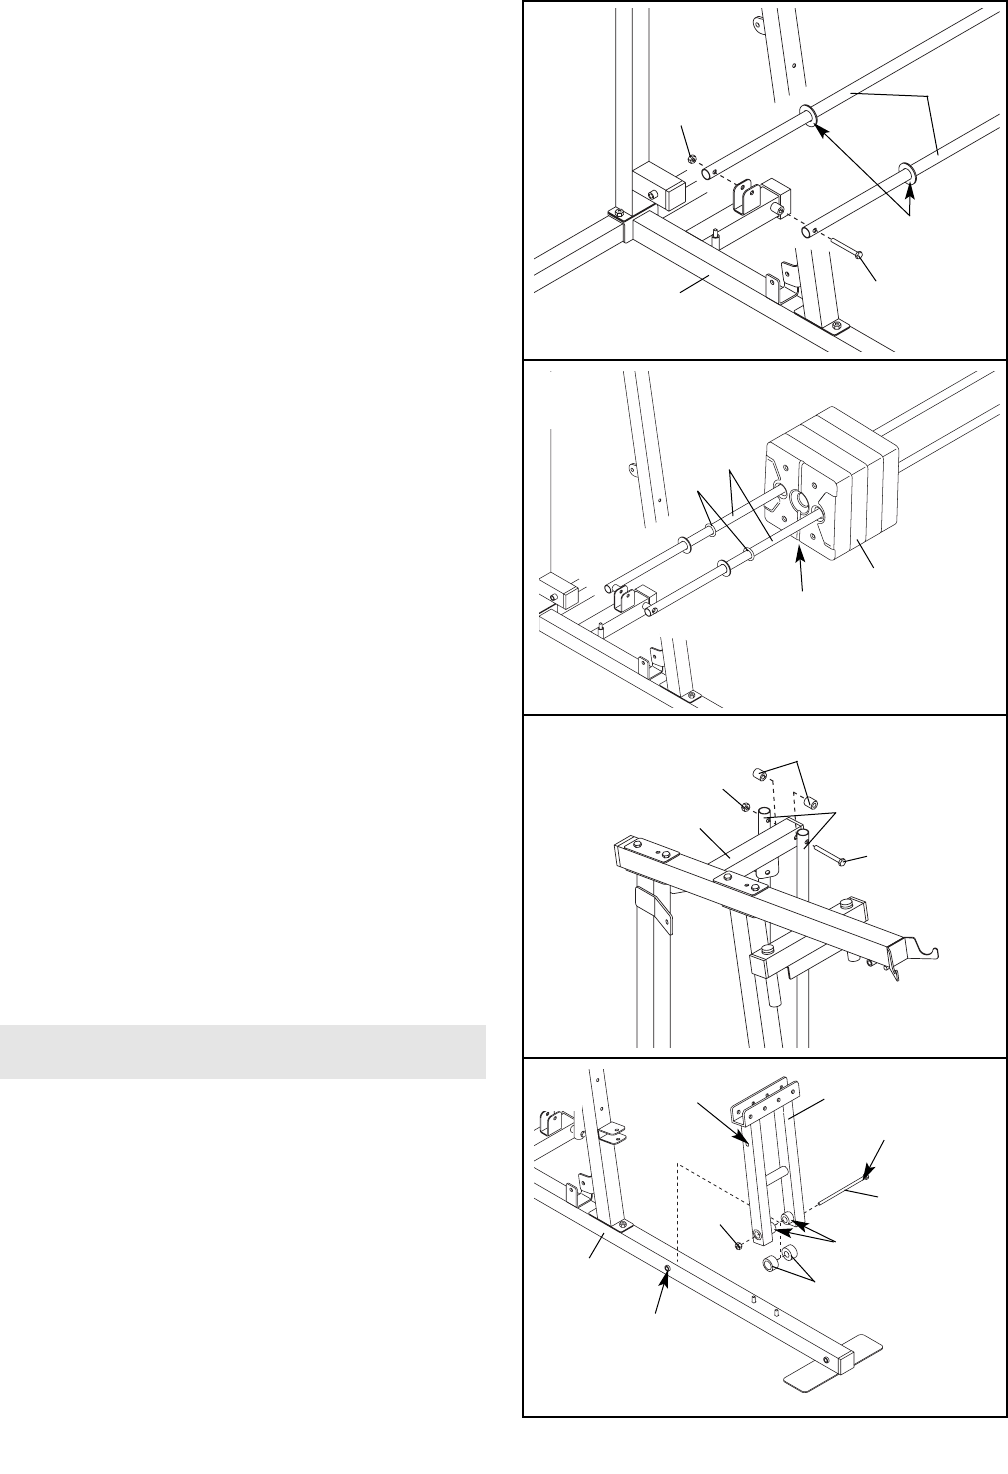
5. Slide a Weight Bumper (95) onto each Weight
Guide (62).
Lubricate the two outer holes in each of the
Weights (25). Slide the Weights onto the Weight
Guides (62). Make sure that the Weights are
turned so the pin grooves are on the indicated
side.
6. Place a piece of cardboard under each Weight
Guide (62) to protect the floor for this step.
Lift the upper ends of the Weight Guides (62) and
attach them to the Top Frame (55) with a 5/16” x
6” Bolt (60), two 1/2” x 7/8” Spacers (100), and a
5/16” Nylon Locknut (3).
5
6
95
100
3
60
55
62
25
Pin grooves
must be on
this side
62
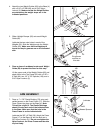
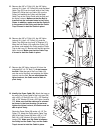
4. Attach the two Weight Guides (62) to the Base (4)
with a 5/16” x 6” Bolt (60) and a 5/16” Nylon
Locknut (3). Make sure that the Weight Guides
are oriented so the weight stops are in the
indicated positions.
4
62
Weight
Stop
3
60
4
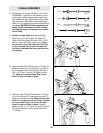
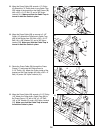
7. Press a 1” x 7/8” Plastic Bushing (75) onto each
welded spacer on the Press Frame (17). Slide the
Press Frame into place on the Base (4). Note:
This will be a tight fit. The Plastic Bushings
should fit onto each end of the indicated tube
in the Base. Make sure that the hole in the
Press Frame is on the indicated side.
Lubricate the 3/8” x 8” Bolt (59). Attach the Press
Frame (17) to the Base (4) with the Bolt and a
3/8” Nylon Locknut (21). Do not overtighten the
Nylon Locknut; the Press Frame must be able
to pivot freely.
7
Tube
Welded Spacers
17
59
Lubricate
Hole
21
4
75
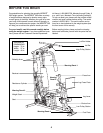
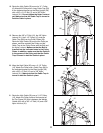
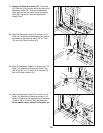
ARM ASSEMBLY