


13
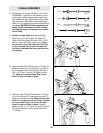
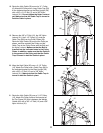
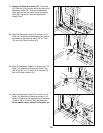
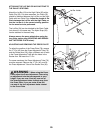
25. Remove the 3/8” x 2” Bolt (12), the 3/8” Nylon
Locknut (21), the 4 1/2” Pulley (84), and the Metal
Cable Trap (97) from the lower ends of the Pulley
Plates (20). Wrap the Low Cable (19) over the
Pulley, and reattach the Pulley and the Metal
Cable Trap to the Pulley Plates with the Bolt and
the Nylon Locknut. Make sure that the Bolt is
inserted into the indicated holes in the Pulley
Plates. In addition, make sure that the Cable is
in the groove of the Pulley and that the Cable
Trap is turned to hold the Cable in place.
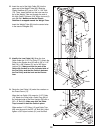
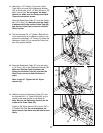
26. Remove the 3/8” x 2” Bolt (12), the 3/8” Nylon
Locknut (21), the 3 1/2” Pulley (15), and the
Cable Trap (66) from the Long “U”-Bracket (57).
Wrap the Low Cable (19) around the Pulley (15)
as shown, and reattach the Pulley and the Cable
Trap to the Long “U”-Bracket with the Bolt and the
Nylon Locknut. Make sure that the Cable Trap
is turned to hold the Cable in place.
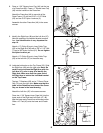
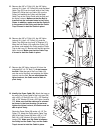
27. Remove the 3/8” Nylon Locknut (21) from the
indicated 3/8” x 2 1/2” Bolt (7); do not remove
the Bolt. Slide the end of the Low Cable (19)
onto the end of the Bolt, and retighten the Nylon
Locknut onto the Bolt. Do not overtighten the
Nylon Locknut; the Cable must be able to
pivot freely.
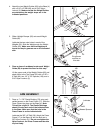
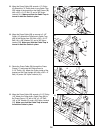
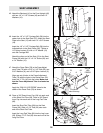
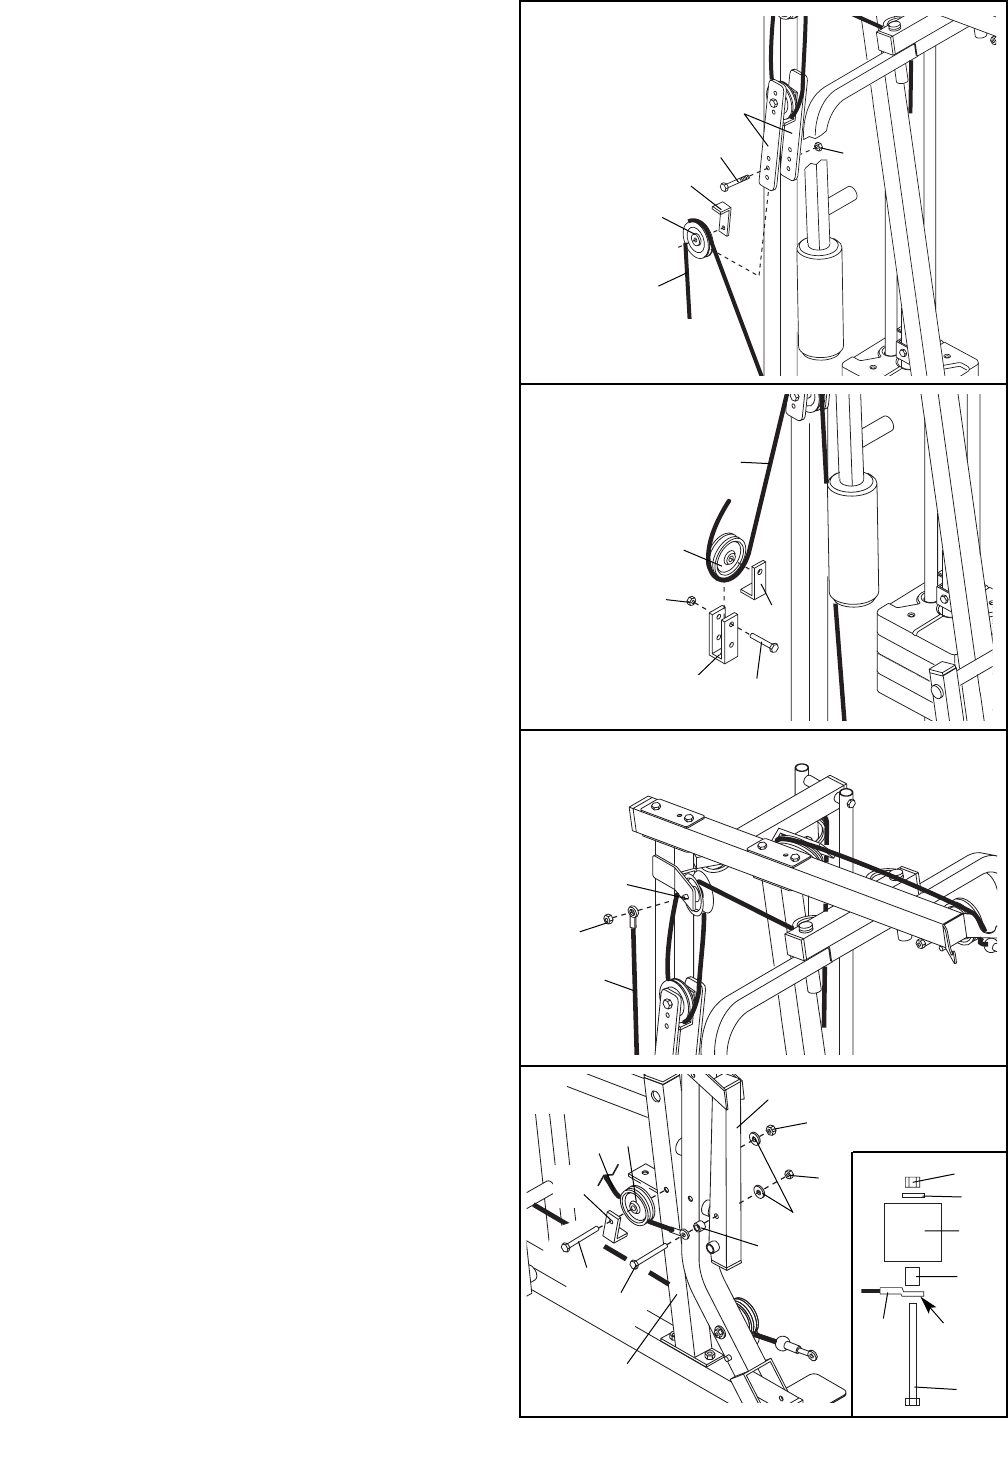
28. Identify the Press Cable (58). Attach the loop on
the end of the Press Cable to the Leg Lever (29)
with a 3/8” x 3” Bolt (93), the 1/2” x 1/2” Bushing
(96), a 3/8” Washer (9), and a 3/8” Nylon Locknut
(21). Make sure that the cable end is oriented
as shown in the inset drawing. Do not over-
tighten the Nylon Locknut; the Cable must be
able to pivot freely.
Route the Press Cable (58) under a 3 1/2” Pro
Pulley (77). Attach the Pulley and a Cable Trap
(66) to the Seat Frame (36) with a 3/8” x 3 1/2”
Bolt (16), a 3/8” Washer (9), and a 3/8” Nylon
Jamnut (33). Make sure the Cable is between
the Pulley and the Cable Trap, and the Cable
Trap is turned to hold the Cable in place.
26
27
28
15
19
12
21
19
7
21
66
57
21
21
33
9
9
96
96
58
29
29
58
Cable
End
93
36
66
77
25
20
21
12
19
97
84
93
16