


6
2
42
3
1
4
1
56
76
51
5
94
3
51
51
1
76
4
4
16
1
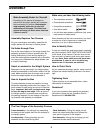
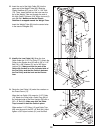
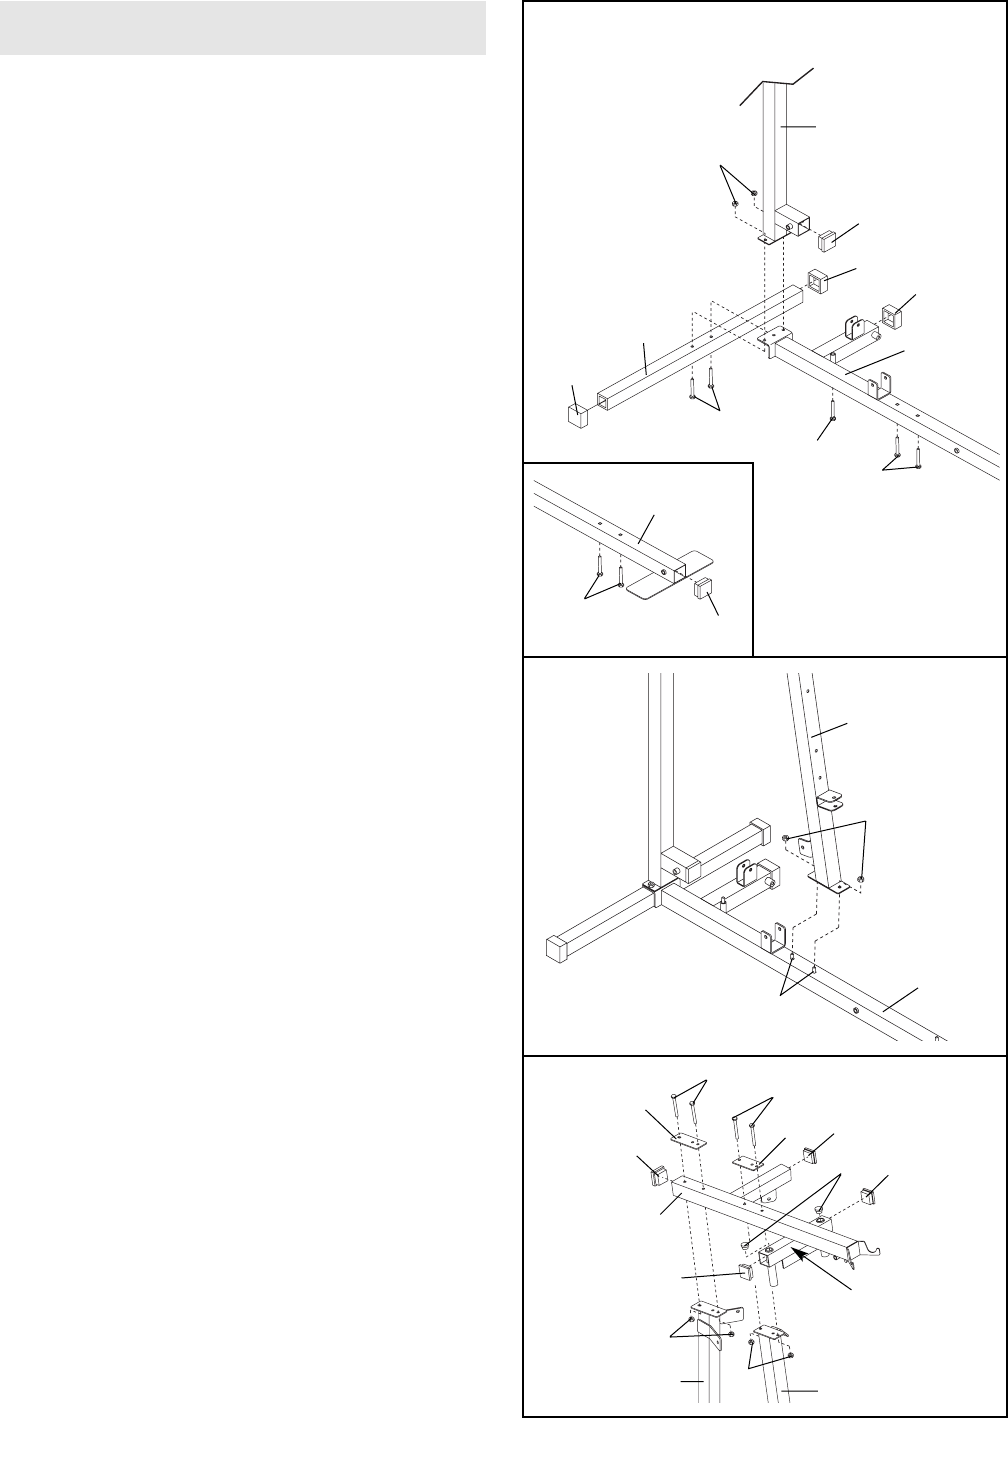
1. Before beginning assembly, make sure that
you have read and understand the information
on page 5.
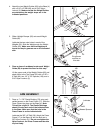
Press a 2” Square Outer Cap (51) onto each end
of the Stabilizer (5). Press a 2” Square Outer Cap
(51) onto the Base (4). Press a 2” Square Inner
Cap (76) into the Rear Upright (56).
See the inset drawing. Press a 2” Square Inner
Cap (76) into the other end of the Base (4). Insert
two 5/16” x 2 1/2” Carriage Bolts (1) up into the
Base.
Insert two additional 5/16” x 2 1/2” Carriage Bolts
(1) and a 3/8” x 3 1/2” Bolt (16) up into the Base
(4). Insert two 5/16” x 2 3/4” Carriage Bolts (94)
up into the Stabilizer (5).
Place a piece of tape over the head of the
seven bolts to hold them in place.
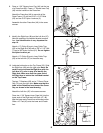
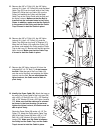
Slide the indicated end of the Base (4) onto the
5/16” x 2 3/4” Carriage Bolts (94) in the Stabilizer
(5). Slide the Rear Upright (56) onto the Carriage
Bolts. Hand tighten two 5/16” Nylon Locknuts (3)
onto the Carriage Bolts. Do not tighten the
Nylon Locknuts yet.
2. Slide the Front Upright (42) onto the 5/16” x
2 1/2” Carriage Bolts (1) in the Base (4). Hand
tighten two 5/16” Nylon Locknuts (3) onto the
Carriage Bolts. Do not tighten the Nylon
Locknuts yet.
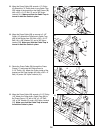
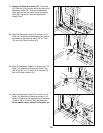
FRAME ASSEMBLY
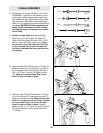
3. Press a 2” Square Inner Cap (76) into the indicat-
ed end of the Top Frame (55). Press three 1 3/4”
Square Inner Caps (44) into the Top Frame.
Press two 1” Inner Caps (81) into the top of the
crossbar on the Top Frame.
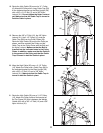
Attach the Top Frame (55) to the Front Upright
(42) and the Rear Upright (56) with four 5/16” x
2 3/4” Bolts (11), the Long Support Plate (91), the
Short Support Plate (103), and four 5/16” Nylon
Locknuts (3) as shown.
Tighten all of the 5/16” Nylon Locknuts (3)
used in steps 1 to 3.
3
11
11
81
44
44
44
76
55
56
42
3
Crossbar
3
91
103