


7
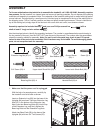
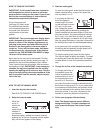
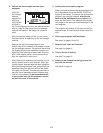
2. With the help of a second person, carefully tip
the treadmill onto its right side as shown.
Insert the other Extension Leg (89) into the base
o
f the Uprights (84) as shown. Hold two
Extension Leg Nuts (67) in the bottom of the
Extension Leg. Next, insert two Base Leg Bolts
(65) into the top of the Extension Leg, and firmly
tighten the Base Leg Bolts into the Extension
Leg Nuts.
Attach two Base Pads (82) to the base of the
Uprights (84) with two 3/4" Tek Screws (22).
With the help of a second person, carefully raise
the treadmill so that all four Base Pads (82) are
on the floor and the Frame (58) is in a vertical
position (see the drawing in step 4).
84
22
82
6
5
67
2
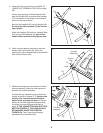
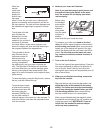
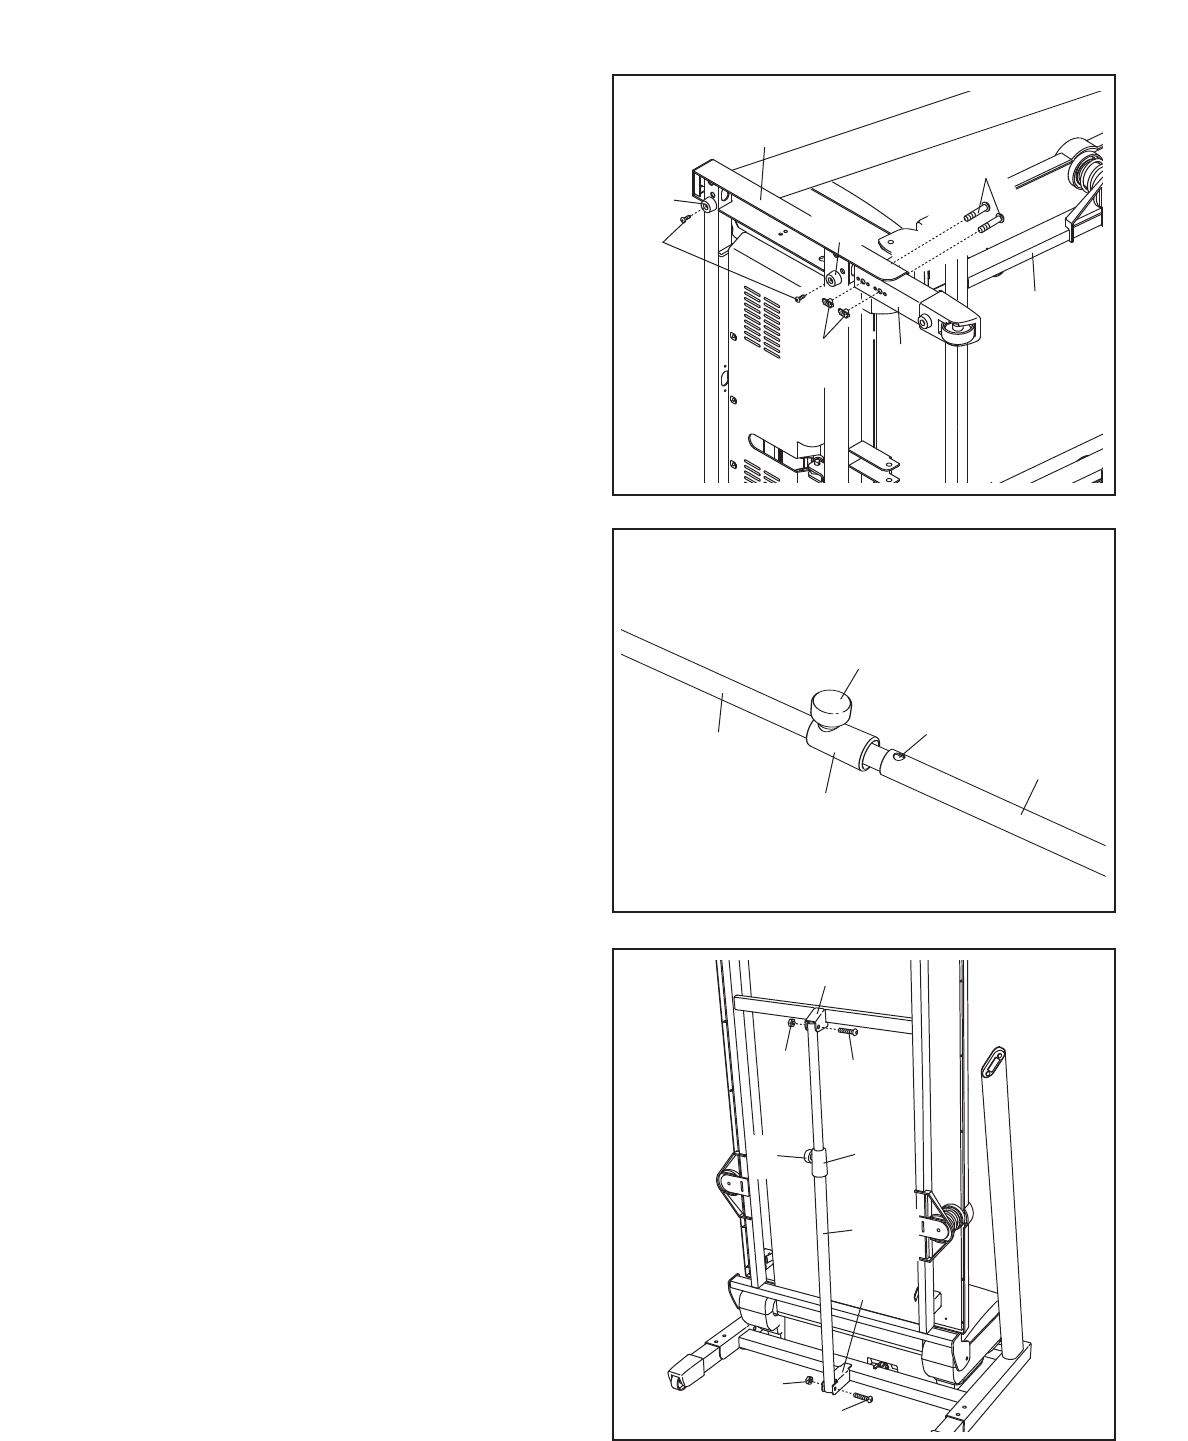
3. Identify the Storage Latch (29). Remove the tie
from the end of the tube. Make sure that the
sleeve has been slid over hole 1 and that the
Latch Knob (97) is locked into hole 1. Pull on
the sleeve to make sure that it is locked into
place.
3
89
58
8
2
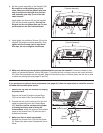
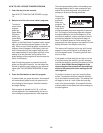
4. Orient the Latch Assembly (29) so that the large
barrel and the Latch Knob (97) are positioned as
shown. Attach the lower end of the Latch
Assembly to the bracket on the Upright (84) with
the Lower Latch Shock Bolt (39) and a Latch
Shock Nut (30).
Then, attach the upper end of the Latch
Assembly (29) to the bracket on the Frame (58)
with the Upper Latch Shock Bolt (50) and a
Latch Shock Nut (30). Note: It may be neces-
sary to move the Frame back and forth to align
the Latch Assembly with the bracket.
29
30
30
84
39
58
4
50
97
Large
Barrel
97
Sleeve
Hole 1
Tube
29