


ENGLISH
HOW TO ADJUST YOUR GIRO FIT SYSTEM
Your helmet may come with either a Roc Loc, Acu Dial, or a Mini Loc - Giro
patented fit and stabilizing systems. As with any new piece of equipment you
should experiment with the adjustment of your fit system before using the hel-
met on the road or the trail. To adjust any of our fit systems, follow these steps:
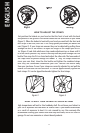
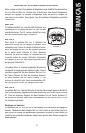
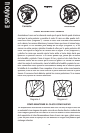
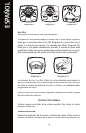
Mini Loc
To tighten the Mini Loc, turn the dial clockwise to a
comfortable fit. To loosen the Mini Loc, turn the dial
counterclockwise. The fit system should be snug,
but not uncomfortably tight (Figure 4).
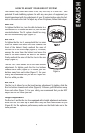
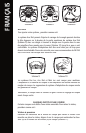
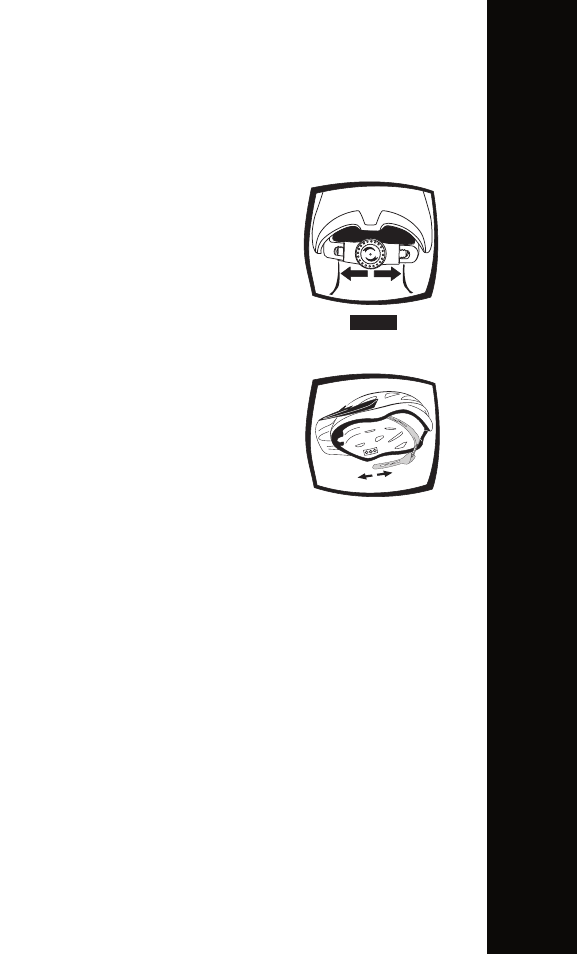
Roc Loc 3
To tighten the Roc Loc 3, unsnap both Roc Loc arms
from the helmet and move the ends towards the
front of the helmet. Firmly reattach the arms of
the Roc Loc in the front snaps (Figure 5). To loosen,
unsnap the arms from the helmet and move the
ends of the arms towards the back of the helmet.
Firmly reattach the arms of the Roc Loc in the rear
snaps (Figure 5).
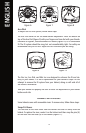
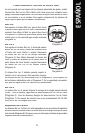
The Roc Loc 3 also allows for on the head tension
adjustment. To tighten, push the Roc Loc buttons
towards each other (Figure 6). To loosen, pull the
buttons away from each other (Figure 7). For your
safety, we recommend that you do NOT adjust the
Roc Loc while you ride.
Roc Loc 4
The Roc Loc 4 allows for on the head tension adjustment. To tighten, slide the
Roc Loc buttons towards each other (Figure 6). To loosen, pull the buttons away
from each other (Figure 7). For your safety, we recommend that you do NOT
adjust the Roc Loc while you ride.
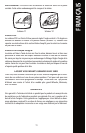
Height adjustment
The Roc Loc 3 and the Roc Loc 4 are equipped with a height adjustment mechanism.
Move the Roc Loc arms up or down until they are most comfortable for you
(Figure 8). For the optimum performance, make sure that both tabs are in the
same position.
3
Figure 4
Figure
5