


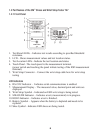

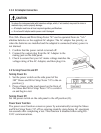


14
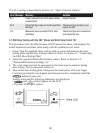
5. Testing finished in about a second, and the results are displayed as follows:
• and
symbol appear on the LCD.
• The measured value appears on the LCD, and
one of the result LEDs lights according to the
test result (comparison of measured value and
thresholds).
• The shoe LED lights either green or red
according to the test result:
• When the test result is OK, the LED lights
green.
• When the test result is HIGH or LOW, the LED lights red.
6. When the test is finished, the results are displayed for about ten seconds.
Afterwards, if running on batteries, the power turns off. If running on the AC
adapter, the power saver activates the stand-by state.
Important Notes:
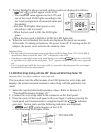
• The high end of the measurement range of the Shoes and Wrist Strap Tester 747 is 200.0 MΩ. If
the measured value exceeds this limit, “O.F.” is displayed on the LCD.
• If the finger is removed from the touch panel during a test (while appears on the LCD),
or if pressure is too light on the touch panel, “Err.1” appears on the LCD. In this case, repeat the
test.
• If a test is performed while the wrist strap cable is connected to the front panel, the wrist strap is
automatically selected for measurement.
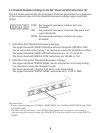
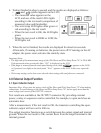
3.2 ESD Wrist Strap Testing with the 3M
™
Shoes and Wrist Strap Tester 747
Important Note: Use single-conductor wrist straps only.
This procedure tests the effectiveness of an ESD protective wrist strap, and
displays the actual measured resistance value along with the qualitative test
result.
1. Select the required threshold resistance values. Refer to Section 2.2,
“Threshold Resistance Settings (2).”
2. Connect the wrist strap cable to the connector on the front panel.
3. Press the center of the touch panel with your finger. Continue pressing the
touch panel until measurement is completed (until the indicator
goes out). Testing starts and the following indicators are displayed:
• and
symbol appear on the LCD.
• The wrist strap LED lights yellow.