


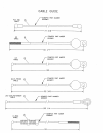

L
~3/8 X 3"
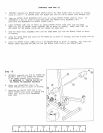
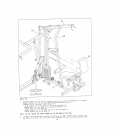
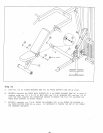
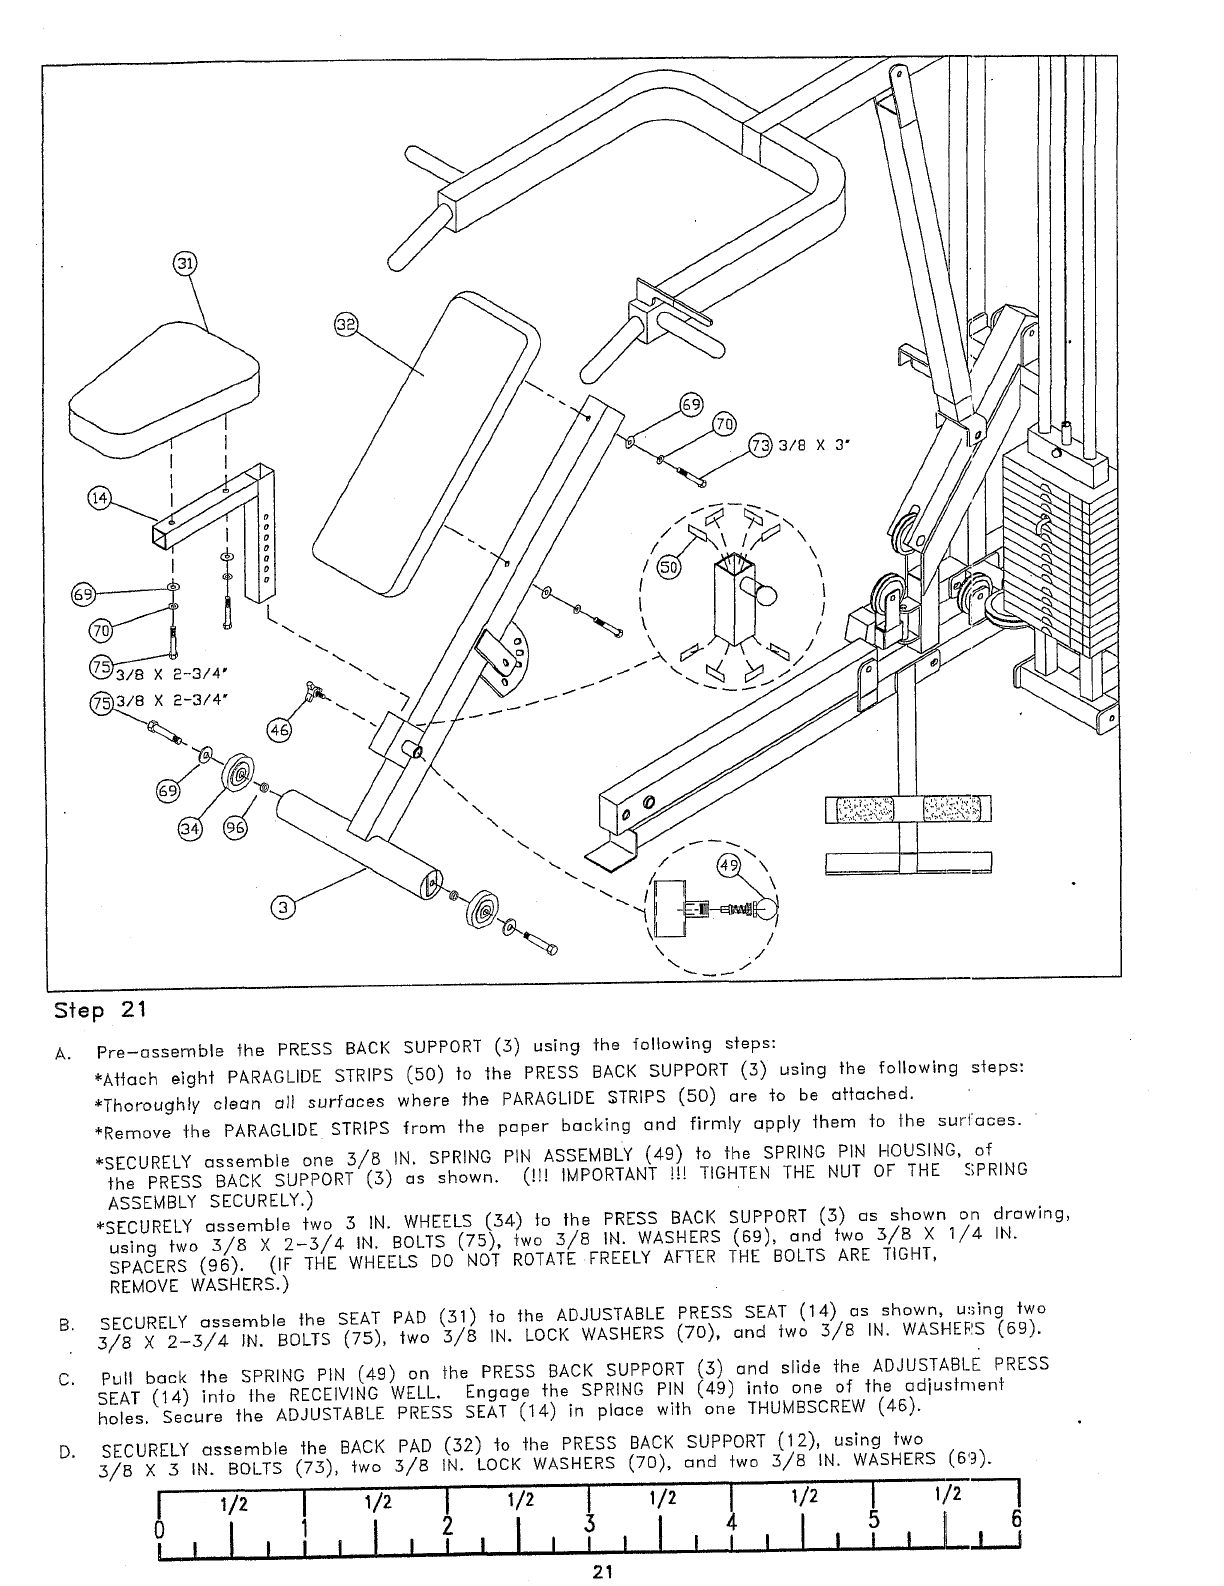
Step 21
A.
Pre-assemble the PRESS BACK SUPPORT (5) using the following steps:
*Att(]ch eight PARAOLIDE STRIPS (50) to the PRESS BACK SUPPORT (5) using the following steps:
*Thoroughly clean all surfaces where the PARAGLIDE ~;TRIPS (50) ore "~o be attached.
*Remove the PARAGLIDE STRIPS from the paper backing and firmly apply them fo the surfaces.
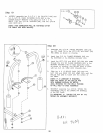
*SECURELY assemble one 5/8 IN. SPRING PIN ASSEMBLY (49) to the SPRING PIN HOUSING,
the PRESS BACK SUPPORT (5) as shown. (!!! IMPORTANT !!! TIGHTEN THE NUT OF THE SPRING
ASSEMBLY SECURELY.)
*SECURELY assemble two 5 IN. WHEELS (54) ~o the PRESS BACK SUPPORT (S) as shown on drawing,
using two 5/8 X 2-5/4 IN. BOLTS (75), two 5/8 IN. WASHERS (69), and two 5/8 X 1/4
SPACERS (96). (IF THE WHEELS DO NOT ROTATE FREELY AFTER THE BOLTS ARE TIGHT,
REMOVE WASHERS.)
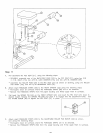
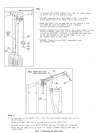
B.
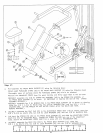
SECURELY assemble the SEAT PAD (.51) to the ADJUSTABLE PRESS SEAT (14) us shown, using
3/8 X 2-3/4 IN. BOLTS (75), two 3/8 IN. LOCK WASHERS (70), and ~wo 3/8 IN. WASHERS (69).
C.
Pull buck the SPRING PIN (49) on the PRESS BACK SUPPORT (3) and slide flqe ADJUSTABLE PRESS
SEAT (14) in~o the RECEIVING WELL. Engage the SPRING PIN (49) into one of the adiusfmenf
holes. Secure the ADJUSTABLE PRESS SEAT (14) in place with one THUMBSCREW (46).
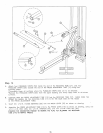
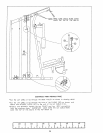
D.
SECURELY assemble the BACK PAD (32) to the PRESS BACK SUPPORT (12), using
3/B X ..5 IN. BOLTS (73), two 3/8 IN. LOCK WASHERS (70), und two 3/8 IN. WASHERS
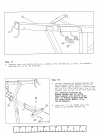
i 1/2 I 1/2
I
in I
’1 1/2
I
I
5
I_~ 6
=
I,,,I,,,
0 1 } i I
I.
21