46
SINGLE SPEED & BMX
Includes 16" and 20" BMX Bikes
Assembly is the same for boy’s and girl’s bikes.
Getting Started
Open the carton from the top and remove the bicycle. Remove the
straps and protective wrapping from the bicycle. Inspect the bicycle and
all accessories and parts for possible shortages. It is recommended that
the threads and all moving parts in the parts package be lubricated prior to
installation. Do not discard packing materials until assembly is complete
to insure that no required parts are accidentally discarded. Assemble
your bicycle following the steps that pertain to your model.
Note: Your bicycle may be equipped with different style components than
the ones illustrated.
Handlebars
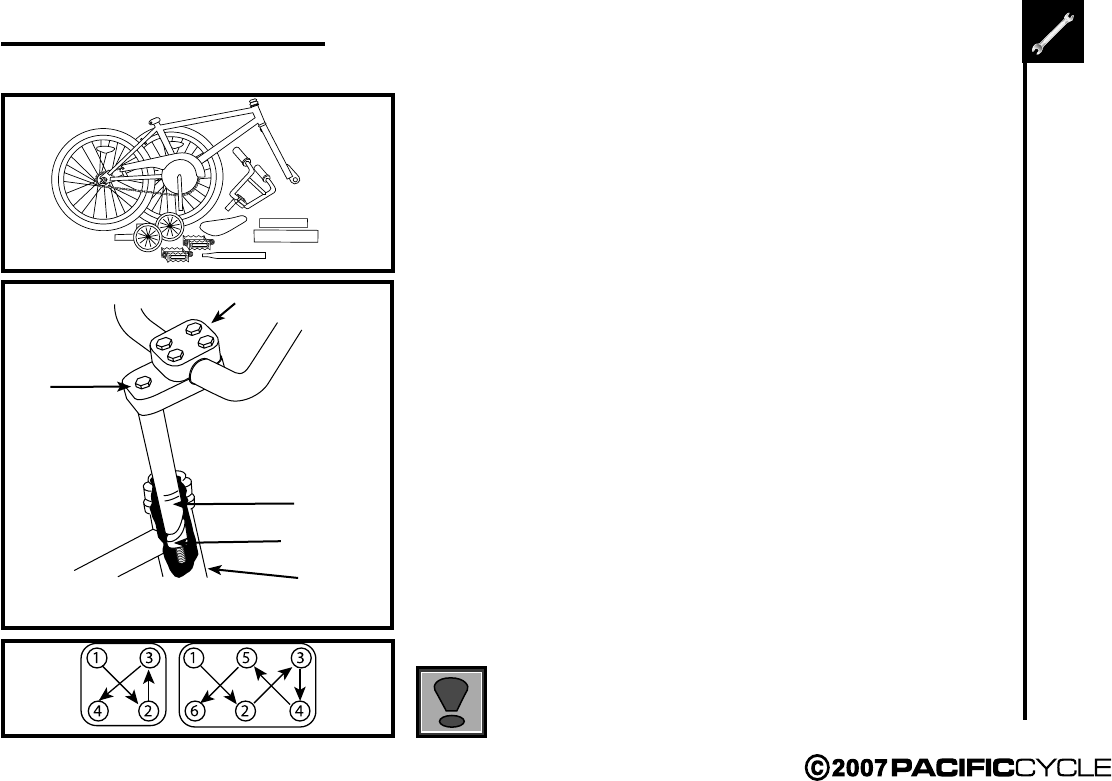
Remove the protective cap from the stem wedge and loosen the stem
bolt using the 6mm Allen key. Some models may use a 13mm
hexagonal bolt instead of an Allen key bolt. Place the handlebar stem
into the head tube, observing the minimum insertion mark on the
handlebar stem and ensuring that all cables are free of tangles. Check
that the fork and the handlebar are facing forward, and that they are
properly aligned with the front wheel. Tighten the stem bolt. Rotate the
handlebar to the desired position. Tighten stem cap bolt 1 (see picture)
two turns, tighten stem cap bolt 2 two turns and so on. Repeat until
handle bar is secure to the stem. See picture for a 4 or 6-bolt system.
Also check that the stem binder bolts are tightened equally and securely.
The handlebar must be inserted so that the minimum insertion
mark cannot be seen. WARNING: Over tightening the stem
bolt or headset assembly may cause damage to the bicycle and/
or injury to the rider.
Stem
Bolt
Minimum
Insertion Mark
Head
Tube
Foreword: Assembling a bicycle is an important responsibility. Proper
assembly not only gives the rider more enjoyment of the bicycle; it
also offers an important measure of safety.
Stem Cap Binder Bolts
Stem Wedge
four bolt
face plate
six bolt face plate
Four Bolt
Face
Plate
Six Bolt
Face
Plate


