37
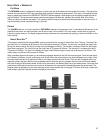
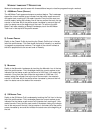
Frequency Tuning: Opens the Frequency Tuning window. Allows channel scanning through all available frequen-
cies beginning at 45 MHZ. Begin a scan by selecting Start. Scroll through found channels using the Channel Up and
Down arrow keys on the screen.
Channels can be fine tuned using the arrow keys located below the Frequency Tuning Start button. Use the Channel
Up and Down arrow keys to select a channel to fine tune. Press the Fine Tuning arrow keys to adjust the frequency
for the best possible picture.
Select OK to accept channels.
TV C
HANNEL FAVORITES
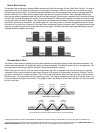
Opens the Favorite Channel configuration screen. Up to 9 favorite channels can be stored for quick access during a
workout. This feature may be enabled or disabled.
NOTE: Setting channels using the auto channel setup procedure, as instructed in TV SETUP, is recommended before
attempting to setup favorite channels.
To Set Up a Favorite Channel: Select (touch) the ENABLE radial button, select the radial button next to the input slot
desired, select Enter Name, input the channel name using the keyboard display, select OK to accept the channel
name, select the desired channel using the Up or Down ARROW Keys. Continue as desired to set up to 9 favorite
channels. Select OK to set the channels to memory.
TV C
HANNEL NAME
/SORT
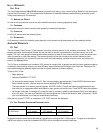
Opens the Channel Name / Sort configuration screen. Allows the facility manager to customize the TV channel list order. This
feature may be enabled or disabled.
NOTE: Setting channels using the auto channel setup procedure, as instructed in TV SETUP, is recommended before attempt-
ing to setup favorite channels.
Validation: The validation checkbox enables or disables viewing of the channel in the list. Select the checkbox to
enable the channel. If Channel Name / Sort and Channel Favorites are both enabled, channels not marked as valid
(enabled) in Channel Name / Sort will be removed from Channel Favorites.
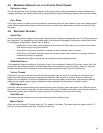
Channel Swap: To swap channels within the channel listing, select Channel Swap. Select the radio button next to
the desired channel. The Channel Swap window will appear showing the channel selected for swapping. Use the Up
or Down arrow keys to select the second channel to swap with the previous channel. Select the swap button to pre-
view the channel swap information. Press OK to confirm the channel swap or CANCEL to exit without swapping
channels.
PROMO CHANNEL SETUP
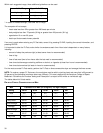
Opens the Promo Channel Setup screen. If enabled, one existing input channel can be selected to be a dedicated chan-
nel for internal promotional broadcast use. Select the Channel Change button to scroll up or down to the desired chan-
nel.
ADVANCED PROMO CHANNEL SETTINGS
When Promo Channel is enabled, the option becomes available to choose how Promo Channel may be configured when
viewed in the attract screen.
If “Promo Channel Only” is selected, only the channel selected as the Promo Channel is available for display in the
attract screen.
If “Allow User to Change Channel” is selected, users may change the channel displayed in the attract screen using
the CHANNEL UP or DOWN arrow keys.
Within this option, the number of minutes before the TV display returns to the Promo Channel is set. Whether or not
the unit starts up with the Promo Channel displayed can also be configured.
If “Start with Promo Channel” is not selected, the unit will startup and display the last channel selected by the user.
FM RADIO SETUP
Opens the FM Radio Setup screen allowing FM channel setup. This feature may be enabled or disabled.
To Set Up Channels: Select Channel Setup; Auto, Start.
To Delete an Unwanted Channel: Choose Channel Setup; Manual, use the Channel Controls to choose the channel
to be deleted, select delete, return the Channel Setup to Auto.
To Restore a Channel: Choose Channel Setup; Manual, use the Channel Controls to choose the channel to be
restored, select Add, return the Channel Setup to Auto.


