


6
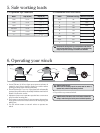
Ocean Electric Winches 34 -
7
7
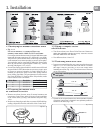
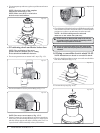
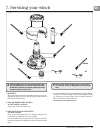
• Use t
h
e temp
l
ate provi
d
e
d
as a gui
d
e to position t
h
e winc
h
on
t
h
e
dec
k
.
NOTE: Check the scale of the tem
p
late
matches the winch
(
Fig 1.4.3
).
NOTE: Make
s
ure there i
s
room below
deck for motor and
s
ub box.
Fig.
1
.4.3
1
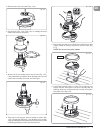
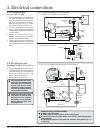
.5 Positionin
g
winch ancillaries below dec
k
N
O
TE: T
h
e pos
i
t
i
on
i
ng o
f
t
h
e motor
gear
b
ox must
b
e c
h
ec
k
e
d
pr
i
or to cutt
i
ng
for deck
/
hull and bulkhead clearance.
• T
h
e motor gear
b
ox can
b
e rotate
d
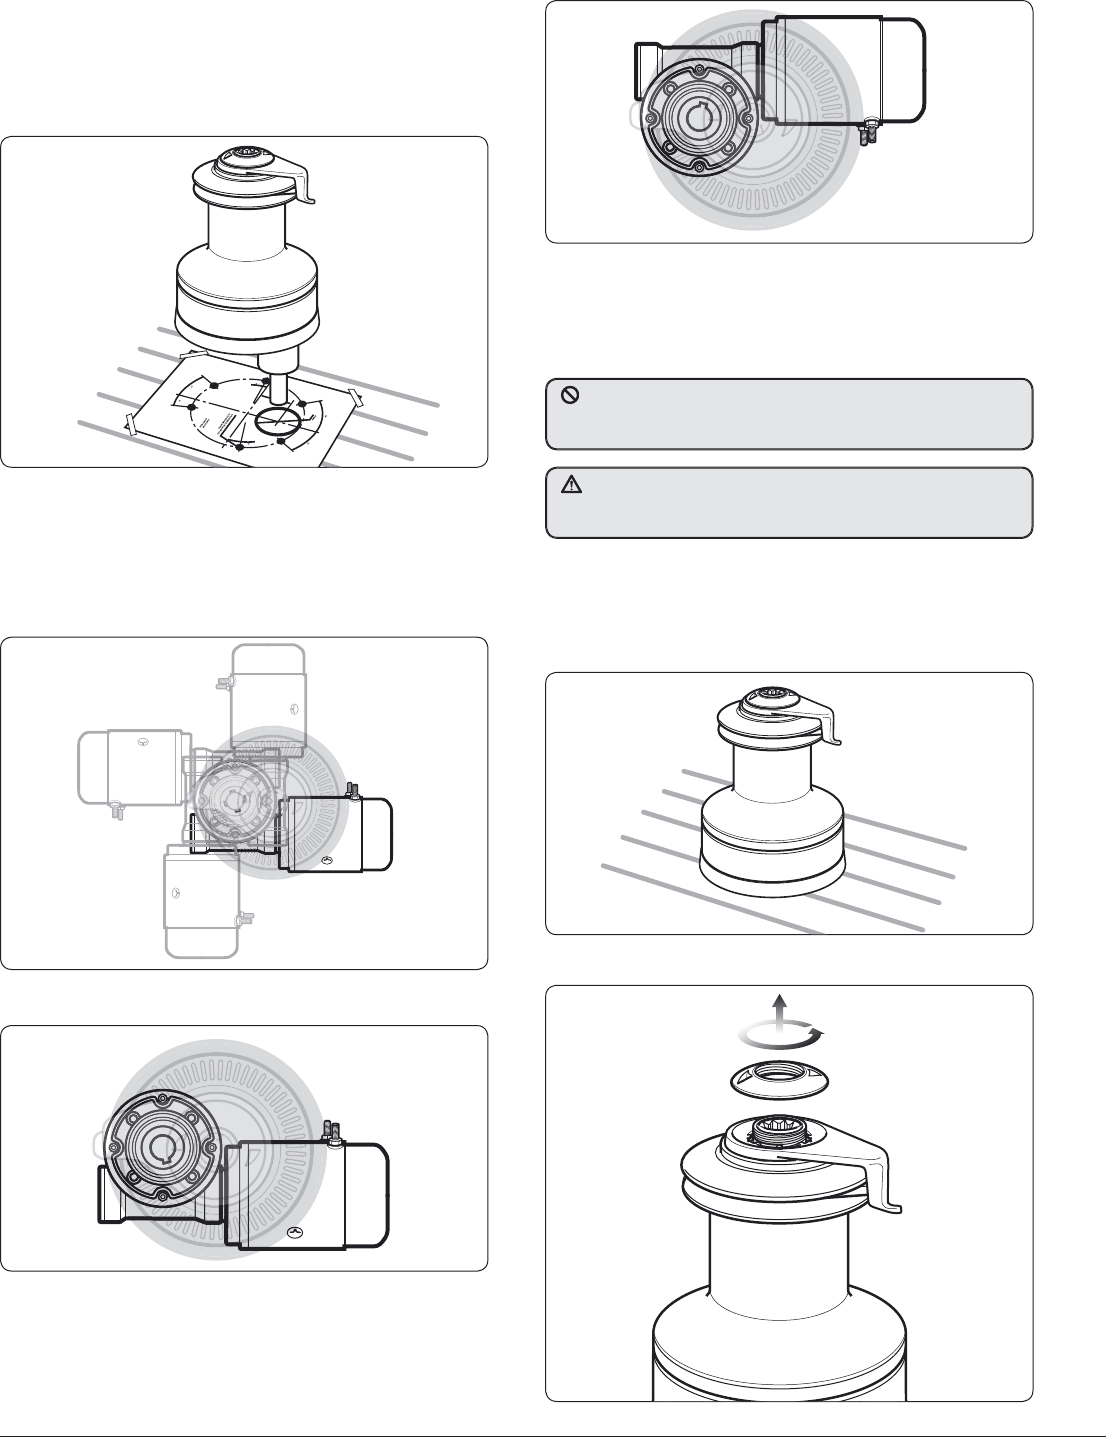
in 90° steps, Fig. 1.5.1.
• T
h
e motor rotation is factory set for fi tting as Fig. 1.5.2.
Fig. 1.5.1
Fig. 1.5.
2
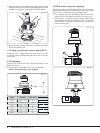
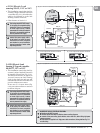
N
O
TE: T
h
e motor can
b
e
fi
tte
d
as F
i
g. 1.5.3.
•
Contact Lewmar for correct fi tting of e
l
ectrica
l
connections.
If the motor is unitentionally fi tted this way on a single speed
winch it will not o
p
erate and make a clickin
g
noise, on a 2 or
3 speed winch it will dramaticall
y
reduce performance.
•
Check clearance below deck and accessibilit
y
then position the
d
ec
k
switc
h
es near an
d
in view of t
h
e winc
h
. Use t
h
e temp
l
ates
p
rovi
d
e
d
as a gui
d
e to cut
/d
ri
ll
h
o
l
e, fi t switc
h
an
d
sea
l.
NOTE:
A
ir switch tubing must be twist and
ch
a
f
e
f
ree to t
h
e sw
i
tc
h
un
i
t
(
su
b
b
ox
).
F
i
g
. 1.5.
3
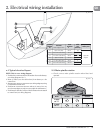
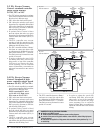
1.6 F
i
tt
i
n
g
a convert
ibl
e e
l
ectr
i
c w
i
nc
h
34-65
NOTE: Illu
s
tration
s
are ba
s
ed on a model 50 winch.
•
Place the winch in
p
osition to ensure correct fi t once the holes
h
ave been drilled/cut (Fi
g
. 1.6.1).
F
i
g
. 1.6.
1
F
i
g
. 1.6.
2
•
Unscrew the to
p
ca
p
(Fi
g
. 1.6.2).
DO NOT cover the air bleed hole with sealant as this will sto
p
a
ir esca
p
in
g
and could result in winches self o
p
eratin
g
as the air
ex
p
ands with risin
g
tem
p
eratures in the tube
.
Once you have selected the
p
osition for the winch, motor
g
earbox
a
nd controls, double check everythin
g
and only then drill the holes
i
n th
e
dec
k
.