


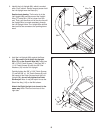
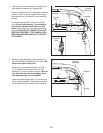

14
15. IMPORTANT: See page 17 and plug in the
power cord. Next, see page 19 and turn on
the power.
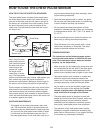
S
ee page 29; follow steps 1 through 3 to cal-
ibrate the incline of the treadmill.
When the frame stops moving, remove the
k
ey from the console and unplug the power
cord.
15
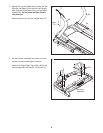
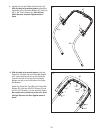
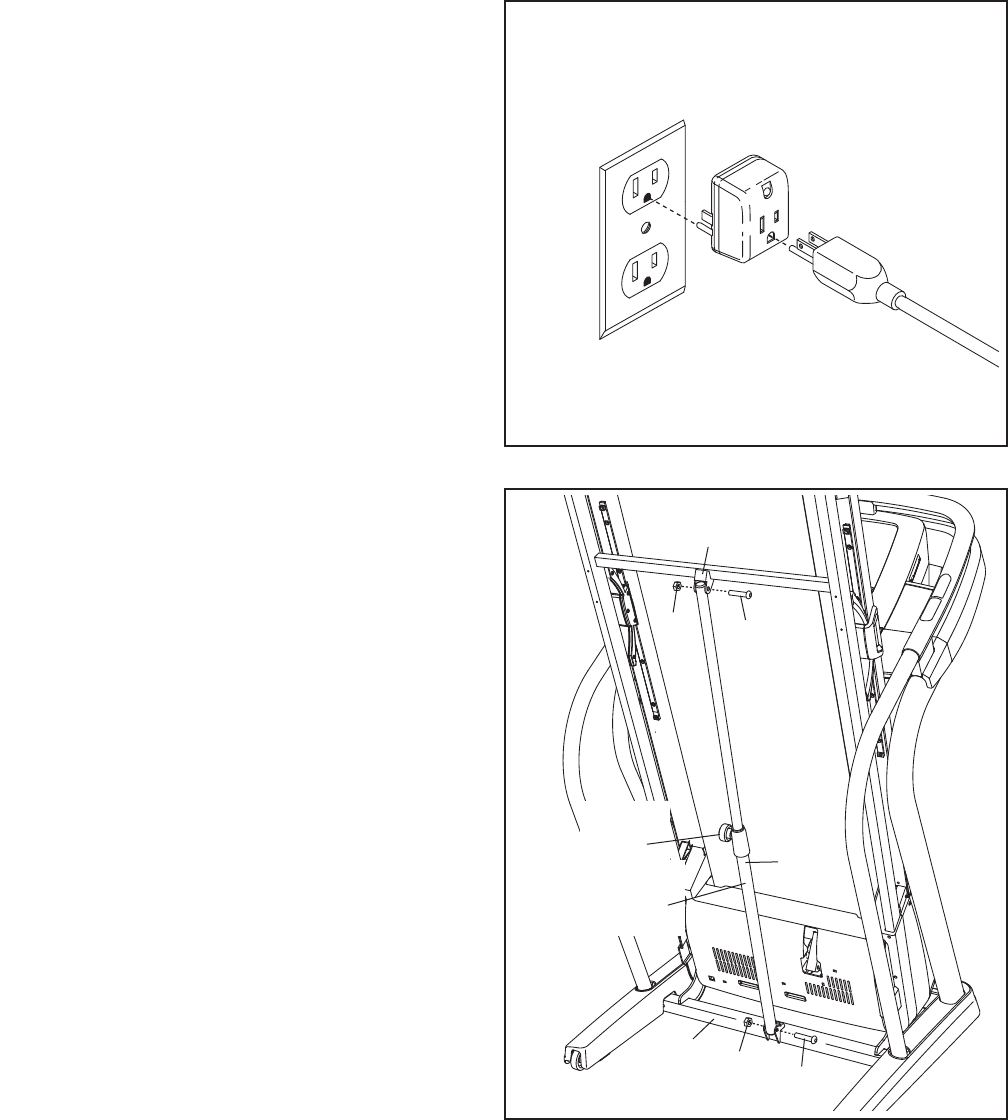
IMPORTANT:
Make sure to follow all
instructions in this step.
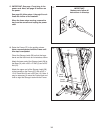
16. Raise the Frame (57) to the position shown.
Have a second person hold the Frame until
this step is completed.
Orient the Storage Latch (58) so that the large
barrel and the latch knob are oriented as shown.
Attach the lower end of the Storage Latch (58) to
the Base (91) with a 3/8" x 2" Bolt (3) and a 3/8"
Nut (12).
Attach the upper end of the Storage Latch (58)
to the bracket on the Frame (57) with a 3/8" x
1 3/4" Patch Bolt (6) and a 3/8" Nut (12). Note: It
may be necessary to move the Frame back and
forth to align the Storage Latch with the Frame.
58
12
57
6
12
3
91
Large
Barrel
Latch
Knob
16