


2
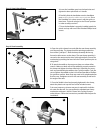
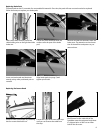
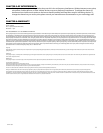
Step 2: Attach Handlebars
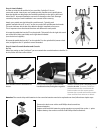
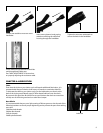
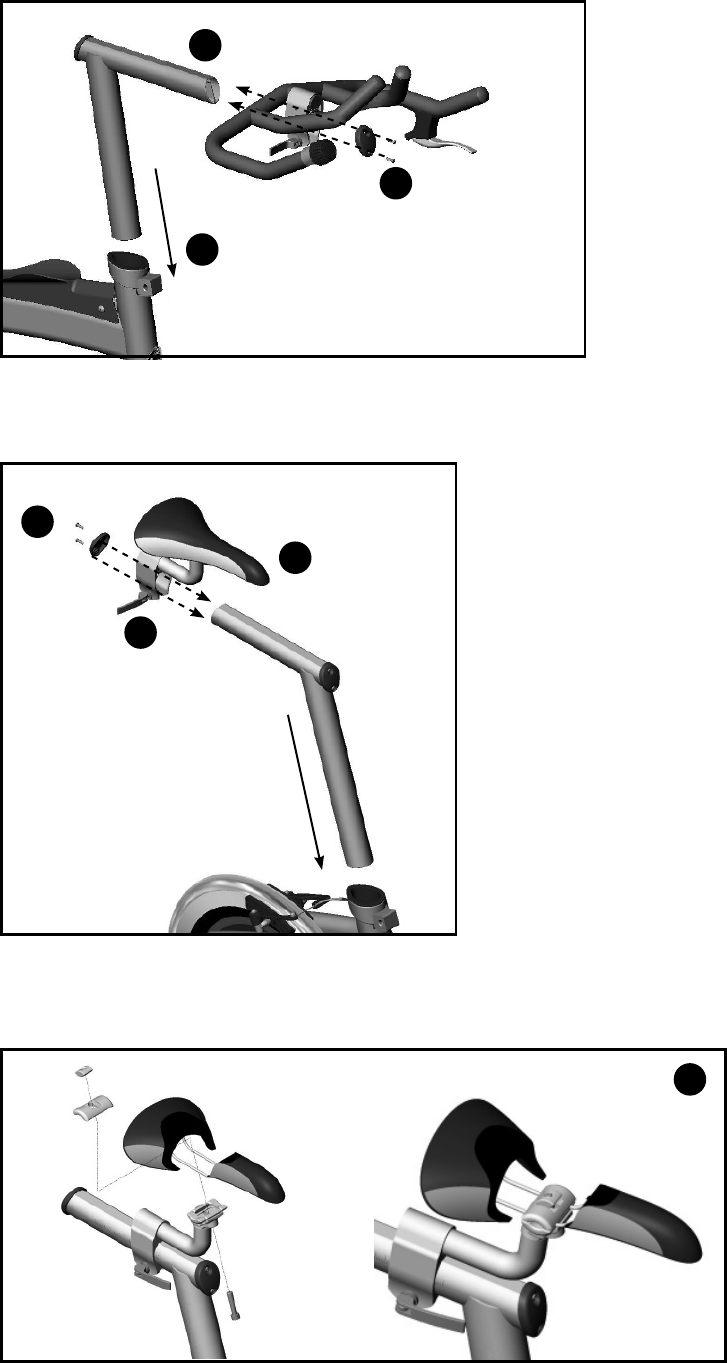
Step 3: Seat Assembly
A. Insert the handlebar post into the head tube and
tighten the 6mm pinch bolt or L-Handle.
B. Carefully slide the handlebar onto the handlebar
post, ensuring that the cables are not twisted. Once
the handlebar is in place, secure it with the quick-re-
lease lever. The lever must be in the “Closed” position
in order to safely use the IC.
C. Once the handlebar is properly installed, attach the
plastic end cap with two of the included Phillips-head
screws.
A. Open the quick-release lever and slide the seat clamp assembly
onto the seat tube. The clamp should be pointing towards the
front of the CycleOps IC. Slide the clamp assembly all the way
forward to allow access to the clamp. The seat clamp assembly is
secured to the seat post tube via a quick-release lever. Secure the
mechanism by rotating the lever into the “Closed” position prior to
using the IC.
B. To attach the saddle to the seat post clamp, use a 6mm Allen
wrench. Make sure both rails of the saddle are properly seated in
the clamp and tighten the 6mm Allen bolt. If desired, you can at-
tach any standard bicycle saddle to the CycleOps Indoor Cycle. Be
sure to tighten the saddle so that it is level and parallel to the fl oor
for optimum comfort. Note: Seat may need to be retightened after
fi rst few uses. Retighten screw for the seat assembly as well as for
the angle of the seat.
C. Once the Saddle is level and properly tightened in the clamp,
attach the plastic end cap with two of the included screws.
D. In some instances, a shorter seat post is required for individu-
als under fi ve feet tall. You can replace the standard seat clamp
mechanism with part # 16616. Contact Saris Cycling Group to
order this part. Follow the instructions provided with that part for
installation.
A
B
C
A
B
C
B