IN1606 Scaling Presentation Switcher • Internal Web Pages 59
Mic/Line Input tab
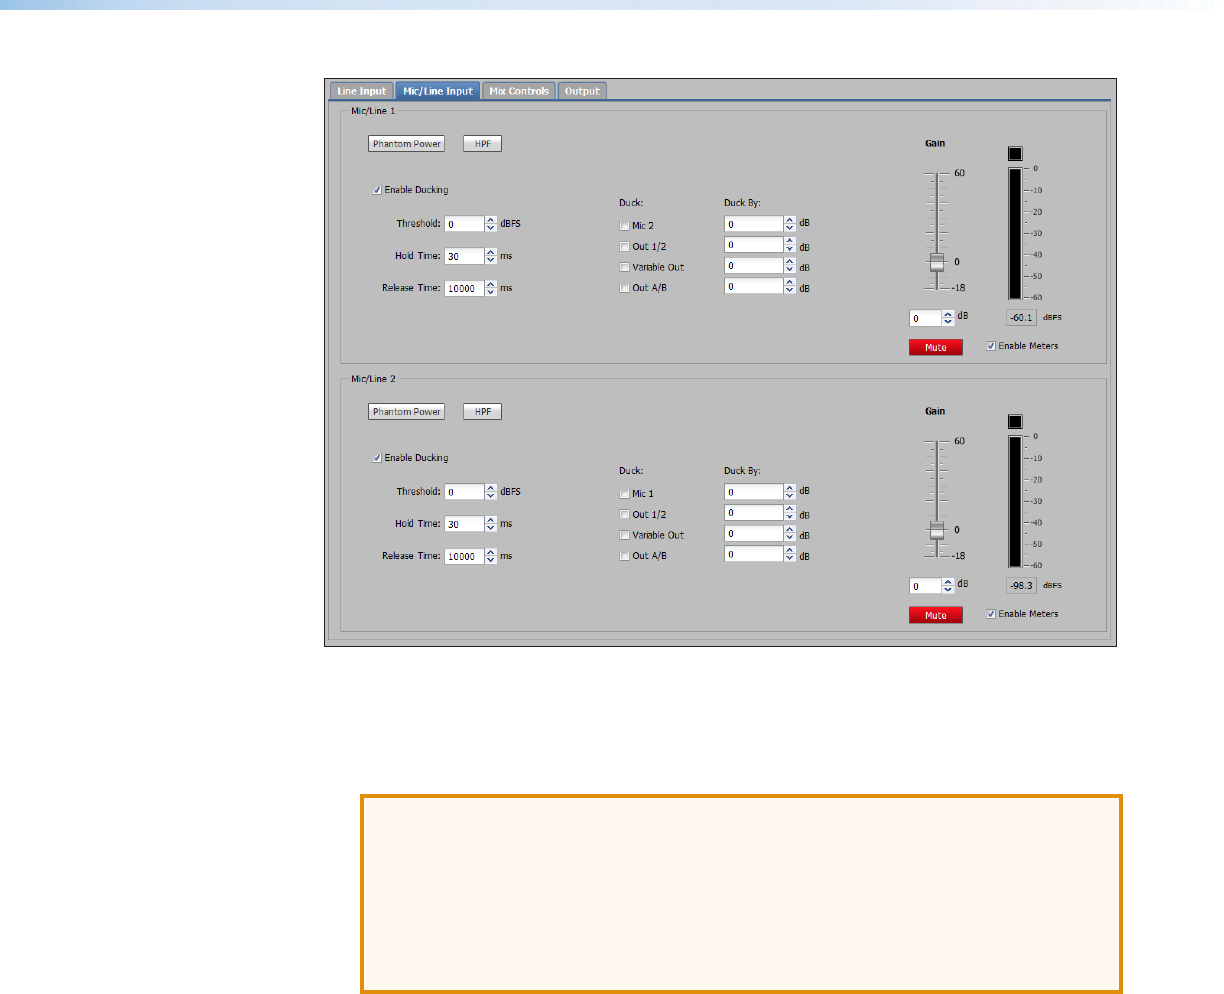
Figure 32. Mic/Line Input Tab with Ducking Enabled
1. Click the Mic/Line Input tab.
2. For each Mic/Line input, click the Phantom Power button to enable or disable +48 VDC
phantom power on the mic input. The button turns blue when enabled.
ATTENTION:
• Condenser microphones require phantom power. Dynamic microphones do not
require power. Never set an unbalanced dynamic microphone to +48V. Doing so
may damage the microphone.
• For condenser microphones, verify it will safely operate at +48 VDC.
• When a line level source is connected, be certain the +48V phantom power is
off.
3. For each Mic/Line input, click HPF to enable or disable a high-pass filter on the mic
input. Lower frequencies are attenuated, allowing higher frequencies to pass. The
button turns blue when enabled.
4. For each Mic/Line input, select the Enable Ducking check box to enable or disable
ducking. Enabling ducking opens additional ducking settings as described below.
Ducking provides a means to duck or lower the level of the program audio when a
specified Mic/Line source must take precedence.
a. In the Threshold field, enter a value or press the Up or Down arrow button to set
the input signal level the ducking source must exceed before ducking begins.
b. In the Hold Time field, enter a value or press the Up or Down arrow button to set
the time between when a ducking source signal drops below the threshold and
before release time engages.
c. In the Release Time field, enter a value or press the Up or Down arrow button
to set the time the ducking targets take to restore signal levels after the ducking
source level is below the threshold and the hold time is met.


