Printing From Start to Finish 25
Basic Printing With Macintosh OS X
If you’re using an OS X compatible application, follow the steps below to print a
document or image using the basic settings. (If you’re using a Macintosh Classic
mode application, follow the steps on page 29 instead.)
Make sure you added your printer to Print Center, as described on the Start Here
sheet.
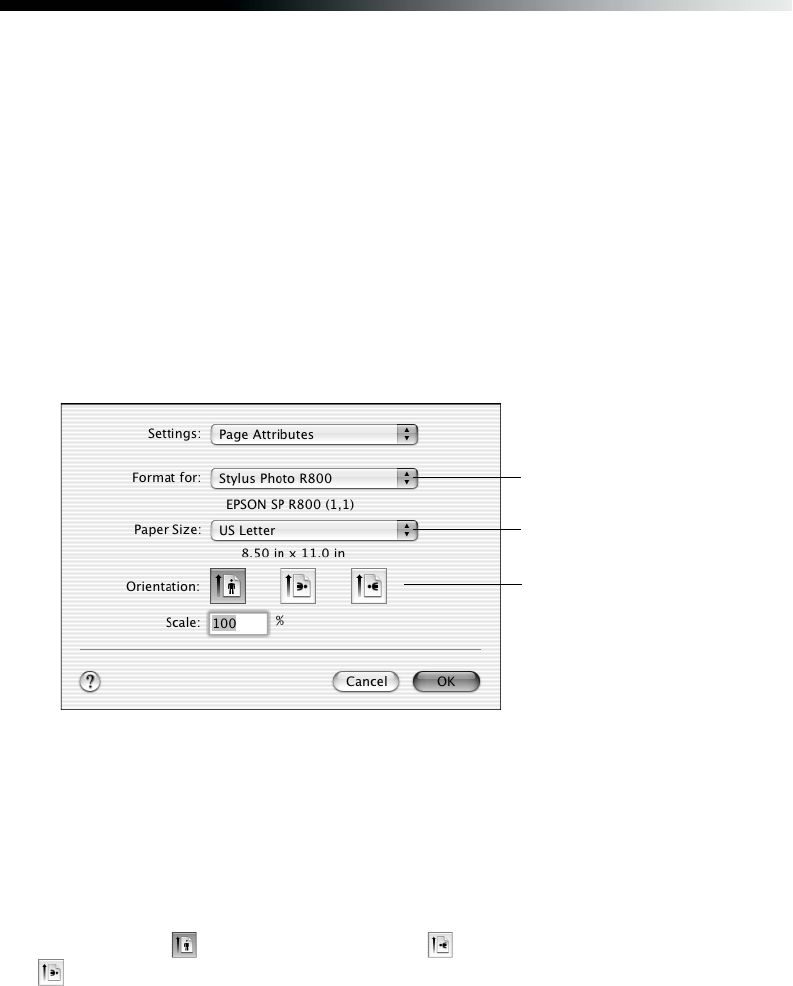
1. From the File menu, select Page Setup.
2. Open the Format for menu and select your printer and any optional feature.
(For roll paper printing, see page 35. For borderless printing, see page 43. For
CD/DVD printing, see page 61.)
3. Select the size of paper you loaded as the Paper Size setting.
Caution: When printing non-borderless print jobs using a custom paper size,
make sure the selected size matches the paper you loaded and is within the
printable area for your printer. For example, never choose a paper size wider than
your printer’s sheet feeder or longer than your paper length.
4. Select the direction you want your image or document to print as the Orientation
setting. Select for vertical orientation, for horizontal facing right, or
for horizontal facing left.
5. Click OK.
Select your printer from the
Format for pop-up menu
Select your paper size
Select your document or
image orientation
