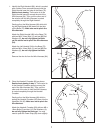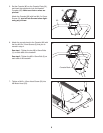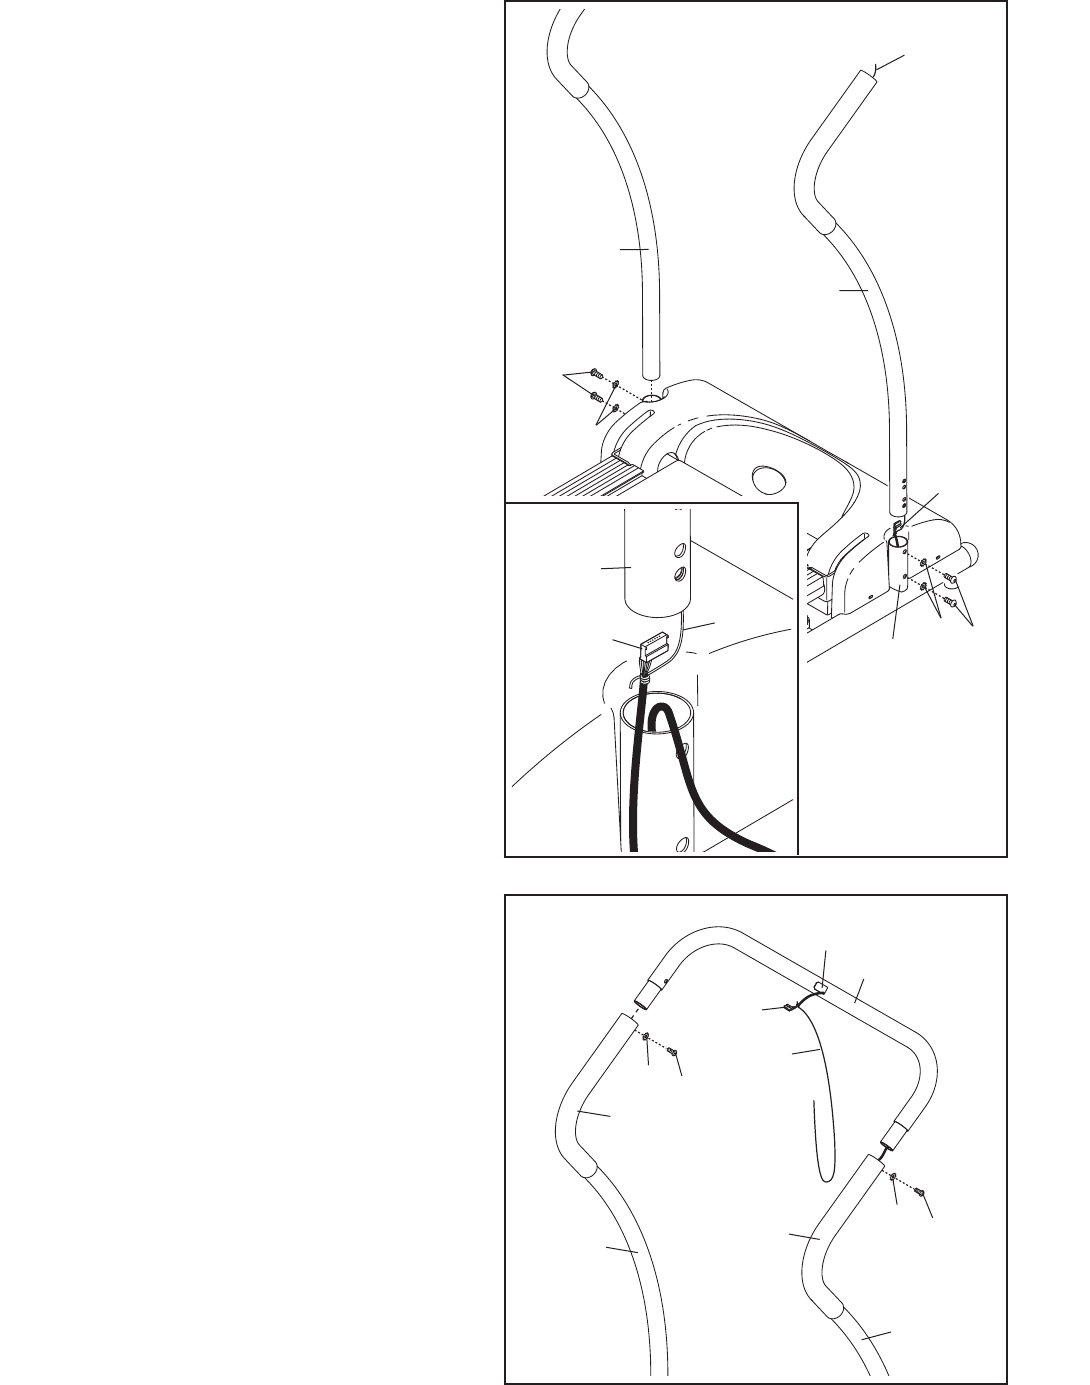
1. Identify the Right Handrail (86), which is marked
with a sticker. Have a second person hold the
Right Handrail near the tube on the Base (79).
S
ee the inset drawing. Tie the wire tie in the
Right Handrail securely around the end of the
W
ire Harness (84). Then, pull the other end of
the wire tie until the Wire Harness is routed
completely through the Right Handrail.
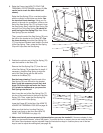
Gently pull on the Wire Harness (84) while slid-
ing the Right Handrail (86) down into the tube
on the Base (79). Make sure not to pinch the
Wire Harness.
Attach the Right Handrail (86) to the Base (79)
with two M8 x 16mm Bolts (1) and two M8 Star
Washers (5); do not fully tighten the Bolts
yet. Be careful not to pinch the Wire Harness
(84).
Attach the Left Handrail (34) to the Base (79)
with two M8 x 16mm Bolts (1) and two M8 Star
Washers (5); do not fully tighten the Bolts
yet.
Remove the wire tie from the Wire Harness (84).
1
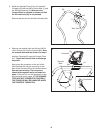
2. Orient the Handrail Crossbar (83) as shown.
See the inset drawing in step 1. Tie the wire tie
in the Handrail Crossbar securely around the
end of the Wire Harness (84). Then, pull the
other end of the wire tie until the Wire Harness
is routed completely through the Handrail
Crossbar.
Gently pull on the Wire Harness (84) while in-
serting the Handrail Crossbar (83) down into the
Handrails (34, 86). Make sure not to pinch the
Wire Harness.
Attach the Handrail Crossbar (83) with two M6 x
10mm Bolts (2) and two 1/4" Star Washers (4);
do not fully tighten the Bolts yet. You may
need to push the Foam Grips (85) down slightly.
2
7
86
83
84
34
84
Wire Tie
86
84
86
Wire
Tie
5
1
1
5
34
79
2
Wire Tie
4
2
4
Hole
85
85


