


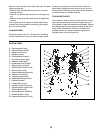

11
26
21
33
8
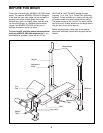
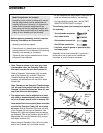
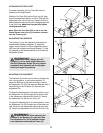
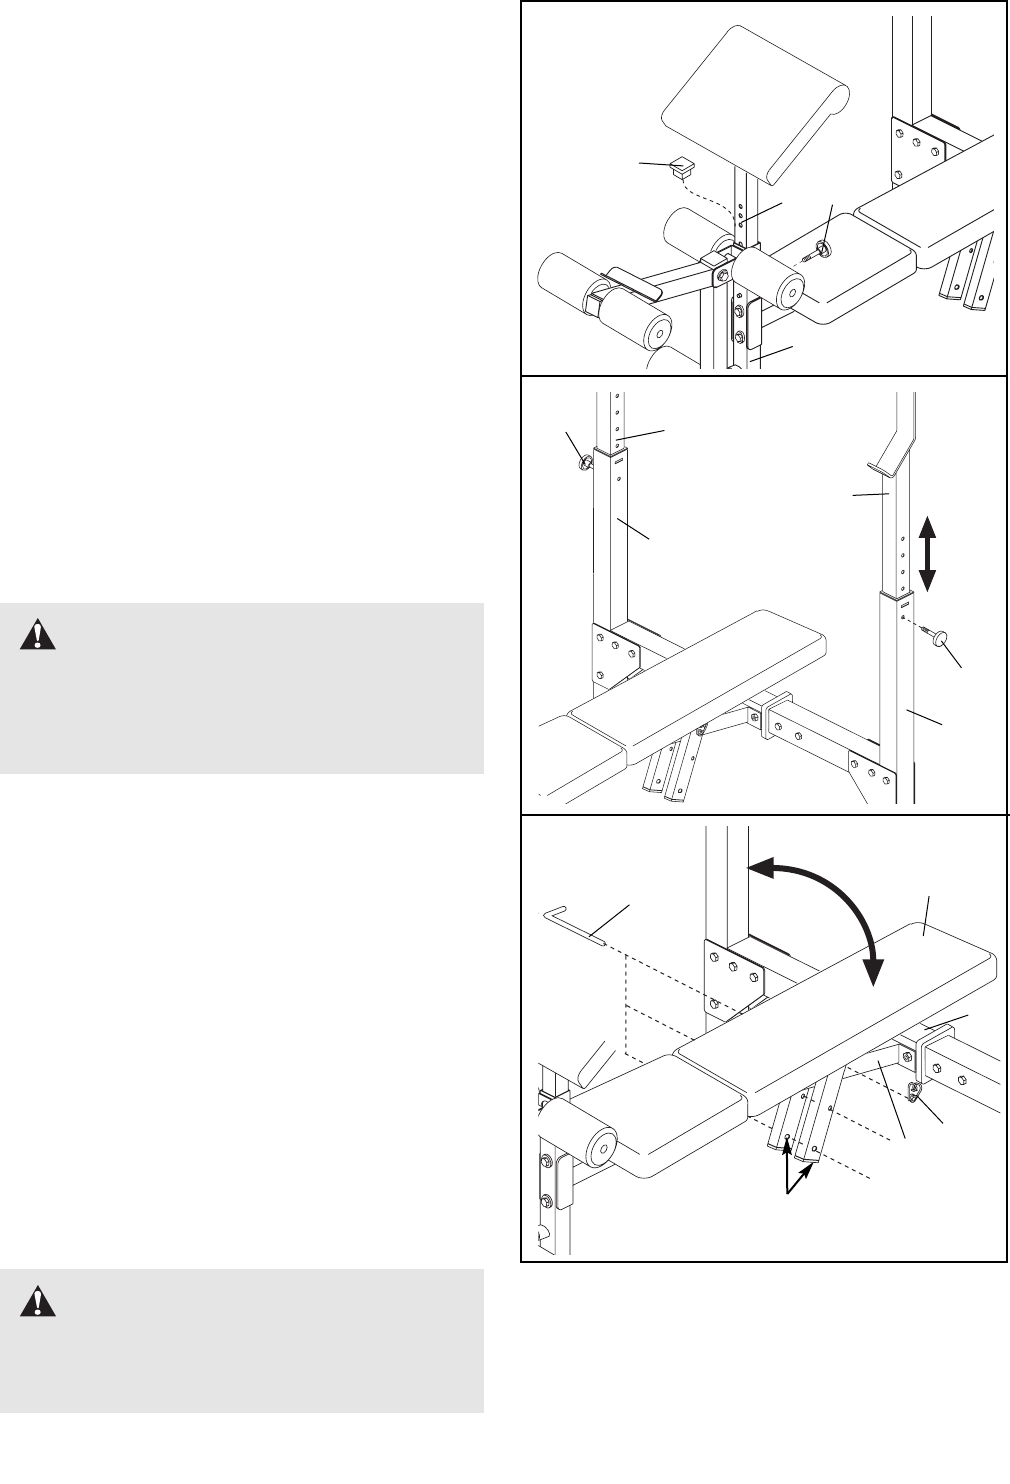
ATTACHING THE CURL POST
For some exercises, the Curl Post (26) must be
attached to the weight bench.
Slide the Curl Post (26) into the Front Leg (8). Align
one of the adjustment holes in the Curl Post with the
adjustment hole in the Front Leg. Tighten the M10 x
48mm Adjustment Knob (33) into the adjustment hole
in the Front Leg. Make sure that you fully tighten
the Adjustment Knob.
Note: When the Curl Post (26) is not in use, the
45mm Square Inner Cap (21) should be inserted
into the Front Leg (8).
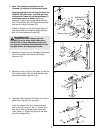
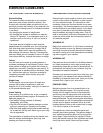
ADJUSTING THE UPRIGHTS
The Uprights (1) can be adjusted to five heights to
accommodate different exercises. To adjust the
height, remove the M10 x 67mm Adjustment Knobs
(30) from both Uprights and Upright Bases (7). Slide
the Uprights to the desired position and re-insert the
Adjustment Knobs.
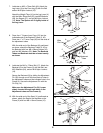
ADJUSTING THE BACKREST
The Backrest (6) can be used in either a decline posi-
tion, a level position, or two incline positions. To
adjust the Backrest to the decline position, remove
the Adjustment Pin (32) and lower the Backrest until it
rests directly on the Crossbar (3). Re-insert the
Adjustment Pin.
To adjust the Backrest (6) to the level position, insert
the Adjustment Pin (32) through the top set of holes
in the adjustment tubes and the Frame (2). Secure
the Adjustment Pin with the Pin Clip (14).
To adjust the Backrest (6) to an incline position, insert
the Adjustment Pin (32) through one of the lower two
sets of holes in the adjustment tubes and the Frame
(2). Secure the Adjustment Pin with the Pin Clip (14).
7
7
1
30
1
30
32
Adjustment Tubes
3
2
14
6
WARNING: When adjusting the
position of the Backrest (6), make sure that
the Adjustment Pin (32) is inserted through
both adjustment tubes and the Frame (2).
WARNING: Always set both
Uprights (1) at the same height. Make sure
that the Adjustment Knobs (30) are inserted
completely and tightened into the Uprights
before you begin any exercise.