


15
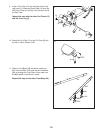
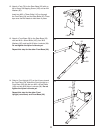
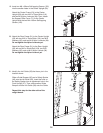
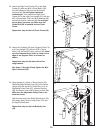
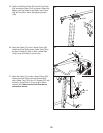
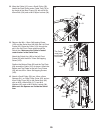
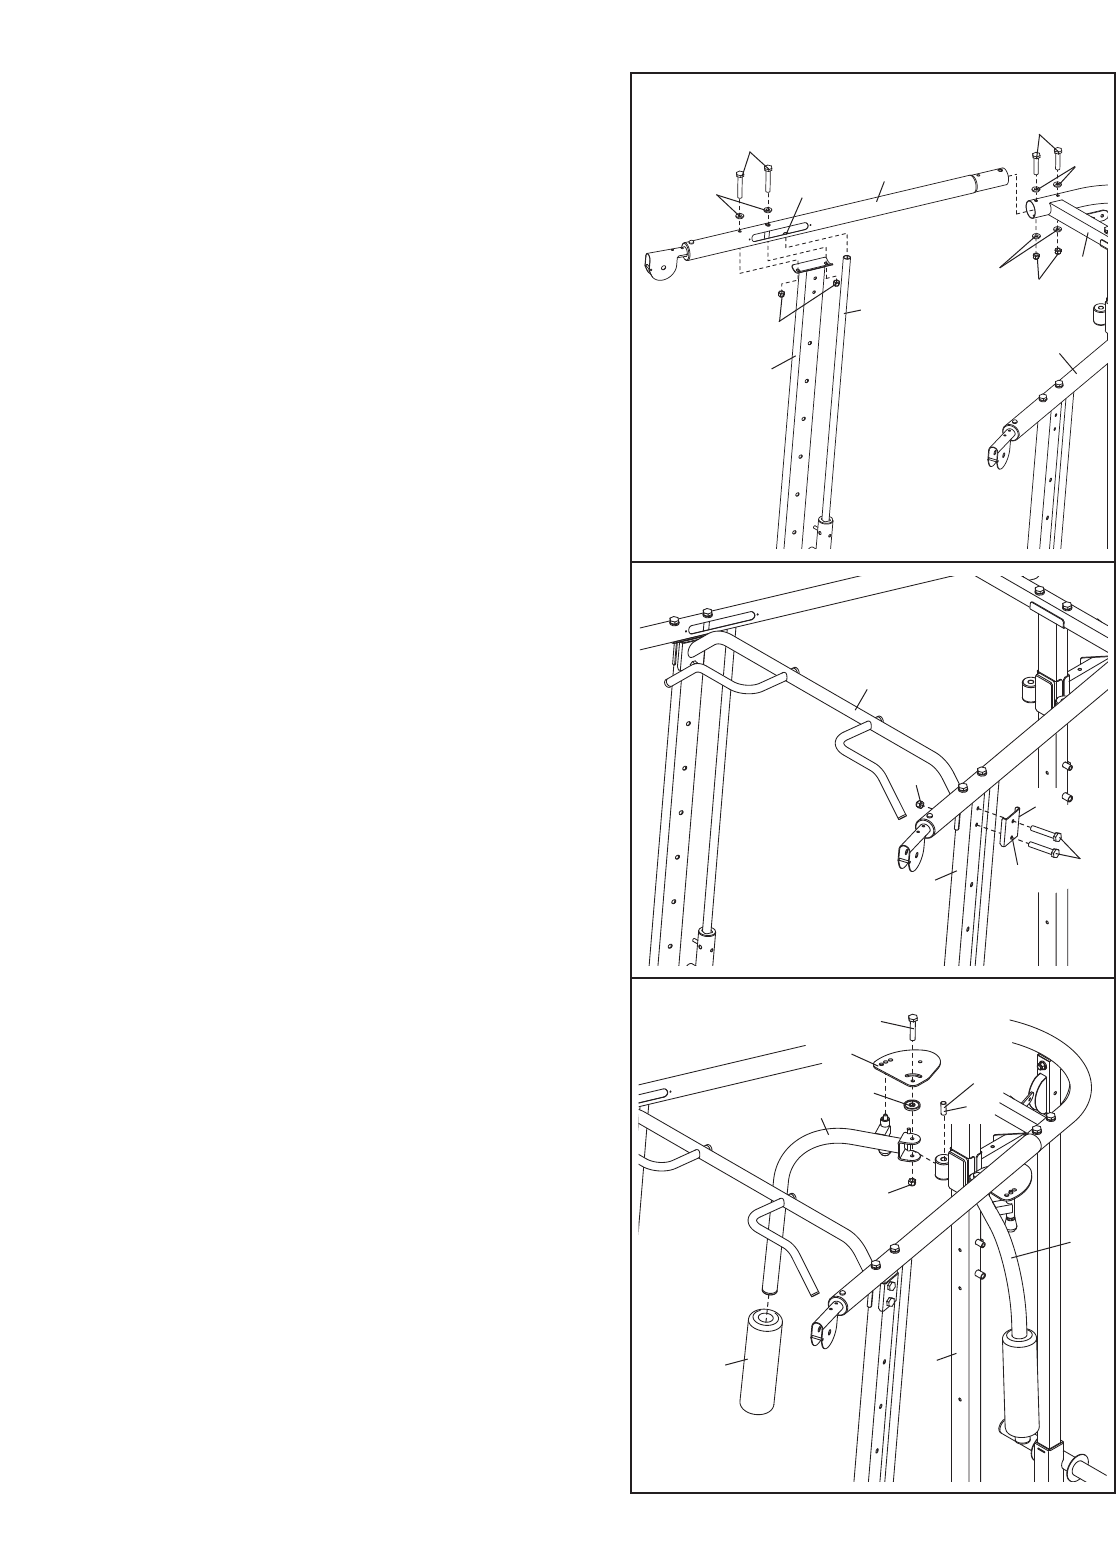
24. Apply grease to a 16mm x 56mm Spacer (23).
Attach the Right Butterfly Arm (50) to the Center
Upright (29) with an M10 x 95mm Bolt (114), an
Adjustable Pulley Plate (67), a 46mm Bushing
(88), the Spacer, and an M10 Nylon Locknut (94).
Make sure the Adjustable Pulley Plate is ori-
ented as shown.
W
et the lower end of the Right Butterfly
Arm (50)
with soapy water. Slide a Large Foam (75) onto
the Right Butterfly Arm.
Repeat this step for the Left Butterfly Arm
(49)
.
24
50
23
49
88
67
114
Grease
94
29
75
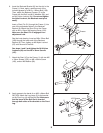
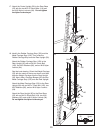
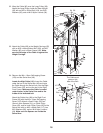
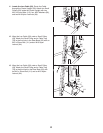
23. Attach the Crossbar (34) and a Support Plate (70)
to a Front Upright (27) with two M10 x 70mm
Bolts (116) and an M10 Nylon Locknut (94). Make
sure the indicated hole, which is closer to the
edge of the Support Plate, is oriented as
shown.
Repeat this step for the other side of the
weight bench.
See steps 14 through 22 and tighten the M10
Nylon Locknuts (94).
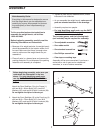
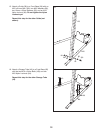
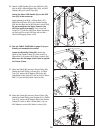
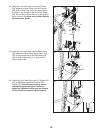
22. Attach the Right Front Frame (33) to the Rear
Frame (31) with two M10 x 81mm Bolts (100),
four M10 Washers (96), and two M10 Nylon
Locknuts (94). Do not tighten the Nylon
Locknuts yet. Then, attach the Right Front
Frame (33) to the right Front Upright (27) with two
M
10 x 81mm Bolts (100), two M10 Washers (96),
and two M10 Nylon Locknuts (94). Do not tight-
en the Nylon Locknuts yet. Make sure the
Guide Rod (28) is inserted into the Front
Frame.
Repeat this step for the Left Front Frame (32).
23
2
2
94
70
116
Hole
34
100
96
Hole
94
9
4
1
00
96
3
3
32
27
28
3
1
96
27