


17
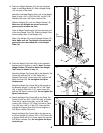
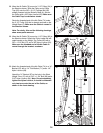
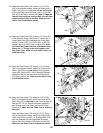
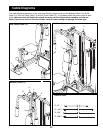
39. Important: Although the following steps are not
difficult to perform, the correct routing of the
cable is critical to the functioning of the home
gym. Please make sure that you wrap the cable
around the pulleys exactly as shown in each step.
Route the Press Cable (72) through the opening in
the Press Frame (8), and wrap the Cable around a
3 1/2” Pulley (24) in the direction shown. Route the
end of the Cable back through the opening in the
Press Frame.
Attach the Pulley (24) to the indicated hole in the
Press Frame (8) with a 3/8” x 3 1/4” Bolt (62), a 3/8”
Flat Washer (48) and a 3/8” Nylon Locknut (50).
Make sure the Pulley is mounted on the inside of
the Press Frame. Make sure the Cable Trap is ori-
ented as shown.
39
62
48
50
8
24
25
72
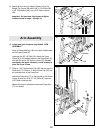
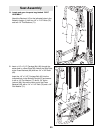
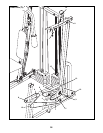
40. Wrap the Press Cable (72) around a “V”-Pulley (27) in
the direction shown. Attach the “V”-Pulley and a Large
Cable Trap (32) to the small tube on the Press
Upright (2) with a 3/8” x 3 1/4” Bolt (62), a 3/8” Flat
Washer (48) and a 3/8” Nylon Locknut (50). Note:
The small tube has four adjustment holes. Mount
the “V”-Pulley in the hole farthest from the
Upright. Make sure the Cable Trap is oriented as
shown.
48
50
72
27
Small tube,
last hole
62
32
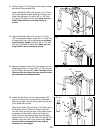
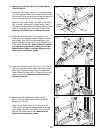
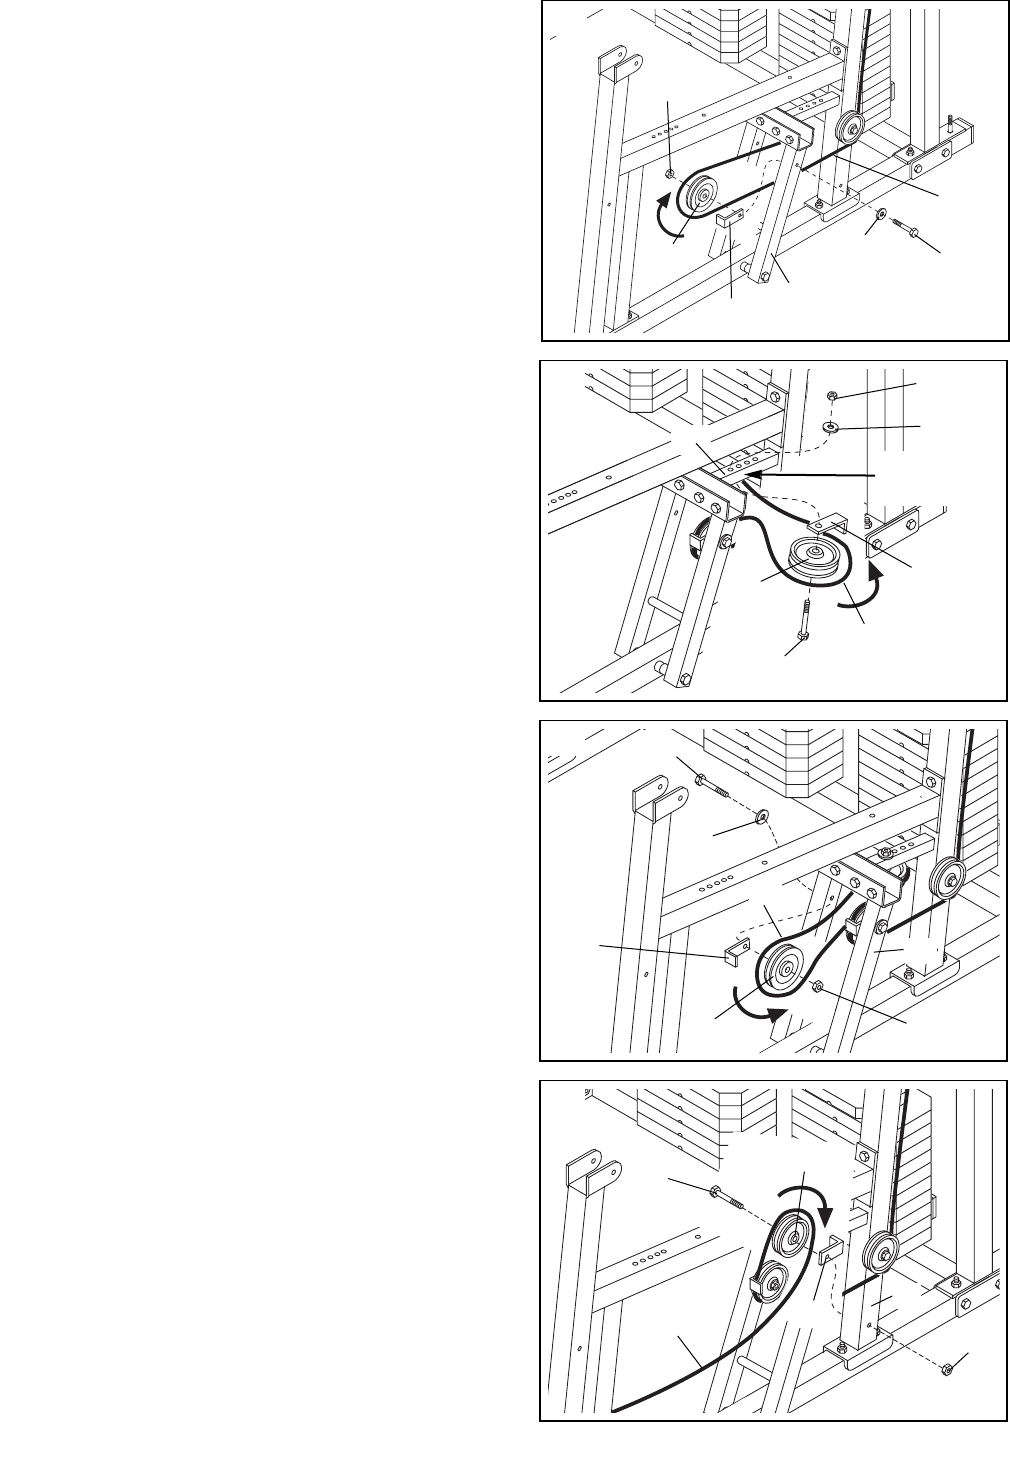
41. Route the Press Cable (72) back through the opening
in the Press Frame (8) and wrap the Press Cable
around a 3 1/2” Pulley (24) in the direction shown.
Then, route the Press Cable back through the open-
ing in the Press Frame (8).
Attach the Pulley (24) to the indicated hole in the
Press Frame (8) with a 3/8” x 3 1/4” Bolt (62), a 3/8”
Flat Washer (48), and a 3/8” Nylon Locknut (50).
Make sure the Pulley is mounted on the inside of
the Press Frame. Make sure the Cable Trap is ori-
ented as shown.
41
8
50
62
25
48
24
72
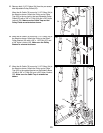
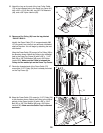
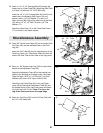
42. Wrap the Press Cable (72) around a 3 1/2” Pulley
(24) in the direction shown. Attach the Pulley and a
Cable Trap (25) to the indicated hole on the far side
of the Press Upright (2) with a 3/8” x 4 3/4” Bolt (60)
and a 3/8” Nylon Jamnut (63). Note: Thread the
Jamnut only two turns onto the Bolt; you will later
attach another Pulley to the Bolt. Make sure the
Cable Trap is oriented as shown.
Route the Press Cable (72) back through the opening
in the Press Frame (8), so the end is in front of the
Press Frame.
42
63
2
25
24
60
72
2
40