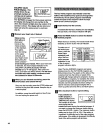
4. SYMPTOM: THE DISPLAYS OF THE CONSOLE DO NOT FUNCTION PROPERLY
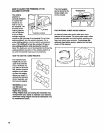
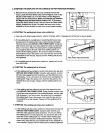
a. Remove the sixscrews from the hood.Carefully remove the
hood. Locate the Reed Switch (26) and the Magnet (107) on the
leftside ofthe Pulley (12). Turn the Pulley untilthe Magnet is
aligned with the Reed Switch. Make sure that the gap between
the Magnet and the Reed Switch is about 1/8". If necessary,
loosen the Reed Switch Screw (109) and move the Reed Switch
slightly.,Retightenthe Screw. Re-attach the hood, and runthe
treadmillfor a few minutes tocheck for a correctspeed reading.
5. SYMPTOM: The walking belt slows when walked on
I wl L_J
I It "
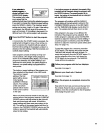
a. Use only a UL-listed surge protector, rated at 15 amps, with a 14-gauge cord of five feet or less in length.
b. If the walking belt isovertightened, treadmill performance may
decrease and the walking belt may be permanently damaged.
Remove the key and UNPLUG THE POWER CORD. Using the
allen wrench, turn both rear rolleradjustment boltscounterclock-
wise, 1/4 ofatum. When the walking belt is propedytightened,
you shouldbe able to lifteach side of the walking belt 3 to 4
inches offthe walking platform. Be carefulto keep the walking
belt centered, Plug in the power cord, insertthe key and run the
treadmillfor e few minutes. Repeat untilthe walking belt isprup-
edy tightened.
b
Rear Roller Adjustment Bolts
c. If the walking belt still slows when walked on, please call our toll-
free HELPLINE.
6. SYMPTOM: The walking belt is off-center
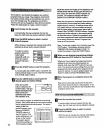
a. If the walking belt has shiftedto the left, first remove the key and
UNPLUG THE POWER CORD. Using the allen wrench, turn the
left rear roller adjustment bolt clockwise, and the dght bolt coun-
terolockwise, 1/4 of a turn each. Be careful not to overtighten the
walking belt. Plug in the power cord, insert the key and run the
treadmill for a few minutes. Repeat until the walking belt is cen-
tered.
a
18
b.
Ifthe walking belt has shifted to the right, first remove the key
and UNPLUG THE POWER CORD. Using the allen wrench, turn
the left rear roller adjustment bolt counterclockwise, and the right
bolt clockwise, 1/4 of a turn each. Be careful not to overtighten
the walking belt. Plug in the power cord, insert the key and run
the treadmill for a few minutes. Repeat until the walking belt is
centered.
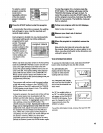
7. SYMPTOM: The walking belt slips when walked on
a. Ifthe walking belt slipswhen walked on, first remove the key and
UNPLUG THE POWER CORD. Using the allen wrench, turn
both rear roller adjustment bolts clockwise, 1/4 of a turn. When
the walking belt is correctly tightened, you should be able to lift
each side of the walking belt 3 to 4 inches off the walking plat-
form. Be careful to keep the walking belt centered. Plug in the
power cord, insert the key and carefully walk on the treadmill for
a few minutes. Repeat until the walking belt is properly tightened.
b
a


