


page 4
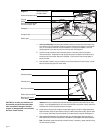
7.
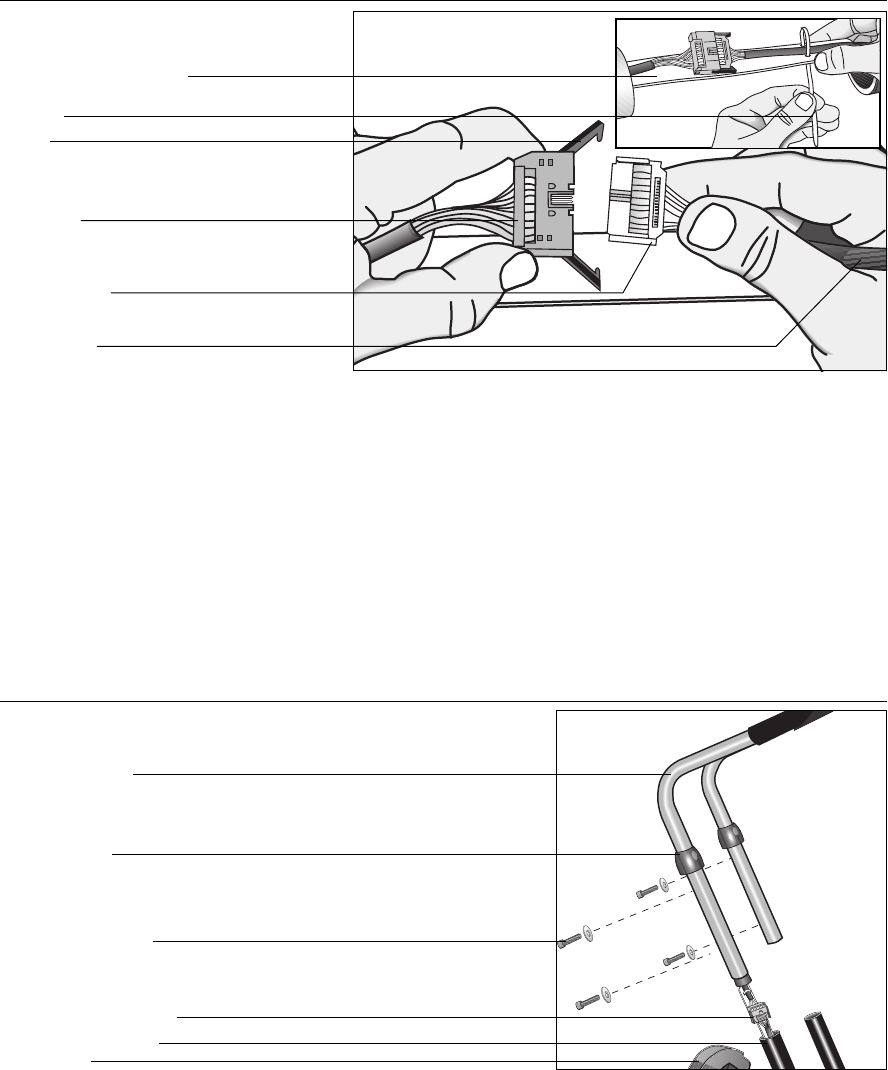
Have your assistant(s)
hold the handrail assembly while you connect the ribbon cable. Plug
the connector into the receptacle. Since the connector is designed to engage in one direction
only, do not force the connector into the receptacle. To secure the connection, press the
flanges together so that they clip onto the connector tabs. See Diagram 4.
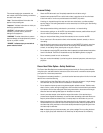
8. Use the tie wrap provided to secure the lower portion of the ribbon cable to the plastic
reinforcement strip. Thread the tie wrap through the holes in the plastic reinforcement strip
and around the ribbon cable. See inset in Diagram 4. Pull the end of the tie wrap tightly to
secure the cable.
9. Once the cable is secure, use your scissors to cut off the excess end of the tie wrap. You can
also remove the string from the ribbon cable.
Diagram 4
Connect and secure
the ribbon cable.
Plastic reinforcement strip
Tie wrap
Flange
Securely press the flanges
onto the connector tabs
Connector tabs
Receptacle
Ribbon cable
CAUTION: Do not allow your assistant to lift
the handrails so high that the excess ribbon
cable is stretched or damaged. Stretched,
crimped, or damaged cable is not covered by
the Precor limited warranty.
Important:
While your assistant(s) holds the handrails, guide the ribbon cable into the base
support. If you feel
any
resistance, do not force the handrails into position, slowly remove the
handrails from the base supports and start over again.
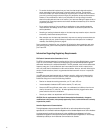
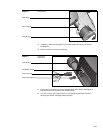
10. Notice that the two bolt hole locations on each base support provide for height adjustments.
Determine which height is best suited to meet your needs (lower holes usually used for those
5'6" or shorter) before securing the handrails to the base handrail supports. See Diagram 5.
11. After adjusting the handrails to the height that suits you, alternately tighten each bolt using the
Allen wrench. Be sure that the concave side of the washer is placed against the handrail supports.
Note: Periodically inspect the handrail-to-base bolts and, if necessary, tighten each bolt using
the Allen wrench provided.
Diagram 5
Secure handrail to base.
Handrail assembly
Handrail covers
Bolt & curved washer
Front casing
Ribbon cable connection
Base handrail support