


page 17
COMMERCIAL PRODUCTS DIVISION
3
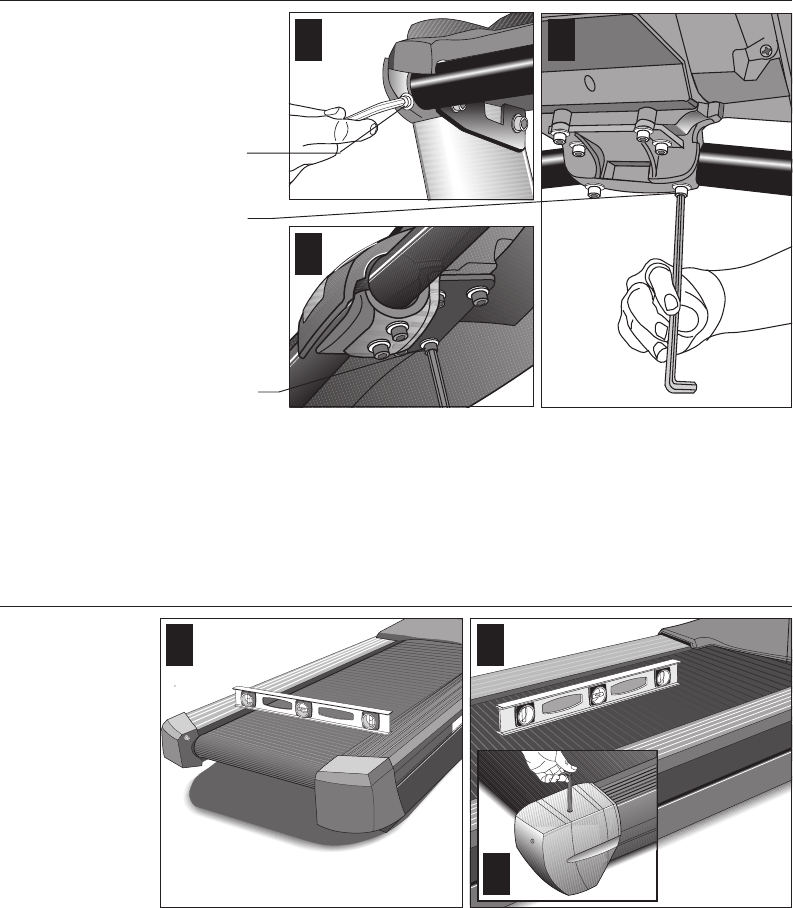
Diagram 13
Tighten the handrail
fasteners.
1
2
Center handrail
clamp screws (2)
Handrail end cap
Center console
bracket screws (4)
Diagram 14
2
1
Level the unit.
3
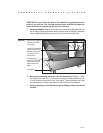
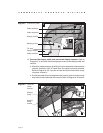
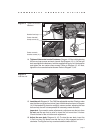
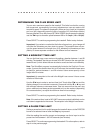
14. Tighten all the center handrail fasteners. Diagram 13. Start with tightening
the two end cap screws and work inward. See Diagram 13, #1. So that you
don’t overtighten the fasteners, hold the supplied hex key by its 3-inch section
and tighten the two center clamp screws. Refer to Diagram 13, #2. Next,
tighten the four console bracket screws. Refer to Diagram 13, #3.
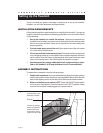
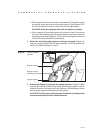
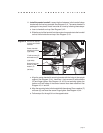
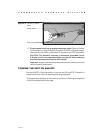
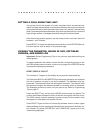
15. Level the unit. Diagram 14. The C932 has adjustable rear feet. Check to make
sure that the running surface is level (use a bubble level as shown in Diagram
14). If the treadmill is placed on a slightly, uneven surface, adjusting the rear
feet can help, but will not compensate for extremely uneven surfaces.
Important: If you need to make adjustments, adjust one rear foot at a time.
Do not use the rear foot to raise or lower the unit more than ¾-inches.
Check the level of the unit after each adjustment.
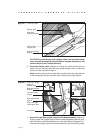
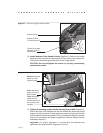
16. Adjust the rear deck. Diagram 14, #3. To raise the rear deck, insert the
¼-inch hex key (G). Make sure that the key is fully engaged and turn it
clockwise. Turning the hex key counterclockwise lowers the unit.