


31
PROBLEM: The walking belt slows when walked on
S
OLUTION: a
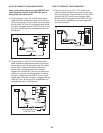
. Use only a single-outlet surge suppressor that meets all of the specifications described on page 11.
b
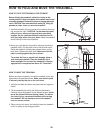
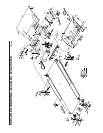
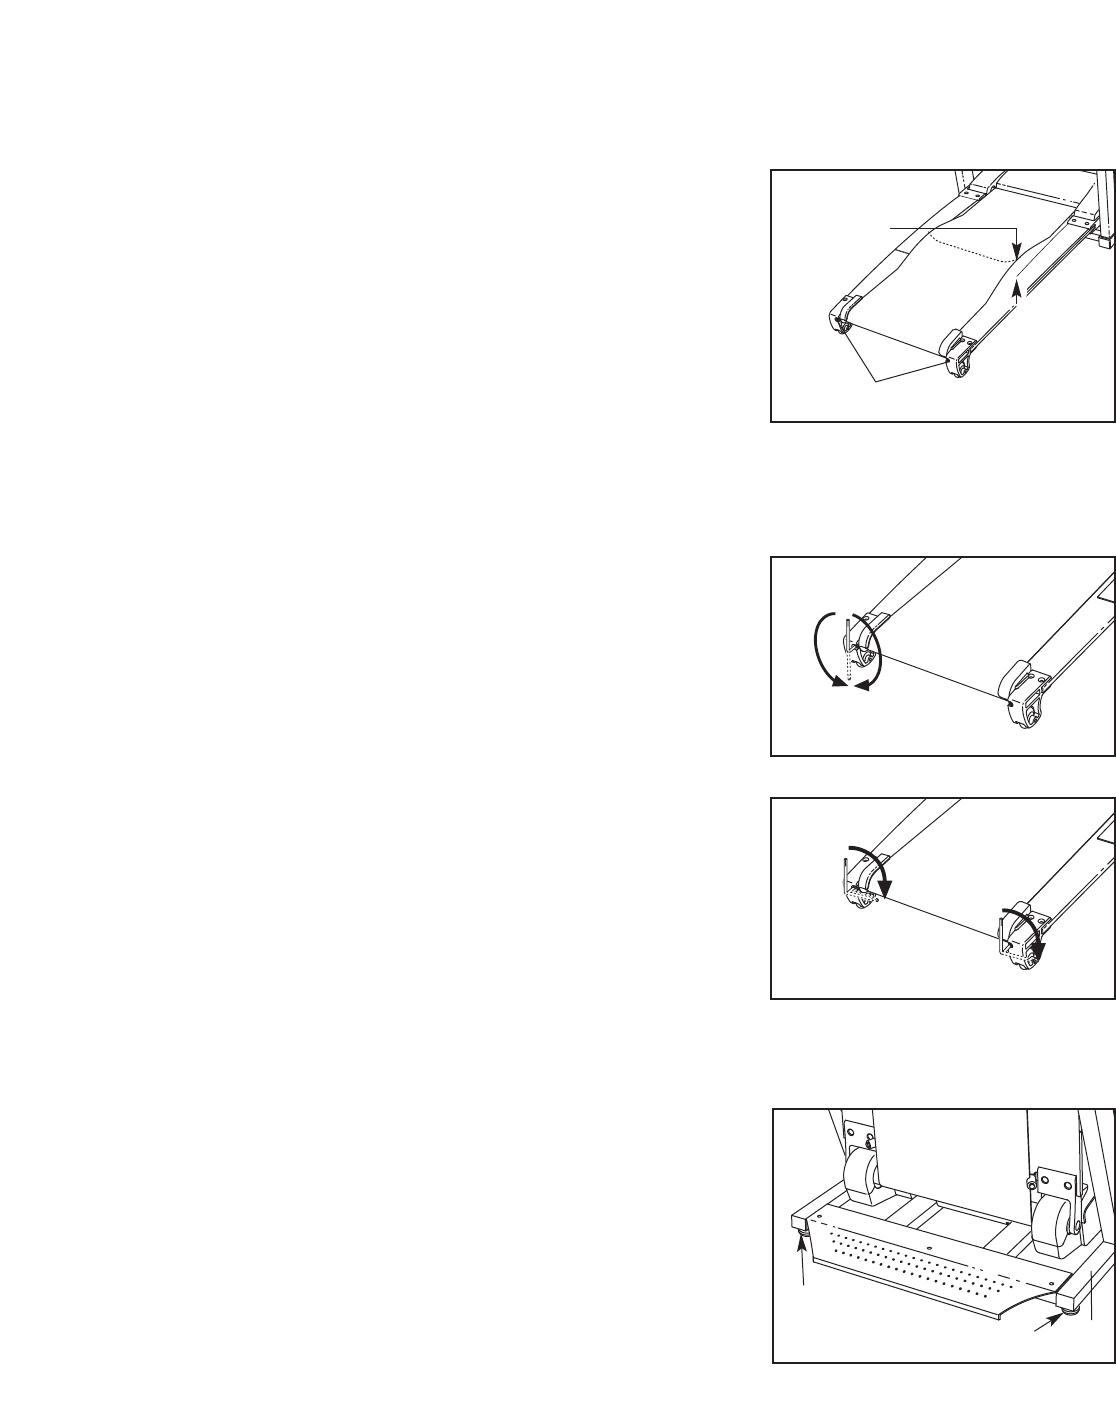
. If the walking belt is overtightened, treadmill perfor-
mance may decrease and the walking belt may be-
come damaged. Remove the key and
UNPLUG THE
POWER CORD. Using the allen wrench, turn both rear
roller bolts counterclockwise, 1/4 of a turn. When the
walking belt is properly tightened, you should be able
to lift each edge of the walking belt 7 to 10 cm (3 to 4
in.) off the walking platform. Be careful to keep the
walking belt centered. Plug in the power cord, insert
the key, and run the treadmill for a few minutes.
Repeat until the walking belt is properly tightened.
c. If the walking belt still slows when walked on, please see the front cover of this manual.
PROBLEM: The walking belt is off-center or slips when walked on
SOLUTION:
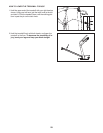
a. If the walking belt is off-center, remove the key and
UNPLUG THE POWER CORD. If the walking belt
has shifted to the left, use the allen wrench to turn
the left rear roller bolt clockwise 1/2 of a turn; if the
walking belt has shifted to the right, turn the left
rear roller bolt counterclockwise 1/2 of a turn. Be
careful not to overtighten the walking belt. Plug in the
power cord, insert the key, and run the treadmill for a
few minutes. Repeat until the walking belt is centered.
b. If the walking belt slips when walked on, first remove
the key and UNPLUG THE POWER CORD. Using
the allen wrench, turn both rear roller bolts clockwise,
1/4 of a turn. When the walking belt is correctly tight-
ened, you should be able to lift each edge of the
walking belt 7 to 10 cm (3 to 4 in.) off the walking plat-
form. Be careful to keep the walking belt centered.
Then, plug in the power cord, insert the key, and
carefully walk on the treadmill for a few minutes.
Repeat until the walking belt is properly tightened.
PROBLEM: The treadmill rocks during use
SOLUTION: a.
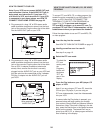
If the
treadmill
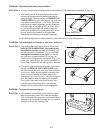
rocks slightly during use, turn one or
both of the Leveling Feet (130) under the Uprights
(20) until the the rocking motion is eliminated. Note: If
necessary, tip the treadmill forward and use a phillips
screwdriver to turn the Leveling Feet.
Rear Roller Bolts
7–10 cm
b
a
b
130
130
a
20