


11
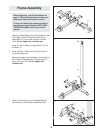
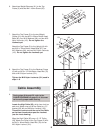
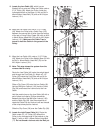
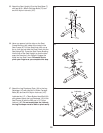
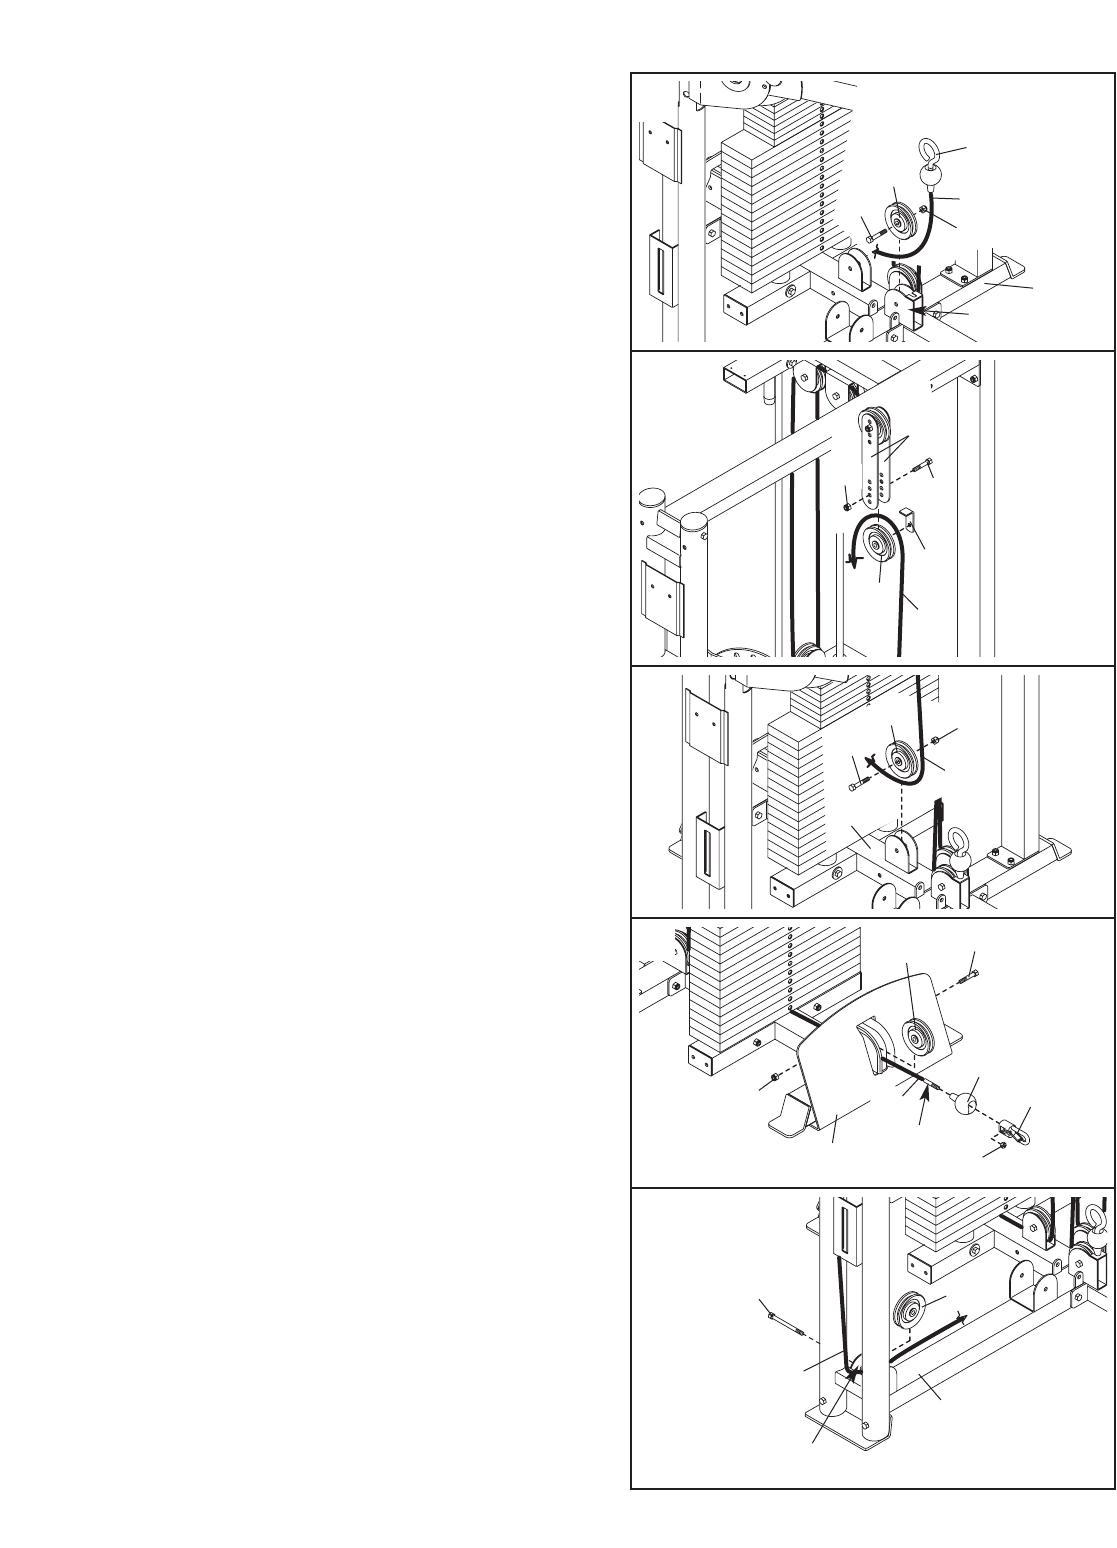
20. Wrap the Low Cable (40) over a 3 1/2” Pulley
(56). Attach the Pulley and a Cable Trap (105)
between the second set of holes from the bottom
of the pair of Long Pulley Plates (59) with an M10
x 46mm Button Head Bolt (76) and an M10 Nylon
Locknut (101). Make sure the Cable Trap is
turned to hold the Cable in the groove of the
Pulley.
21. Wrap the Low Cable (40) under a 3 1/2” Pulley
(56). Attach the Pulley to the Weight Base (2) with
an M10 x 46mm Button Head Bolt (76) and an
M10 Nylon Locknut (101).
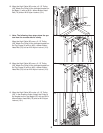
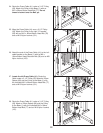
22. Note: This step shows the system from the
reverse side for clarity.
Route the Low Cable (40) under the weight stack
and through the Foot Plate (3). Attach a 3 1/2”
Pulley (56) inside the Foot Plate with an M10 x
46mm Button Head Bolt (76) and an M10 Nylon
Locknut (101).
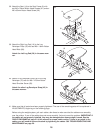
Slide a Clip Cover (39) onto the Low Cable (40).
Hold an M6 Nylon Locknut (103) inside a Cable
Clip (38) and thread the Locknut onto the Low
Cable.
Hold the metal crimp on the Low Cable (40) with a
pair of pliers and insert a Phillips screwdriver
between the side of the M6 Nylon Locknut (103)
and the Cable Clip (38). Use the screwdriver to
rotate the Cable Clip and Locknut until two threads
of the crimp show past the Locknut.
Slide the Clip Cover (39) over the Cable Clip (38).
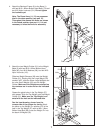
19. Locate the Low Cable (40), which has an
Eyebolt (42) on one end. Wrap the Cable under a
3 1/2” Pulley (56). Attach the Pulley inside the
indicated bracket on the Base (1) with an M10 x
46mm Button Head Bolt (76) and an M10 Nylon
Locknut (101).
19
20
21
22
42
40
1
Bracket
76
56
101
76
56
40
101
59
105
40
76
2
56
101
Crimp
39
38
103
76
56
3
101
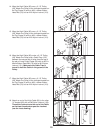
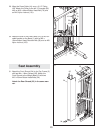
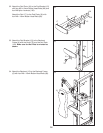
23. Locate the right Press Cable (41). Route the
Cable under a 3 1/2” Pulley (56). Attach the
Pulley to the indicated side of the bracket on the
Base (1) with an M10 x 96mm Button Head Bolt
(77). Do not thread a locknut onto the Bolt yet.
23
77
Bracket
56
41
1
40