


Silver Strike Bowling™ Version 08/04 Page 11
© Copyright 2004 Incredible Technologies, Inc. All Rights Reserved. Unauthorized duplication is a violation of applicable law.
All other marks are the properties of their respective owners. All rights reserved.
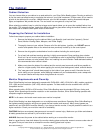
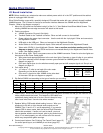
Cabinet Identification Device Installation
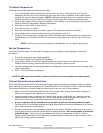
The Cabinet Identification Device or C.I.D. is an innovative and
important component. This device permanently identifies your
cabinet as Silver Strike Bowling. It should remain even if another
component such as the I/O board or chassis is replaced. The C.I.D.
has a unique number to individualize the cabinet and is referred to
as the Cabinet Identification Number.
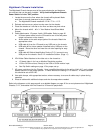
1. Attach the C.I.D. to the inside side of the cabinet using the
2 - #6 X 1” Hex Washer Head Sheet Metal Screws. Mount
so the port is facing up and the electronics faces the wall.
2. Attach the USB cable from the Nighthawk Chassis.
Ø Place the included Cabinet Identification Number on the
back of the cabinet for future reference. Refer to this
number to track your equipment and whenver you
are calling in for service.
Ø The Cabinet Identification Number is displayed in the
operator menus in the lower right hand corner. It is
displayed as Game ID. It is also displayed on the last
line of the initial boot-up screen.
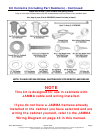
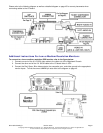
Ticket Dispenser
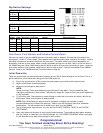
Silver Strike Bowling supports Entropy 2000 Ticket Dispenser Continuous Type (TD963CR) and Deltronic Labs
DL-1275 Continuous Type ticket dispensers. If you wish to connect a ticket dispenser to this game, you will have
to make a cable with the proper connectors. These ticket dispensers mates with a Molex connector #03-09-1041
or #03-09-1042. The I/O board ticket connector J201 mates with a Molex connector #22-01-2047 or #22-01-
3047. Simply connect pins 1 through 4 on one end directly to pins 1 through 4 on the other end. Consult with your
ticket dispenser's manual to verify installation procedures. (See the Ticket Dispener section in the Operator
Menus starting on page 36.)
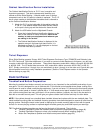
Control Panel
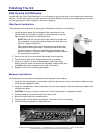
Trackball and Button Preparation
Mounting the trackball and buttons correctly and securely is very important for the profitability and safety of your
new game. This kit is designed for use in cabinets with ¾" thick wood control panels where proper routing of the
control panel is used to create a safe playing experience. If you do not have a ¾" thick wood control panel, please
replace your control panel or choose a cabinet with a ¾" thick wood control panel installed. Keep in mind that if
your current control panel has many old holes in it from previous buttons, joysticks, etc. that it may be easier to
start with a new solid control panel. This will give your game a better look and feel and help it to earn better.
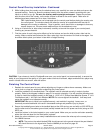
NOTE: If the cabinet already has a trackball plate installed, discard and replace with the new trackball plate. The
metal trackball mounting plate and trackball mounting procedure have been designed to remove all bolts from the
playing surface. Routing the wood control panel is required so the metal mounting plate is flush with the panel
surface. An uneven playing surface or exposed edges will affect game play and could impact your earnings.
TIP: Trackball and button templates can be found at the back of this manual. They include:
q Trackball Template to install the trackball plate and make the appropriate routing (page 49).
q Trackball Orientation Diagram to orient your trackball correctly when installing (page 51).
q Button Set Templates to position and install control panel buttons (page 53).