


Page 19
Step 8:
Step 9:
Step 10:
Step 11:
Step 12:
ASSEMBLY IS NOW COMPLETE.
Make sure that all parts are securely assembled. Familiar-
ize yourself and all users of the trampoline with the care
and maintenance instructions, use and instructional
materials, and warranty and safety precautions contained
in this manual before using the trampoline.
DISASSEMBLY
To disassemble, follow the assembly steps in reverse
order. Do not attempt to disassemble any frame compo-
nents before the mat (bed) and springs have been re-
moved.
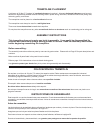
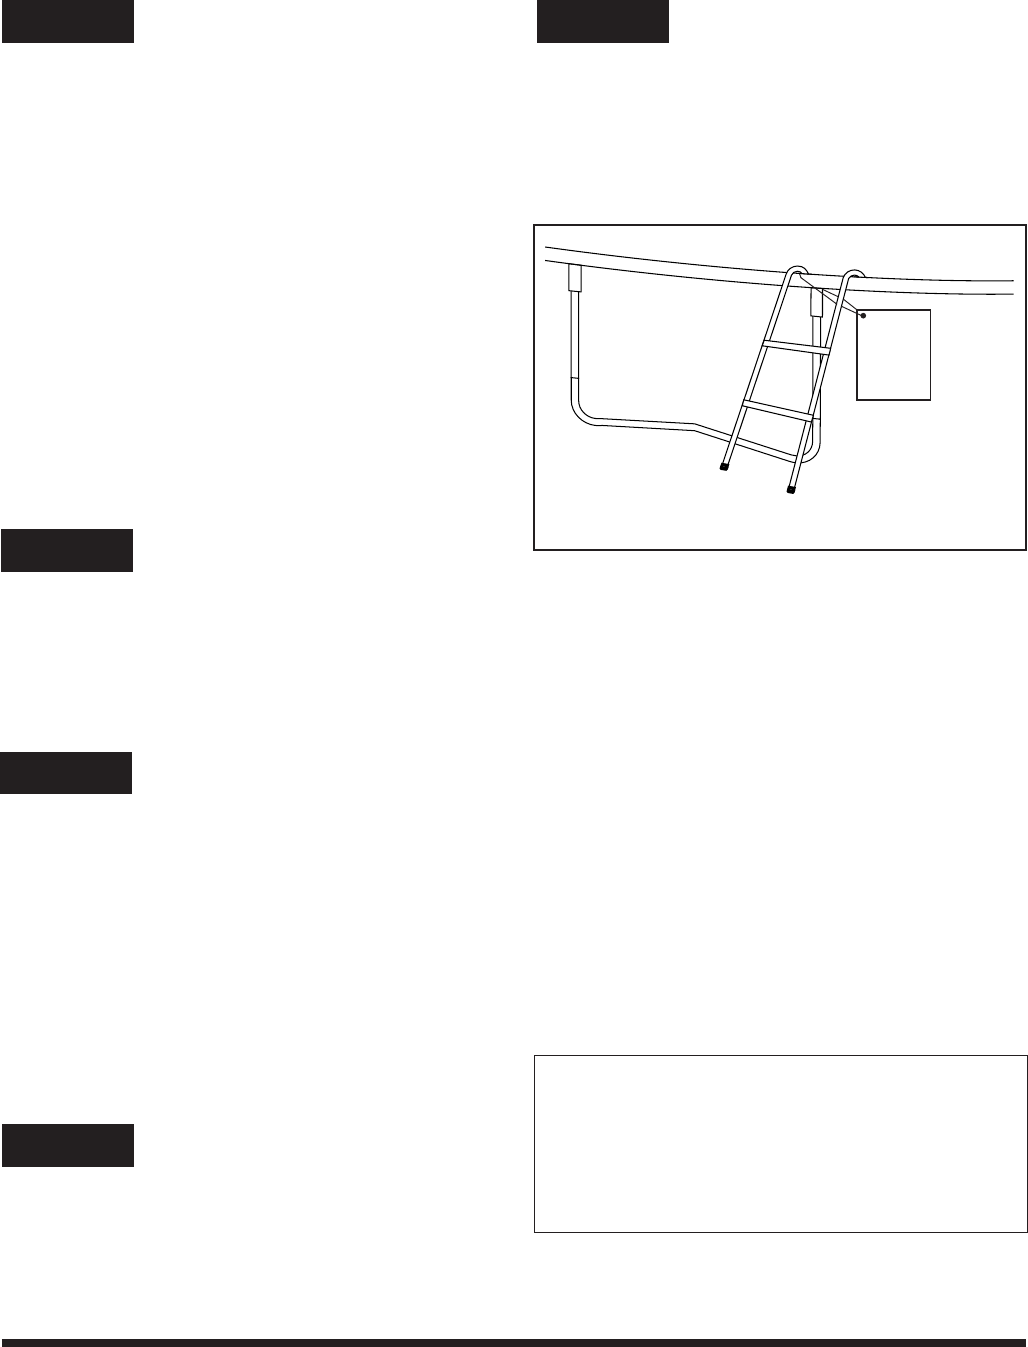
FIGURE 8
SAFETY
INSTRUCTION
PLACARD
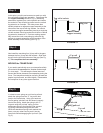
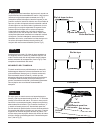
Access ladder (optional part) - Hook the ladder over a
top frame rail/vertical leg extension joint area. This should
be at the normal access point. When the trampoline is not
in use, remove the ladder and store in a secure location
(See Figure 8).
CAUTION: Use of this trampoline is not recommended
without the frame pad, which is designed to reduce the
likelihood of injury to the user from coming into contact
with the frame of the trampoline. If you do not have a
frame pad, contact your dealer to obtain a frame pad.
Properly install the frame pad before using the trampo-
line.
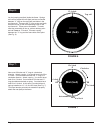
To install the rest of the springs, follow the above proce-
dures in the following steps:
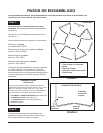
a.Attach springs every 10 holes/”V” rings (springs
now at 10, 30, 50, 70).
b.Attach springs every 5 holes/”V” rings (springs
now at 5, 25, 35, 45, 55, 65, 75).
c. Attach remaining springs.
As you go through the above procedure, make sure
you haven’t skipped a hole/”V” ring alignment. If this
happens, recount and remove/reattach springs as
required to re-establish the proper alignment.
Caution:
As you perform the spring attachment procedure, be
aware that frame member slip joints can become “pinch”
points. Be careful how you place your hands in these
areas.
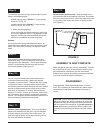
Now attach the safety instruction placard using the
enclosed tie wrap. Place it at the point where you will
normally mount the trampoline. The tie wrap should go
around a vertical frame joint and a top rail to keep it
from moving laterally (See Figure 8).
Lay the one-piece frame pad on the trampoline so it
covers the frame and springs. Make sure the pad
completely covers the frame. The pad has nine (9) sets
of attachment straps. Using the plastic strap buckles
and following the instructions enclosed with them, buckle
one set of straps around the top frame rail at an initial
spot which is designated 12 o’clock. Next buckle the
straps at 3 o’clock, 6 o’clock, and 9 o’clock. Now buckle
the 5 remaining sets of straps in a sequential clockwise
fashion. Do not tighten and final-secure the buckles until
the pad is equally positioned and tensioned.
Weather Cover (optional part) - This cover should be
placed over the bed and frame pad. Use the attached
tie-down straps to secure the cover to the frame. Tie
around the top rail and a vertical leg extension joint so
the cover will maintain its tension.