


12
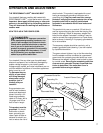
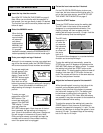
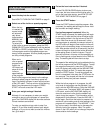
Insert the key into the console.
See HOW TO TURN ON THE POWER on page 9.
Select one of the incline or speed programs.
When the key
is inserted, the
manual mode
will automati-
cally be se-
lected and the
MANUAL indi-
cator will light.
To select one
of the incline or speed programs, press the PRO-
GRAM SELECT button repeatedly until the desired
INCLINE or SPEED indicator lights. Note: The first
incline program and the first speed program are
twenty-minute programs. All other preset programs
are thirty-minute programs.
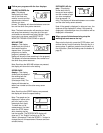
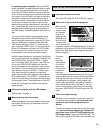
When an in-
cline or speed
program is se-
lected, the
LED matrix will
show all of the
incline or
speed settings
of the program.
Each incline program has twenty incline settings,
and each speed program has twenty speed set-
tings. One setting is shown in each vertical column
of the LED matrix. The first column will be flashing.
Note: Every few seconds, the words “PRESS
START” will scroll across the LED matrix.
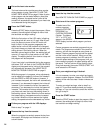
Enter your weight and age if desired.
Although it is not necessary to enter your weight
and age to use an incline program or a speed pro-
gram, the CALORIES display will be more accurate
if these numbers are entered.
To enter you weight and age, refer to step 3 on
page 10. If you have already entered your weight
and age, or if you do not want to enter this informa-
tion, go to step 4.
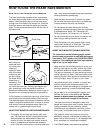
Put on the heart rate monitor if desired.
For the PULSE/CALORIES display to show your
heart rate, the heart rate monitor must be worn. To
put on the heart rate monitor, see HOW TO USE
THE HEART RATE MONITOR on page 6.
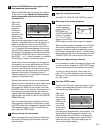
Press the START button.
Press the START button to start the program. After
a moment, the walking belt will begin to move. Hold
the handrails and begin walking.
If an incline program is selected: When the
START button is pressed, the walking belt will begin
to move at 1.0 mph and the incline will adjust to the
incline setting shown in the first column of the LED
matrix. After one minute (or 90 seconds if a thirty-
minute program is selected), the second column of
the LED matrix will begin to flash and the incline will
adjust to the incline setting shown in the second col-
umn. After another minute (or 90 seconds), the third
column will begin to flash and the incline will adjust
to the setting shown in the third column. The pro-
gram will continue in this way until the twentieth col-
umn is flashing and no time remains in the TIME dis-
play. The walking belt will then slow to a stop.
The speed of the walking belt can be adjusted during
the incline program with the SPEED buttons. To stop
the program momentarily, press the STOP button
once. All displays will pause and the INCLINE/TIME
display will begin to flash. To restart the program,
press the START button. To end the program be-
fore it is completed, hold down the STOP button for
two seconds. The console will then be in the same
state as if the key had just been inserted.
While the incline program is in progress, the diffi-
culty level of the program can be adjusted, if de-
sired, with the INCLINE buttons. Press the INCLINE
“+” button once. The letters “MAX” will appear in the
LED matrix, and the INCLINE/TIME display will
show the maximum incline that the treadmill will
reach during the program. This information will be
displayed for three seconds. Press the INCLINE “+”
button again. Each time the button is pressed, the
maximum incline setting and all other settings of the
program will increase slightly. The INCLINE “–” but-
ton can be used in the same way to decrease the
difficulty level of the program. Note: The profile
shown in the LED matrix will not change; the profile
shows relative incline settings.
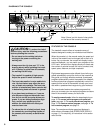
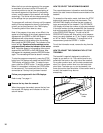
HOW TO USE THE INCLINE PROGRAMS AND THE
SPEED PROGRAMS
1
2
3
4
5