6
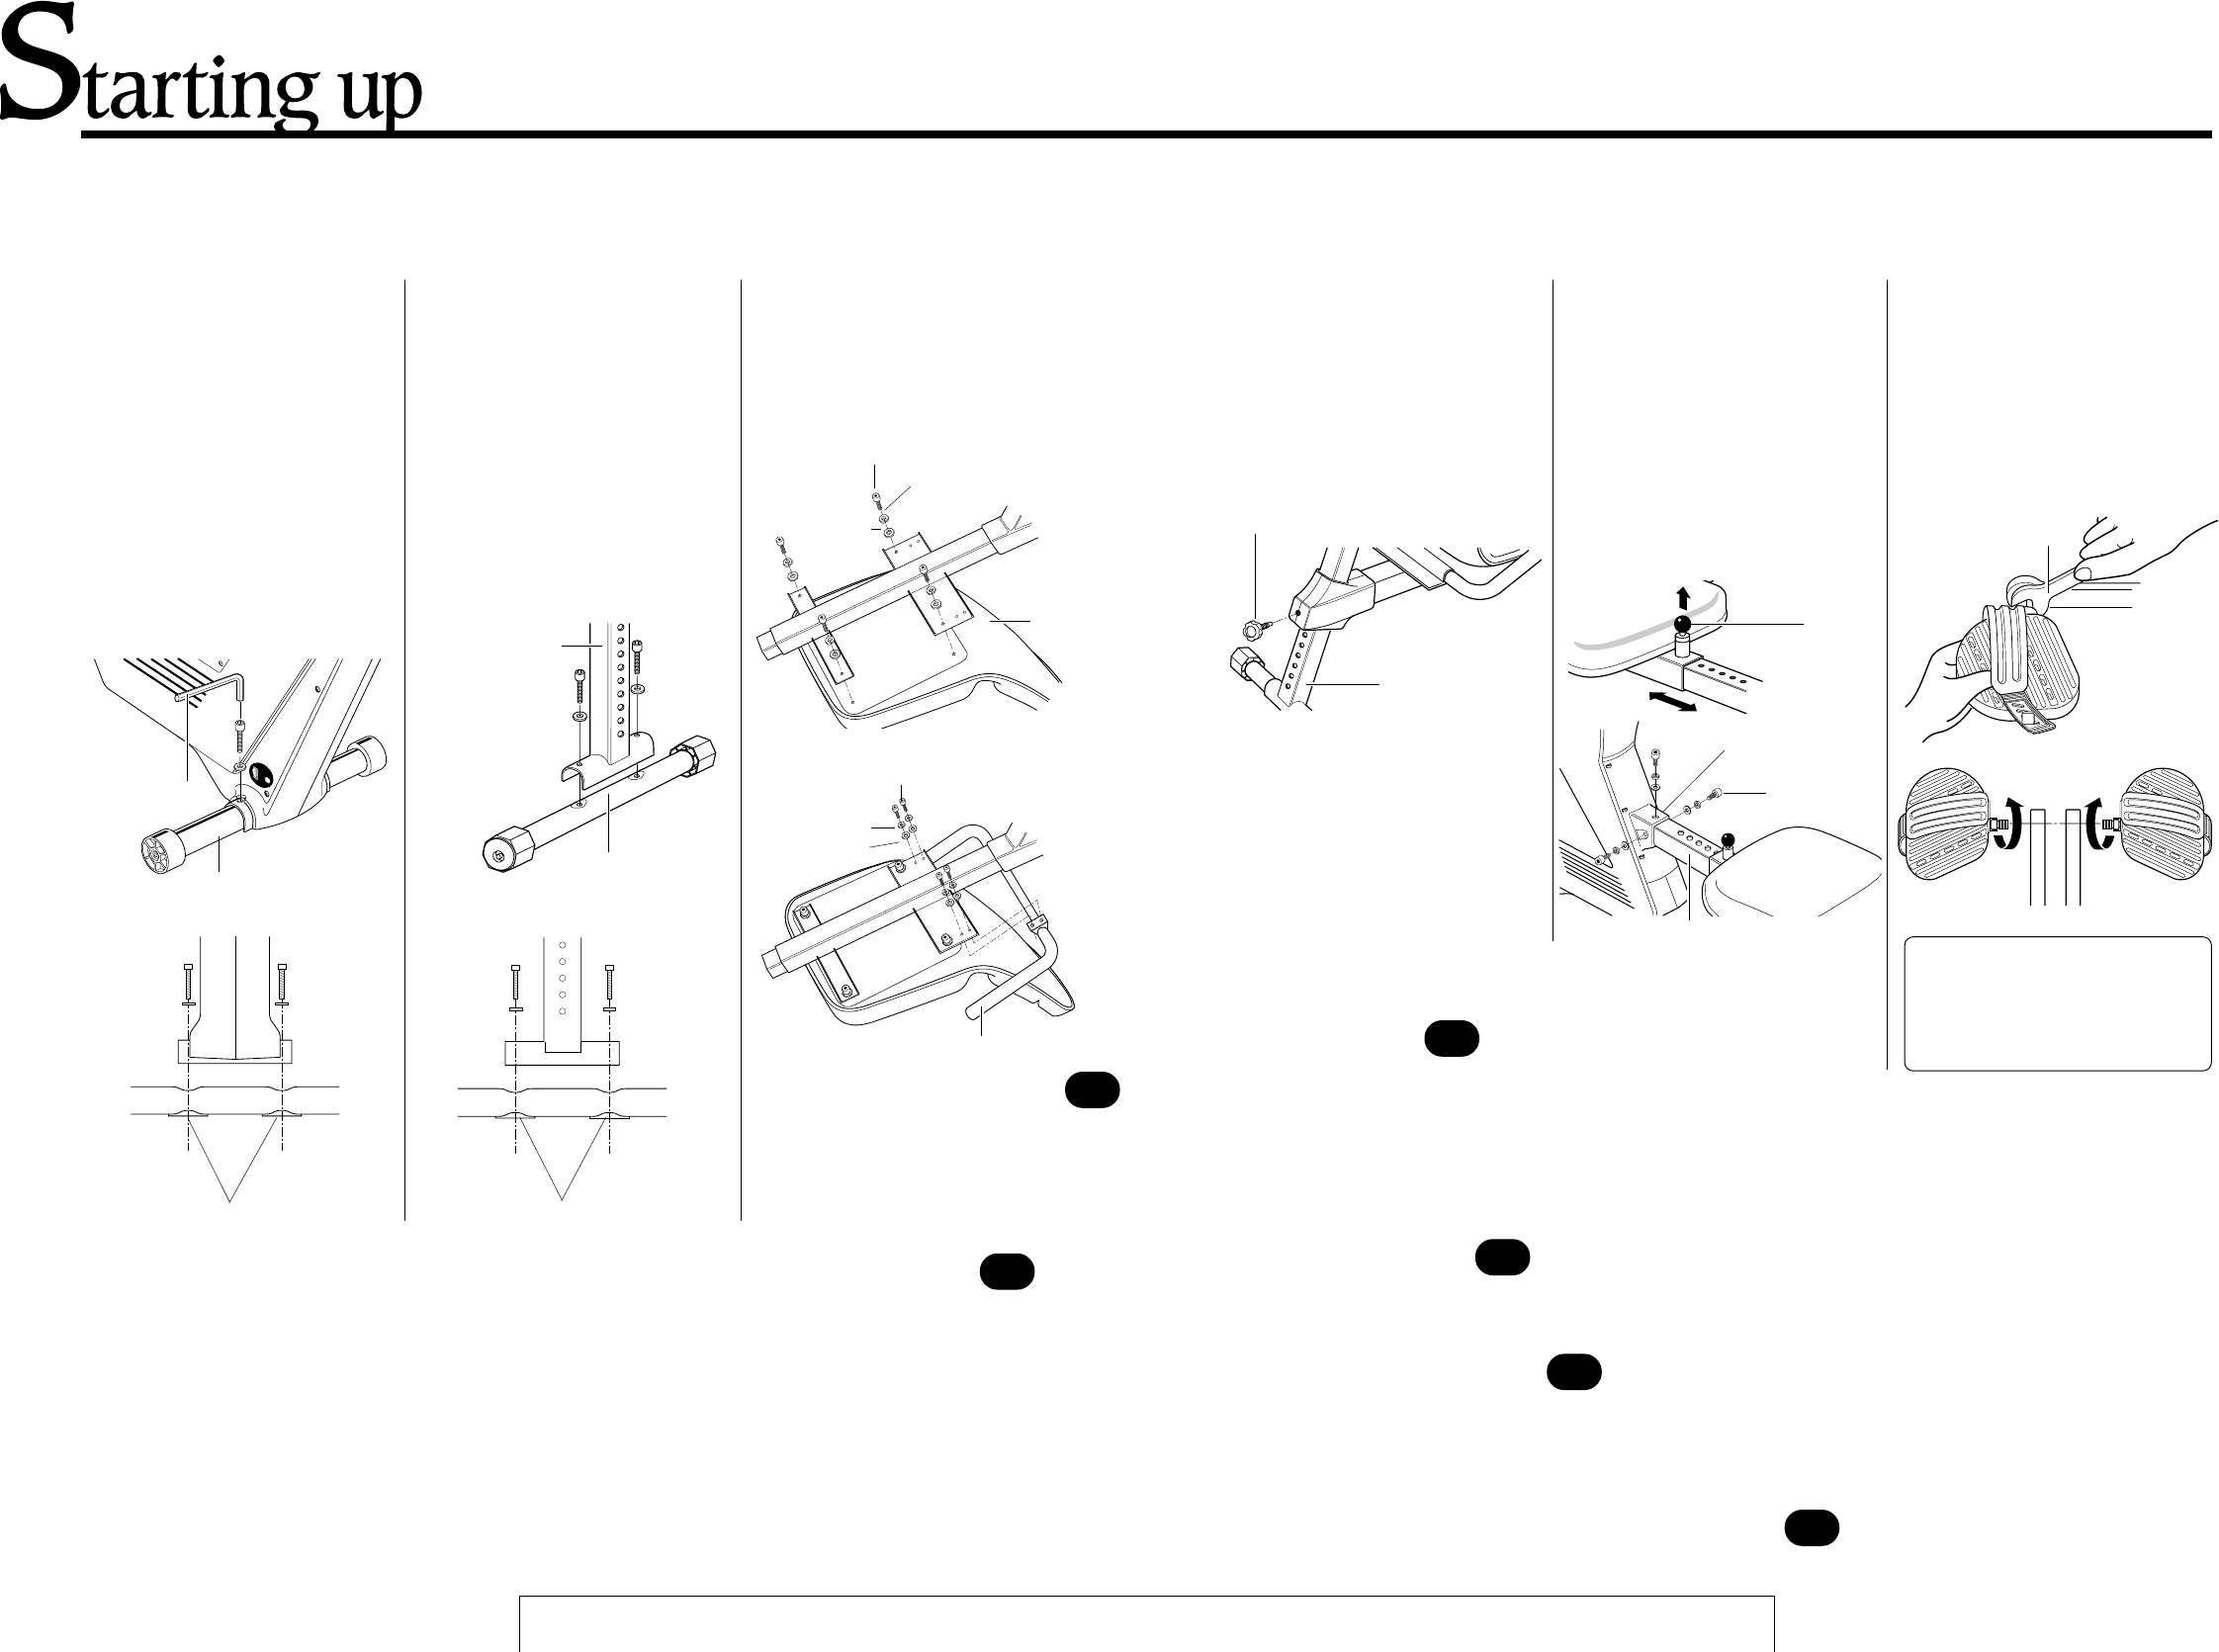
3 Mounting Seat and
Handlebar
• Mount the seat to the seat pipe us-
ing the large screws and the
handlebar using the small ones.
Let's assemble
hexagon wrench
front leg
(with casters)
nuts
1
3
7
8
6
4
2
5
rear support pipe
rear leg
(with level adjusters)
nuts
spring washer
flat washer
small screws
4
2
seat
large screws
spring washer
flat washer
handlebar
1 Mounting Front Leg
• Remove the leg plate from the
main unit. (This plate will not be
used for assembly.)
• Place the front leg (with casters)
under the main unit as shown in
figure and fasten screws securely
with the hexagon wrench making
sure nuts locate at the bottom of
the leg.
2 Mounting Rear Leg
• Place the rear leg (with level ad-
juster) under the rear support pipe
as shown in figure and fasten
screws securely with the hexagon
wrench making sure nuts locate at
the bottom of the leg.
7
3
5
6
1
rear support pipe
spanner wrench #15
Caution: If the pedals are not
attached firmly enough to the
crank, they can an irritating
noise. Be sure to attach them
firmly.
(L) FRONT (R)
lock pin
joint fitting
screws
inner pipe
seat height lock knob
4 Assembling Rear
Frame
• Loosen and remove the seat
height lock knob.
• Insert the rear support pipe into
the socket of seat pipe. Select any
height and tighten the knob.
5 Connecting Inner Pipe
• Lift up the seat lock pin and pull
out the inner pipe by a proper
length for easier connection.
Remove the 3 screws from the
end of the inner pipe.
• Insert the inner pipe into the joint
fitting of the main unit and fasten
it securely with the 3 screws.
6 Mounting Pedals
• Attach the pedals to cranks using
the spanner wrench #15.
• Be sure to install the pedal (R) on
the right crank and (L) on the left
crank to avoid cross threading.
PULL
SLIDE


