16
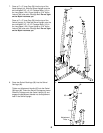
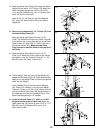
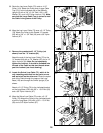
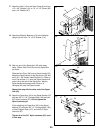
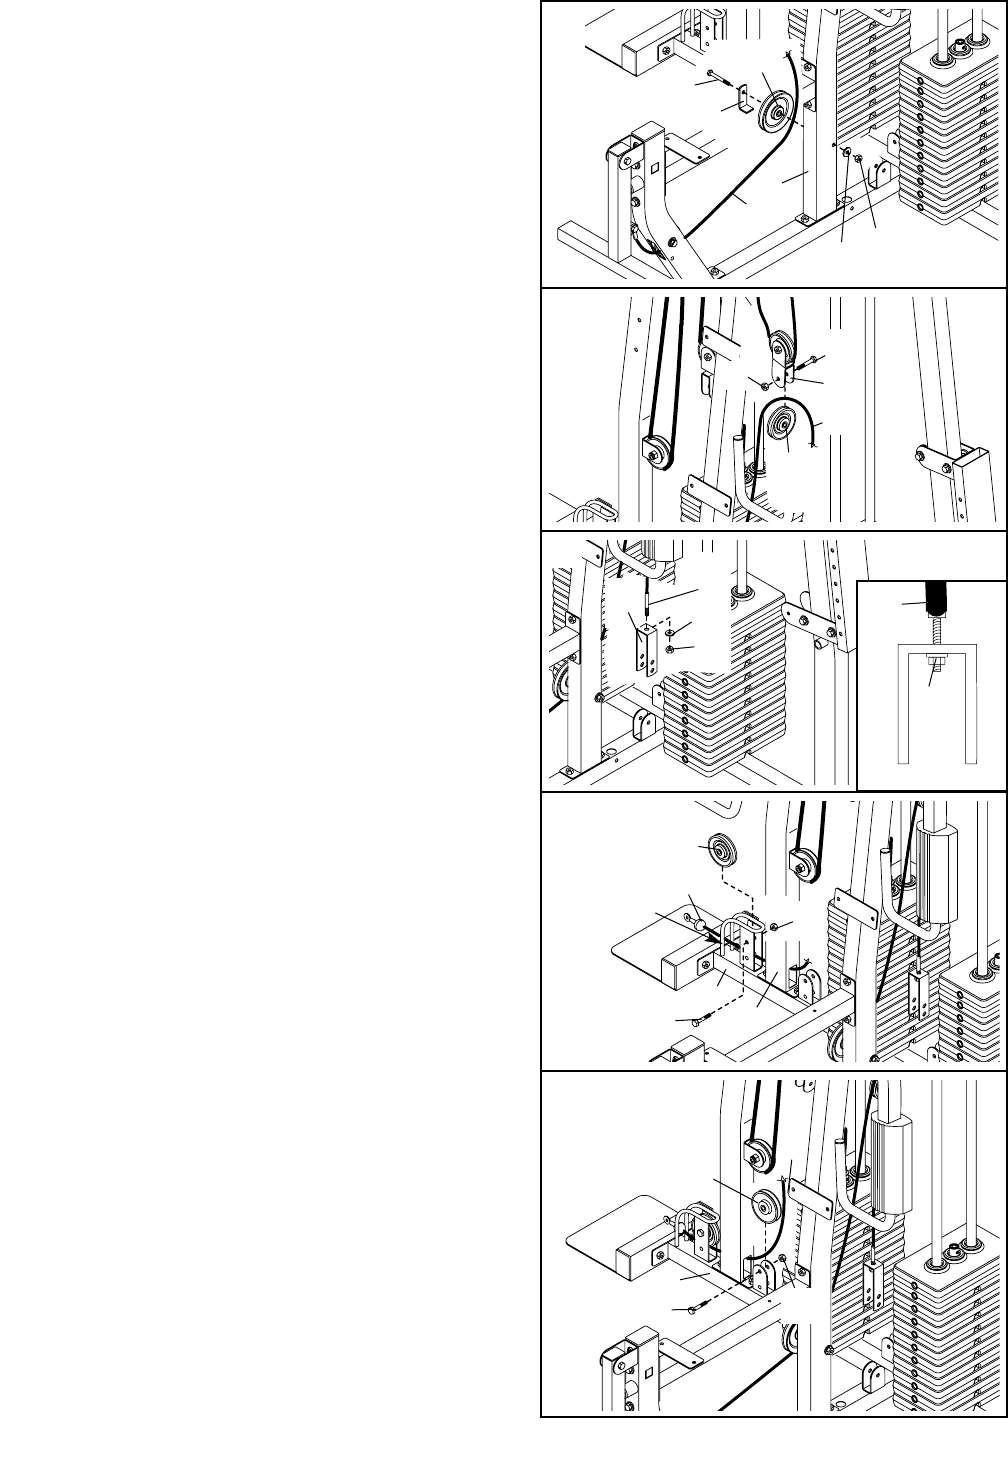
41. Remove the preattached 3 1/2” Pulley (not
shown) from the “U”-bracket (64).
Attach the end of the Leg Lever Cable (75) to the
“U”-bracket (64) with a 1/4” Washer (97) and a 1/4”
Nylon Locknut (34). Note: Do not completely
tighten the Locknut; it should be threaded onto
the end of the Cable so that two threads show
past the Locknut (see inset drawing).
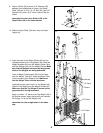
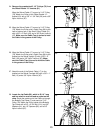
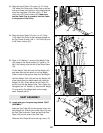
42. Locate the Swivel Low Cable (72), which is the
only remaining cable that has an eyelet on one
end and a ball on the other end. Route the eyelet
end of the Cable through the cage on the Long
Base (120) and through the Swivel Upright (5) as
shown.
Attach a 3 1/2” Pulley (78) to the indicated bracket
on the Long Base (120) with 3/8” x 1 3/4” Bolt (93)
and a 3/8” Nylon Locknut (87).
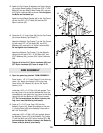
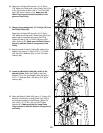
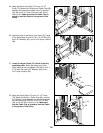
43. Wrap the Swivel Low Cable (72) under a 3 1/2”
Pulley (78). Attach the Pulley to the indicated brack-
et on the Long Base (120) with a 3/8” x 1 3/4” Bolt
(93) and a 3/8” Nylon Locknut (87).
39
40
41
42
122
64
75
78
97
72
87
62
93
34
43
75
91
113
3
119
121
120
78
Cage
93
87
5
72
120
93
78
87
75
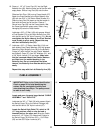
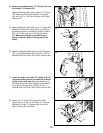
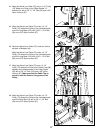
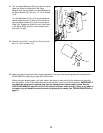
39. Route the Leg Lever Cable (75) under a 4 1/2”
Pulley (119). Attach the Pulley and a Large Cable
Trap (121) to the indicated side of the Butterfly
Upright (3) with a 3/8” x 3 3/4” Bolt (122), a 3/8”
Washer (91), and a 3/8” Nylon Jamnut (113). Make
sure that the Large Cable Trap is turned to hold
the Cable in the groove of the Pulley.
40. Wrap the Leg Lever Cable (75) over a 3 1/2” Pulley
(78). Attach the Pulley to the Double “U”-bracket
(62) with a 3/8” x 1 3/4” Bolt (93) and a 3/8” Nylon
Locknut (87).
75
34


