E4100 Final Assembly
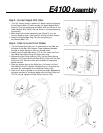
Step 7 • Pedals
1: Identify the left and right Pedals (91). Grease the Pedal threads,
thread each Pedal into the correct left and right crank arms and
tighten.
NOTE: It is very important to FULLY TIGHTEN each pedal using a
long wrench. Failure to do so will result in loosening and NOISE.
Step 8 • Install Batteries and Test Operation
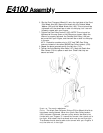
1:Remove the battery compartment lid on the back of the Console
(95) and install the Batteries. Two AA-cell batteries are required.
2:The Console provides accurate workload readouts because it
knows which position the magnet is in through a sensor located
at the base of the tension knob. To check the operation of this
sensor, immediately after battery installation the ‘ML’ icon will be
flashing and a number from 1 to 8 will show in the WORKLOAD
window. This number should indicate the position of the tension
knob.Turn the tension knob from 1 through 8 and check that the
number in the WORKLOAD window matches the number on the
tension knob. Once any key is pressed, the ‘ML’ icon will stop
flashing and WORKLOAD window will display only watts.
3:To change the display to Kilometers, consult the Owner’s Manual.
4:Test ride the bike and make sure that all console feedback
functions are operational.


