


E4100 Assembly
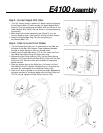
Step 5 • Connect Magnet Shift Cable
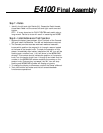
1: Turn the Tension Knob to position 8. Reach inside the opening
of the Console Mast (70) and connect the Upper Magnet Shift
Cable (179) to the rectangular red cable-slide on the end of the
Lower Magnet Shift Cable (143), as shown in the accompanying
illustrations.
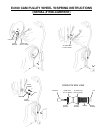
2:While holding the metal separating tab (Figure 5), turn the
Tension Knob to Level 1 and then pull the tab out and discard.
3:Press the Console Mast Plug (78) into the opening of
the Console Mast (70).
Step 6 • Install Arms and Front Wheels
1: Tip the Fitness Cycle back until it is balanced on the Seat and
the back of the Rear Foot Support. Place cardboard beneath
the seat to avoid tearing or marring the seat cover.
2: Identify the Left and Right Arms (115 & 116). Insert the Front
Foot Wheel Axle (60) through the frame axle hole.
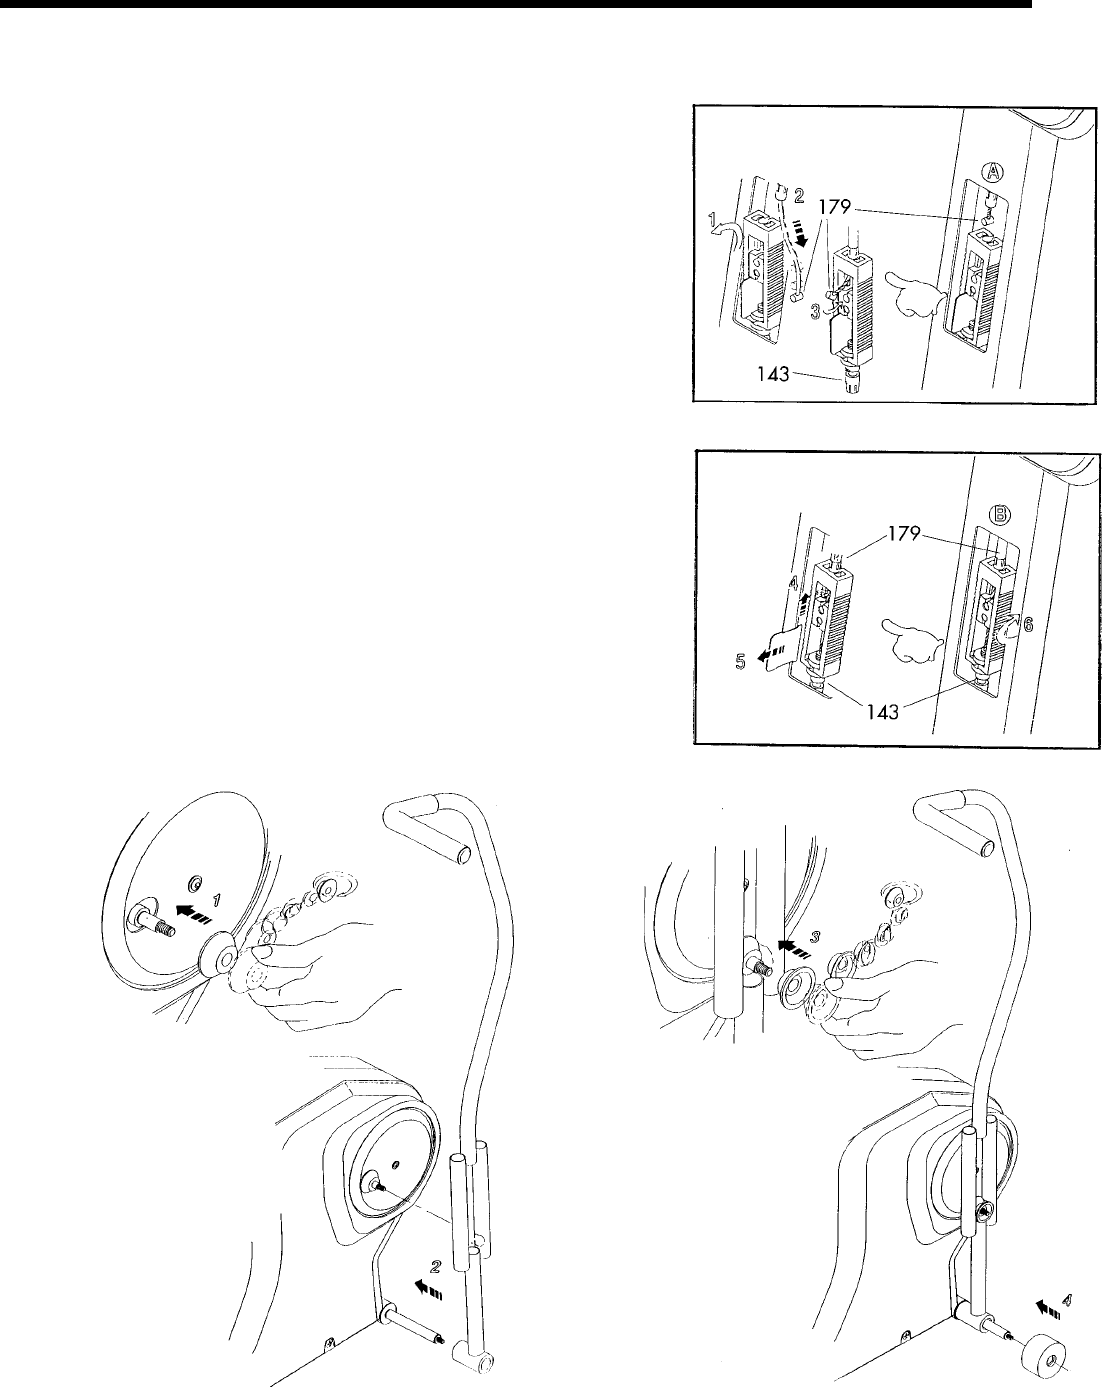
3: Remove the Cam Pulley Locknut (183), the two Pulley Spring
Washers (107), and the Outside Cam Pulley (106) from the Cam
Pulley Arm (75). Note the order and direction of these parts
before removal.
4: Place the bottom hole of the Right Arm (116) onto the Front
Foot Wheel Axle (60). Position the Right Arm (116) so that the
chromed slot rests against the inside Cam Pulley (105).
5: Place a thin layer of grease on the pulley surfaces. Reassemble
the parts removed in the above steps onto the Cam Pulley Arm
(75). Do not yet tighten the Cam Pulley Locknut (183).