


OW NER 'S MAN UAL • F2O O
2
G B
3
OW NER 'S MAN UAL • F2O O
O W N E R ' S M A N U A L F 2 O O
I N F O R M AT I O N
A N D WA R N I N G S
Please read this owner’s manual through
carefully before assembling, using and
servicing the workout cycle! Follow the
instructions described in this manual
carefully.
The equipment has been designed for home
use. Please notice that the warranty does
not cover any damages due to negligence
of assembly, adjustment or maintance
instructions described in this manual!
NOTE ABOUT YOUR HEALTH
•
Before you start any training, consult a
physician to check your state of health.
•
If you experience nausea, dizziness or other
abnormal symptoms while exercising, stop your
workout at once and consult a physician.
•
To avoid muscular pain and strain, begin each
workout by warming up and end it by cooling
down (slow pedalling at low resistance). Don’t
forget to stretch at the end of the workout.
NOTE ABOUT THE EXERCISING
ENVIRONMENT
•
The device is not to be used outdoors.
•
Place the cycle on a rm, level surface.
•
Make sure that the exercising environment has
adequate ventilation. To avoid catching cold, do
not exercise in a draughty place.
NOTE ABOUT USING THE EQUIPMENT
•
Place the machine on a protective base.
•
If children are allowed to use the cycle, they
should be supervised and taught to use the cycle
properly, keeping in mind the child’s physical and
mental development and their personality.
•
Before you start using the cycle, make sure that
it functions correctly in every way. Do not use a
faulty device.
•
Only one person may use the cycle at a time.
•
Hold the handlebar for support when getting
on or off the cycle.
•
Wear appropriate clothing and shoes when
exercising.
•
Press the key with the tip of your nger; your
nails may damage the key membrane.
•
Protect the meter from sunlight and always dry
the surface of the meter if there are any drops of
sweat on it.
•
Do not attempt any servicing or adjustment
other than those described in this manual.
•
The device must not be used by persons
weighing over 100 kg.
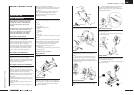
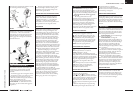
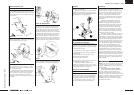
A S S E M B LY
Check that the following parts are in the package
(g. 1):
A Frame
B Rear support
C Handlebar support tube
D Meter
E Pedals (2)
F Handlebar
G Seat
H Seat tube
I Assembly kit (contents marked with in the spare
part list)
If necessary, contact the dealer and give the model,
serial number and the needed spare part number
from the spare part list in the back of the manual.
The package includes a silicate bag for
absorbing moisture during storage and
transportation.
Left, right, front and back are as seen from the
exercising position.
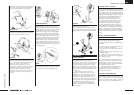
Assemble the cycle as follows:
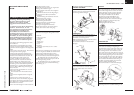
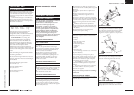
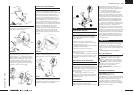
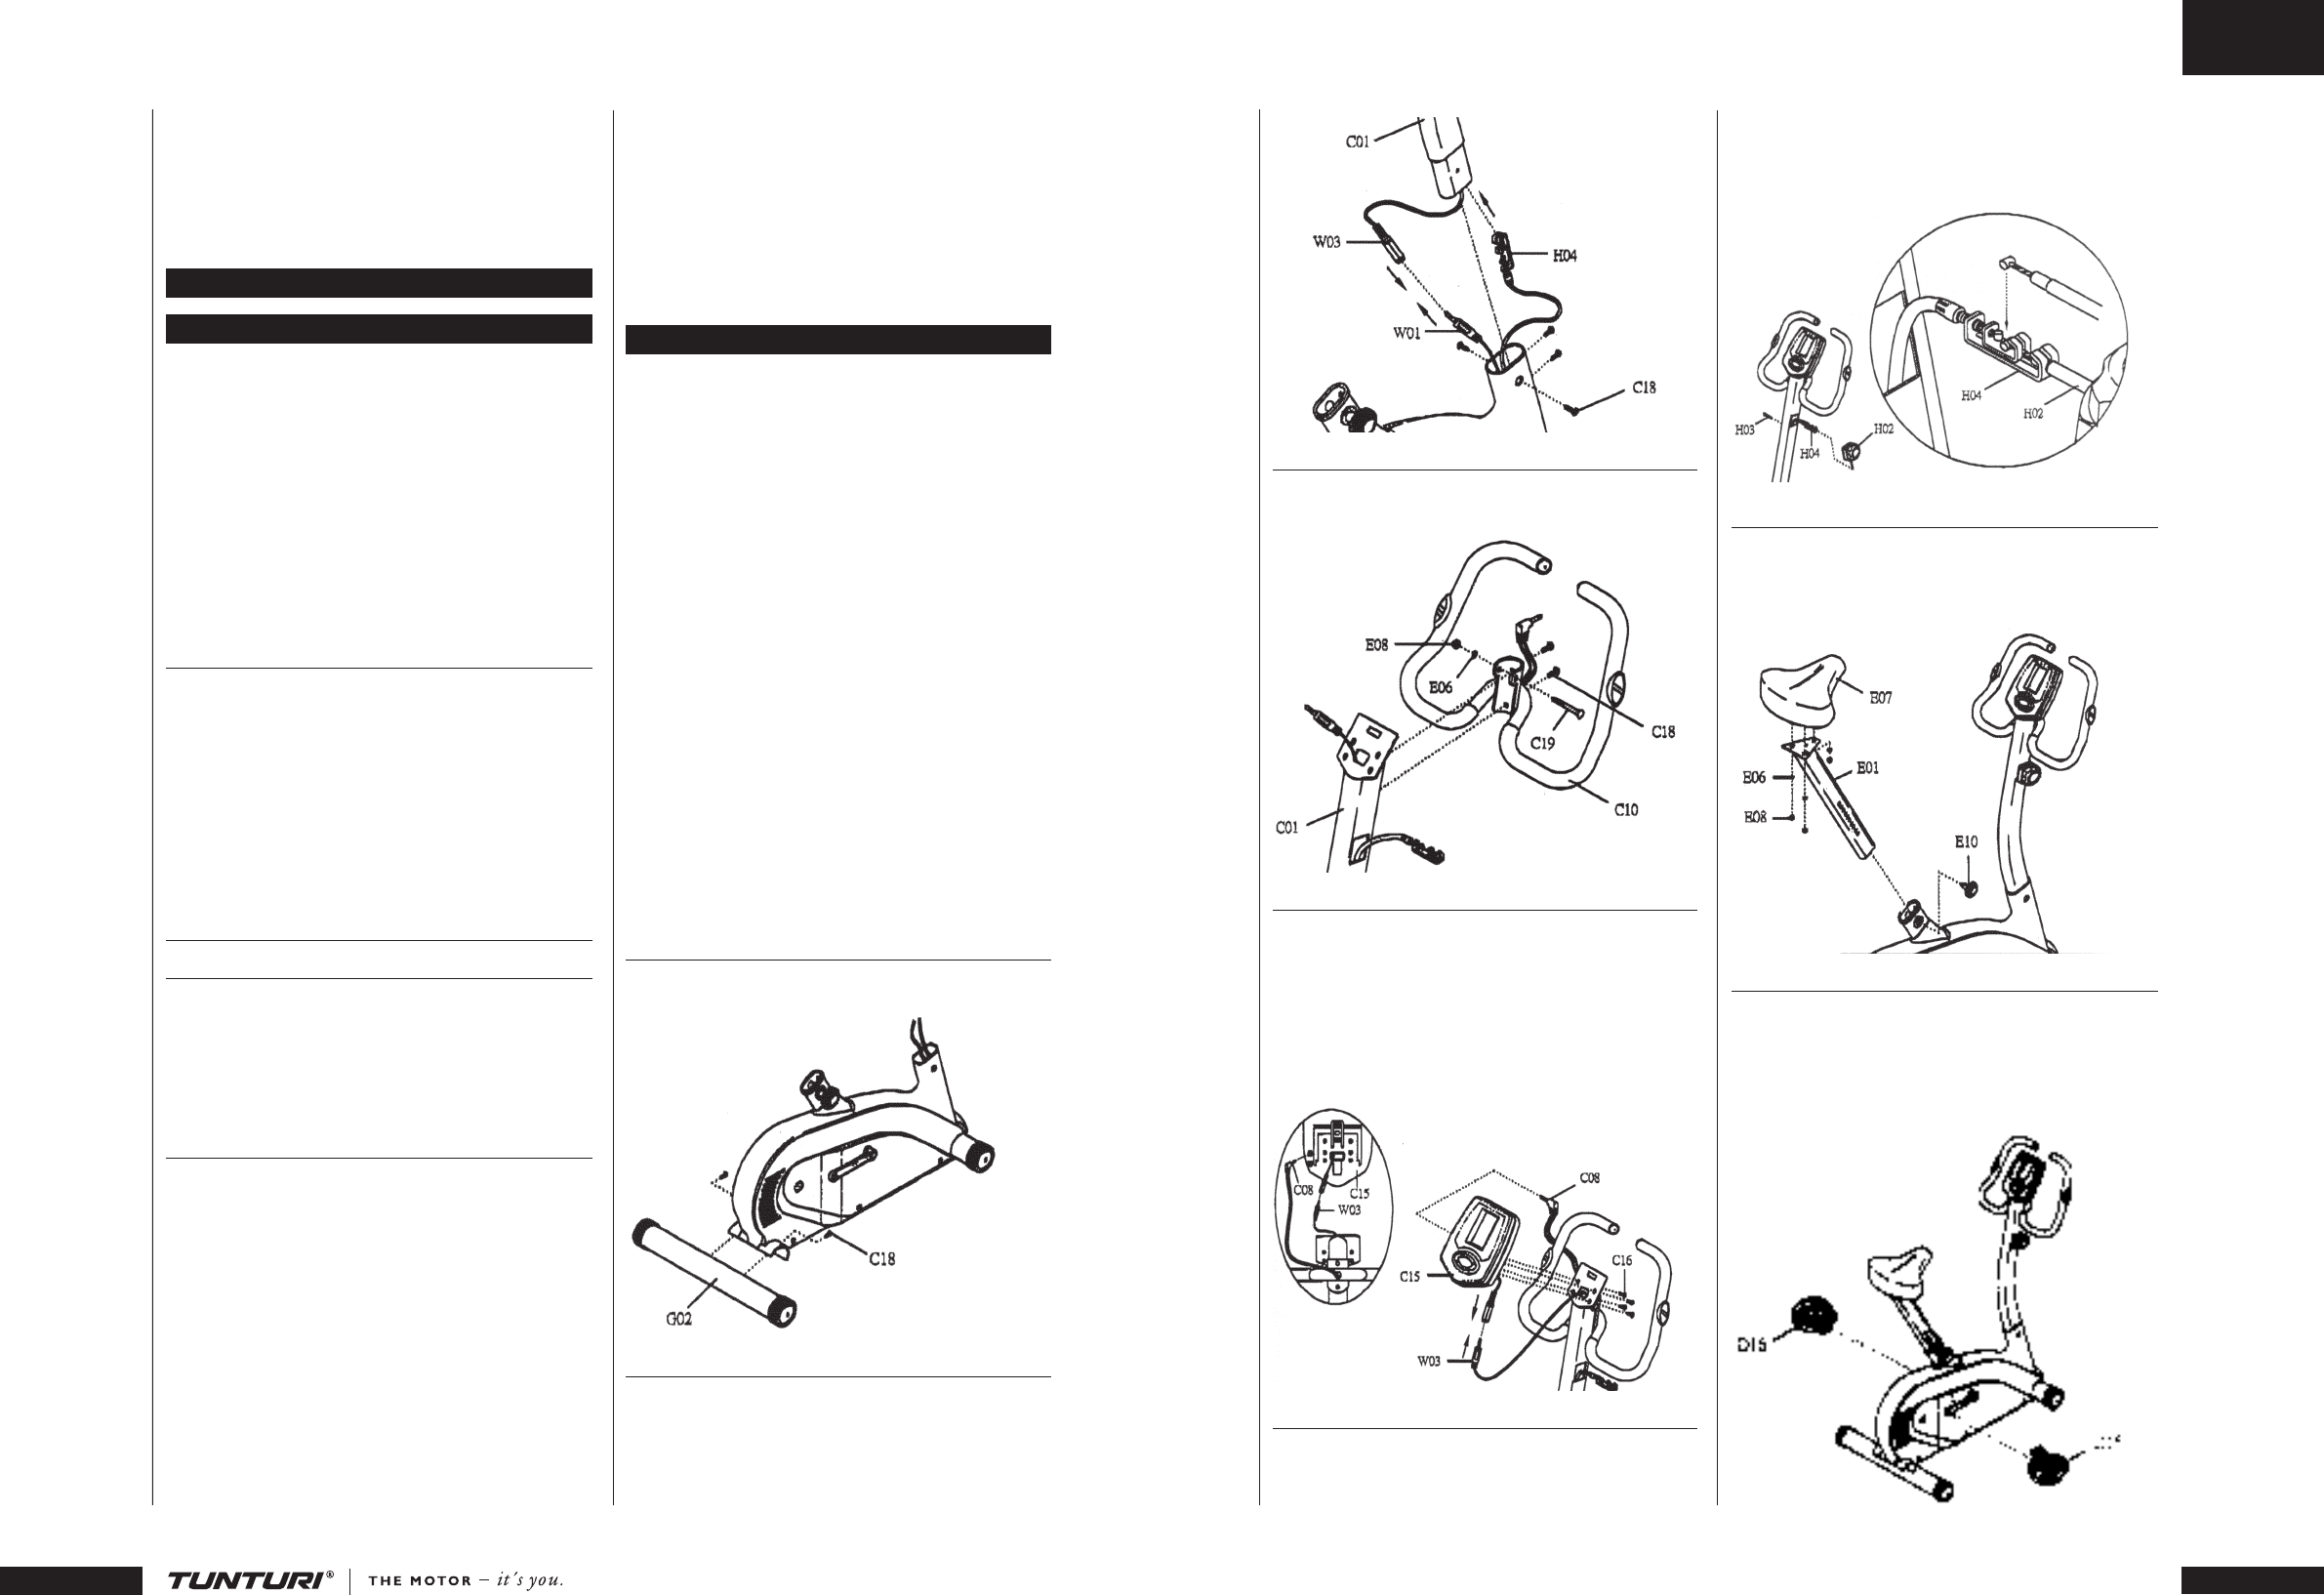
REAR SUPPORT
Mount the rear support to the main frame with
two bolts.
UPRIGHT POST
Connect the upper and lower meter wires together
and push the tension cable into the upright post
prior to tting the upright post to the main frame.
Secure the upright post to the main frame
with four socket bolts.
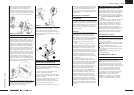
HANDLEBAR
To secure the handlebar to the upright post, use
two bolts and a bolt a washer and a nut.
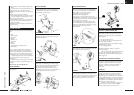
METER
Pop open the battery cover at the back of the meter
to assemble battery. Connect the meter wire to
meter.
Loosen the screws at the back of the meter
enough to t them into the slot on the steel plate
at the top of the upright post. Slide the screws to
the bottom end of the slot before tightening screws
to secure the meter.
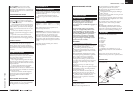
RESISTANCE KNOB
Make sure the display window shows 8 on the
knob. Pull out the connector box from upright
post.
Thread A diagonally into the connector box
and t A into B from behind. Then pull C up
before pushing wedge D into gap E. Make sure D
is tightly inserted into E.
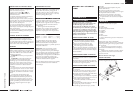
SEAT AND SEAT POST
Secure the seat to the seat post with three washers
and three nylon nuts.
Slide the seat post into the frame and secure
the the locking knob.
FOOT PEDALS
Fasten the right pedal to the right pedal crank
turning clockwise and left pedal to the left pedal
crank turning anti-clockwise.
The pedals and pedal straps are marked R for
right and L for left.