


9
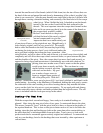
inserted the smaller end of the threads (which I filed down) into the rim of brass that was
the head of the nut and peened the end down by hammering it flat so that it wouldn’t slip
when it was screwed in. After the new threads were stuck tight in the rim, I drilled a hole
through them, creating a threaded bushing, and eventually sized that hole to fit the escape
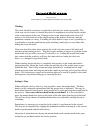
wheel pivot. When I drilled the hole, I chucked up on the threads
instead of the rim so that I could drill the hole centered in the
threads. This was important since the escape wheel turned in that
hole and it was necessary that it be in the center of the threads so
the escape wheel wouldn’t wobble.
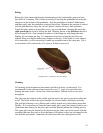
Before I sized the hole to the pivot, I
polished the head of the mostly original
nut and countersunk it to give the
impression that it was made entirely out
of one piece of brass, as the original nut was. Magnificently, it
looks entirely original, and I’m very proud of it! We actually
had to solder the threads to the hole, because they kept falling
out during the sizing process, but it’s not visible and makes the
nut a good deal stronger but softens the brass somewhat. After
sizing the hole, we had to shave off the end of the nut so it would screw down tightly and
completely and still allow the escape wheel some end shake, or space between the plate
and the shoulder of the pivot. Now, the escape wheel can move freely and securely, as
opposed to being sloppy and inaccurate as it undoubtedly was with such a bad nut. In
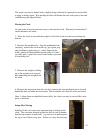
passing, there was another screw I had to create so that the plates
would screw down correctly and fully. This was done in a very
similar fashion, except it was done
with steel and not brass. My goal
was to make a longer screw to
bypass a stripped upper portion of
one of the pillar posts. With skill
and care, I fashioned a screw out of a piece of O-1 tool steel, polished it, and blued it with
gentle heating. According to the Machinery’s Handbook, heating the steel gently, creates
an oxidization of the steel resulting in a colored coating that not only matches the other
screws on the clock, but also acts as a rust preventative. To my equal pride and dismay,
it looks noticeably newer, shinier, and better polished than the original screws. The old
screw is included with the clock upon set-up in the school.
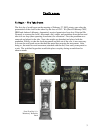
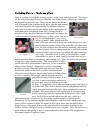
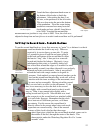
Bushing – For Real Now
With the escape wheel secured and happy, I was ready to do standard bushings as
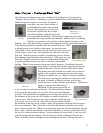
planned. After sizing the new pivot holes of two gears, I countersunk them to the plate.
This means I created a “bowl” with the pivot hole at its base, as shown in the picture of
the repaired hand nut. This is done so that pivots better receive oil, but it also hides the
bushing since the plate and bushing are both on the same plane after countersinking, to
the effect that they’re indistinguishable from each other. It only serves to look more
professional when a movement appears entirely original and unaltered. I countersunk not
only my own bushings, but also the bushings that were inserted by other repairmen at
various times.
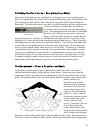
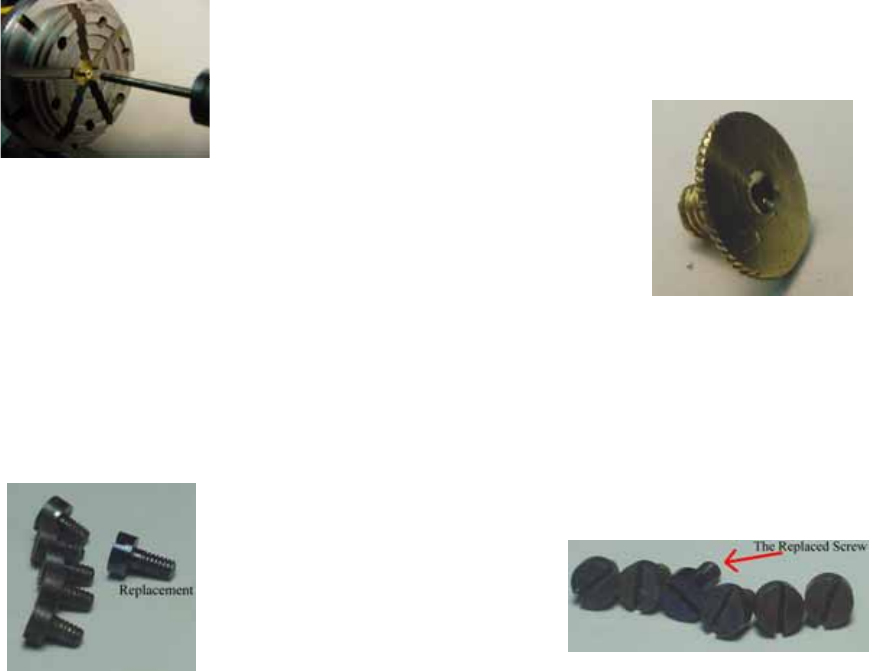
Shaving off the end for
End-Shake
Repaired Hand Nut