


SkyCaddie
®
: #1 Rangefinder in Golf
12
CHAPTER 3
Customizing Your SkyCaddie For Play
Your SkyCaddie can be customized to fit your style of play and to display information in the format you prefer.
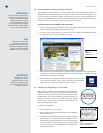
3.1 Preferences
To customize the information to be displayed during play, press the Menu button, scroll to “Preferences” and
press the Left Soft Key under “Select”. Within Preferences, a list of settings is displayed as follows:
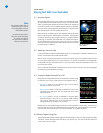
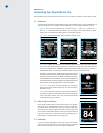
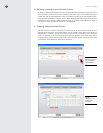
• Distance: You can set your preferred unit of distance as (“Y
ds ” = Yards, “M” = Meters, “mi” =
Miles, “K” = kilometers) by selecting “Distance”, then choosing the unit of measurement you prefer.
A checkmark will be placed next to the item you have chosen (Fig. 24).
• TargetViews: Set the desired target views as detailed in Section 2.4.2.
Fig. 24: Distance preference
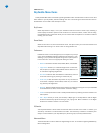
Fig. 25: Auto-Hole option
• AutoHole: If enabled, your SkyCaddie will automatically detect that you are moving toward the next
hole and will automatically advance to that hole. To enable, scroll to “Auto Hole” and select. Press the
Scroll Pad to move either UP or DOWN to highlight ON or OFF and select (Fig. 25). Upon returning to
the Preferences screen, confirm that your selection appears in the box next to “Auto Hole”.
As noted in a previous section, target lists will automatically scroll off
the bottom of the display as you move forward along the fairway without
the need of using the Scroll Pad. In addition, the target list will switch
to the IntelliGreen view automatically as you approach the green. By
combining the ability to auto scroll targets and automatically advancing
to the next hole, your SkyCaddie gives you hands-free operation.
• CenterOnly: If you prefer that the SkyCaddie only display the
distance to the center, enable “Center Only” (For more information
see Section 2.4.3).
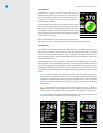
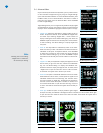
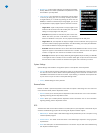
• Theme:Further personalize the look of the SkyCaddie software by
choosing one of several user-selectable themes. Within Preferences,
scroll to and select “Theme”. Then scroll to and select the desired
color theme option (Fig. 26 above).
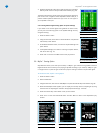
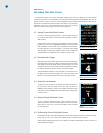
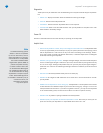
3.2 Determining Shot Distance
Simply press the Mark button at the location where you are going to
take your shot. The “Mark New Ball Location?” screen will display (Fig.
27). Select “Mark” (Left Soft Key) to record your current location and
then take your shot. When you get to the location where your ball came
to rest, press the Mark button again to record and display the distance
(Fig. 28). You may return to your previous screen by selecting “Exit” or
choose “Mark” to mark the distance for another shot.
3.3 Information
To view information regarding the current hole, simply press the Info
button. Pressing the Info button a second time will display on-screen
instructions and information to help you navigate the SkyCaddie.
Fig. 26: Theme selection
Fig. 27: Mark Ball
Fig. 28: Shot Distance