


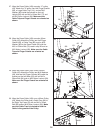
10
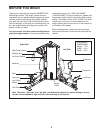
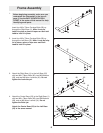
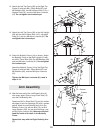
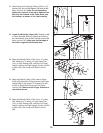
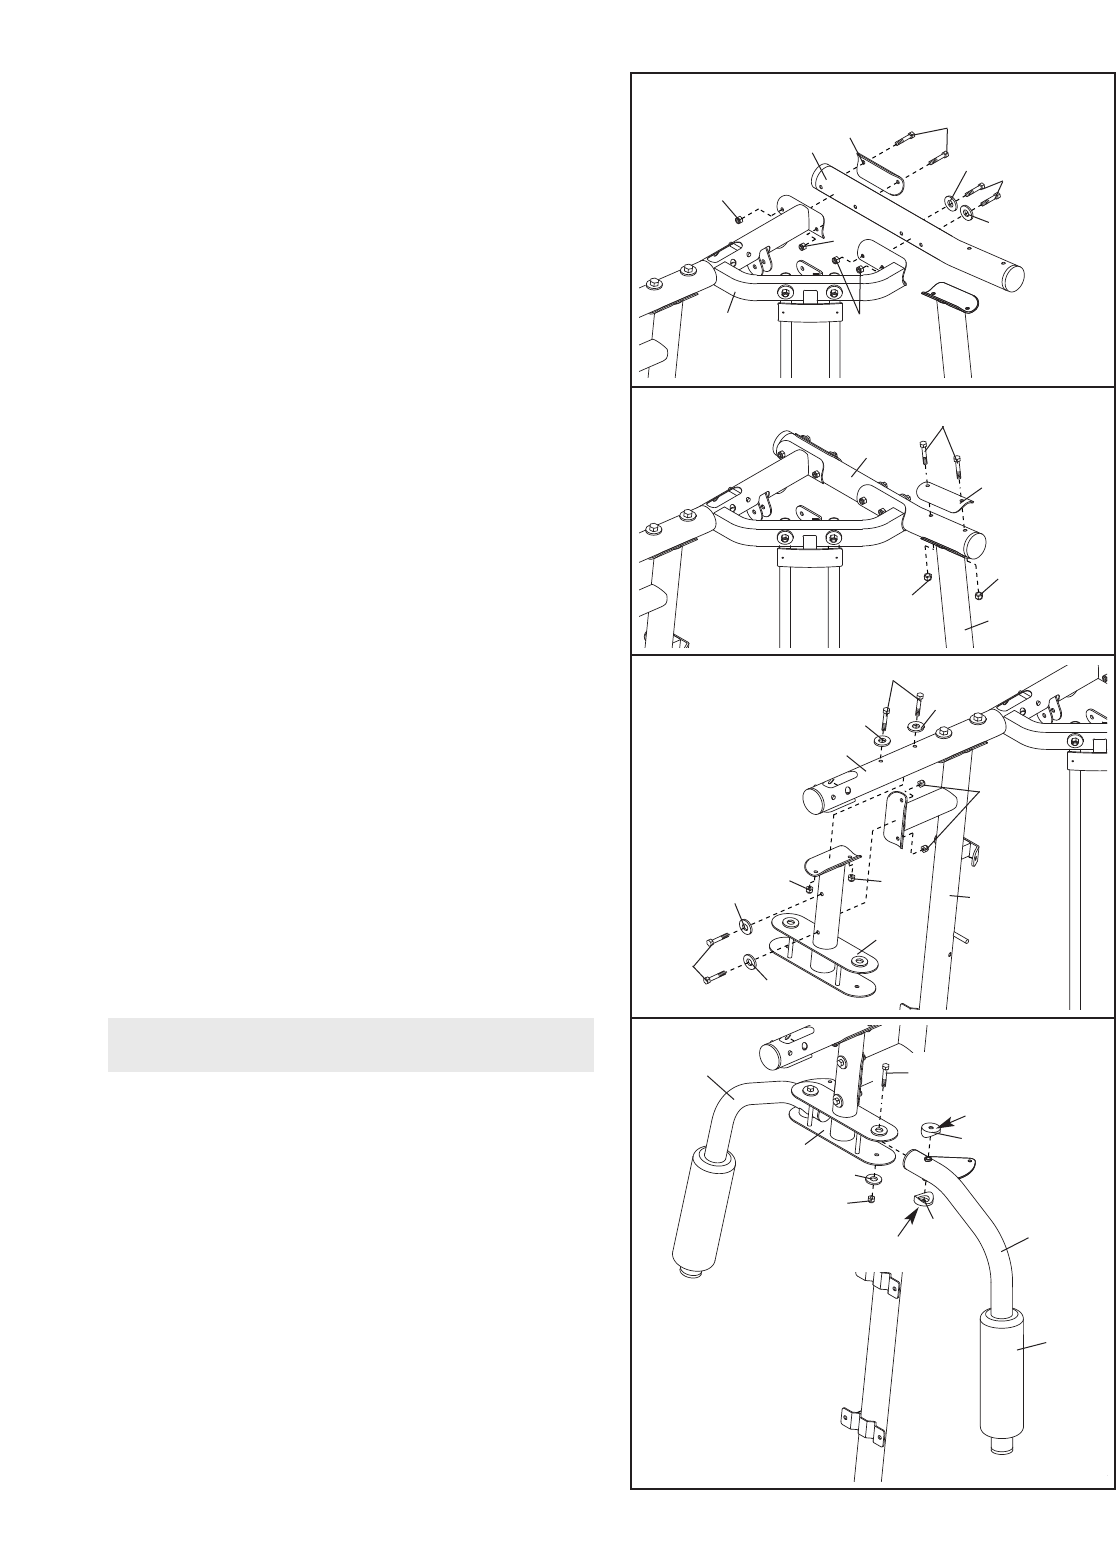
12. Attach the Left Top Frame (36) to the Right Top
Frame (5) with two M8 x 78mm Bolts (82), two
M8 W
ashers (98), two M8 x 83mm Bolts (112), a
Support Plate (31), and four M8 Nylon Locknuts
(91).
Do not tighten the Locknuts yet.
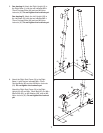
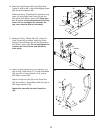
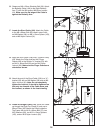
14. Orient the Butterfly Frame (14) as shown. Attach
the Butterfly Frame to the Right Upright (2) with
two M8 x 72mm Bolts (85), two M8 Washers (98),
and two M8 Nylon Locknuts (91). Do not tighten
the Locknuts yet.
Attach the Butterfly Frame (14) to the Right Top
Frame (5) with two M8 x 78mm Bolts (82), two
M8 Washers (98), and two M8 Nylon Locknuts
(91).
Tighten the M8 Nylon Locknuts (91) used in
steps 3–14.
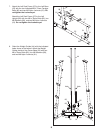
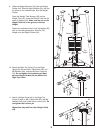
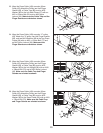
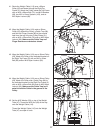
15. Wet the lower end of the Left Butterfly Arm (6)
with soapy water. Slide a Large Foam Pad (15)
onto the Left Butterfly Arm.
Grease an M10 x 90mm Bolt (74) and the indicat-
ed edges of two Arm Bushings (23) with a grease
packet. Attach the Left Butterfly Arm (6) to the
Butterfly Frame (14) with the Bolt (74), an M10
Large Washer (100), the two Arm Bushings, and
an M10 Nylon Locknut (90). Make sure the bolt
head fits inside of the hole in the Butterfly
Frame.
Repeat this step with the Right Butterfly Arm
(7).
13. Attach the Left Top Frame (36) to the Left Upright
(26) with two M8 x 83mm Bolts (112), a Support
Plate (31), and two M8 Nylon Locknuts (91).
Do
not tighten the Locknuts yet.
12
13
14
15
82
98
98
31
112
36
91
5 91
91
91
26
36
91
112
31
82
98
98
91
91
91
98
98
85
14
14
90
23
23
15
7
6
74—Grease
Grease
Grease
100
2
5
Arm Assembly