


10
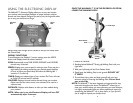
NOTE: Hold onto the Hand Grips at all times to ensure
proper balance.
WARNING: Stop exercising immediately and consult your
physician before continuing if you experience any of the
following symptoms: pain or tightness in your chest, an
irregular heartbeat, lightheadedness, nausea, dizziness or
lower back pain.
WARM UP
Allow yourself time to get up to speed. A 3 to 5-minute slow-paced
walk is recommended prior to stepping up the pace and elevation.
COOL DOWN
After your routine, allow yourself 3-5 minutes at a slow pace without
elevation to lower your heart rate and ensure your muscles a proper
cool down.
8. When finished, slow the Walking Belt to 2 miles per hour. Once unit
has slowed to 2 miles per hour,continue gripping the Hand Grips,
step back on to the Foot Rests and turn the SPEED Dial to OFF.
You can also stop your workout at any time by simply pressing the
STOP Button or by pulling the Magnetic Safety Button.
ENDING YOUR WALK
9. Once unit has stopped moving, step off and unplug unit.
AFTER YOUR WALKOUT
When your workout is done and you've stepped off the Walkmill,™
take a minute or 2 to gently stretch your legs and lower back.Your
muscles will be warmed up and loose and at their most receptive
towards a healthy stretch.This will also go a long way towards avoiding
any soreness or stiffness.
OPERATING INSTRUCTIONS (Continued)
9
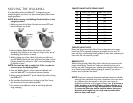
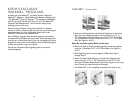
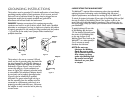
SAFETY CLIP
The Walkmill™ is equipped with a Magnetic Safety Button and Clip.
For safety purposes always attach the Clip to yourself prior to using the
Walkmill.™ The unit will not operate if the Magnetic Safety Button is
not in place, and will shut down if the Magnetic Safety Button is
removed during use. It is recommended that you store the Safety Clip
out of reach of children so the Walkmill™ cannot be operated without
supervision.
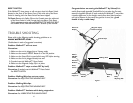
ELEVATION
The Dial on the left controls the Walkmill's™ elevation.Turn the Dial
forward (away from you) to increase the elevation, and towards you to
lower the elevation.The Elevation Motor is located at the rear of the
Walkmill™; therefore the back of the Walking Deck will raise and
lower instead of the front.
NOTE: The Walkmill™ is shipped in the elevated position.
NOTE: CONSECUTIVE OVERUSE OF THE ELEVATION
FEATURE MAY CAUSE THE UNIT TO OVERHEAT.
Therefore, after approximately 5 minutes of constant raising and
lowering of the Walking Deck, a thermal overload circuit will
activate and shut down the Walkmill™ and reset it to the normal
position.The Walkmill™can be reactivated as soon as it has
cooled down.
OPERATING INSTRUCTIONS
1. Make sure unit is in the OFF position.
2. Plug unit into an AC electrical outlet.
3. Turn ON the Power Switch on the front of the unit.
4. Step onto unit and place feet on the Foot Rests.
IMPORTANT: Do not activate the unit while you are standing on the
Walking Belt.
5. Attach yourself to the Safety Clip
6. To activate unit, slowly turn the SPEED Dial forward (away from
you). After a slight delay, the Walking Belt will start to move.
NOTE: For safety purposes the Power/Speed Dial must
always be reset to the OFF position prior to starting the
unit; otherwise the Walkmill™ will not start.
7. Step on to the Walking Belt and begin walking at a slow,
comfortable speed.