


5. 5
64
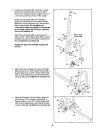
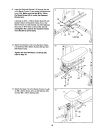
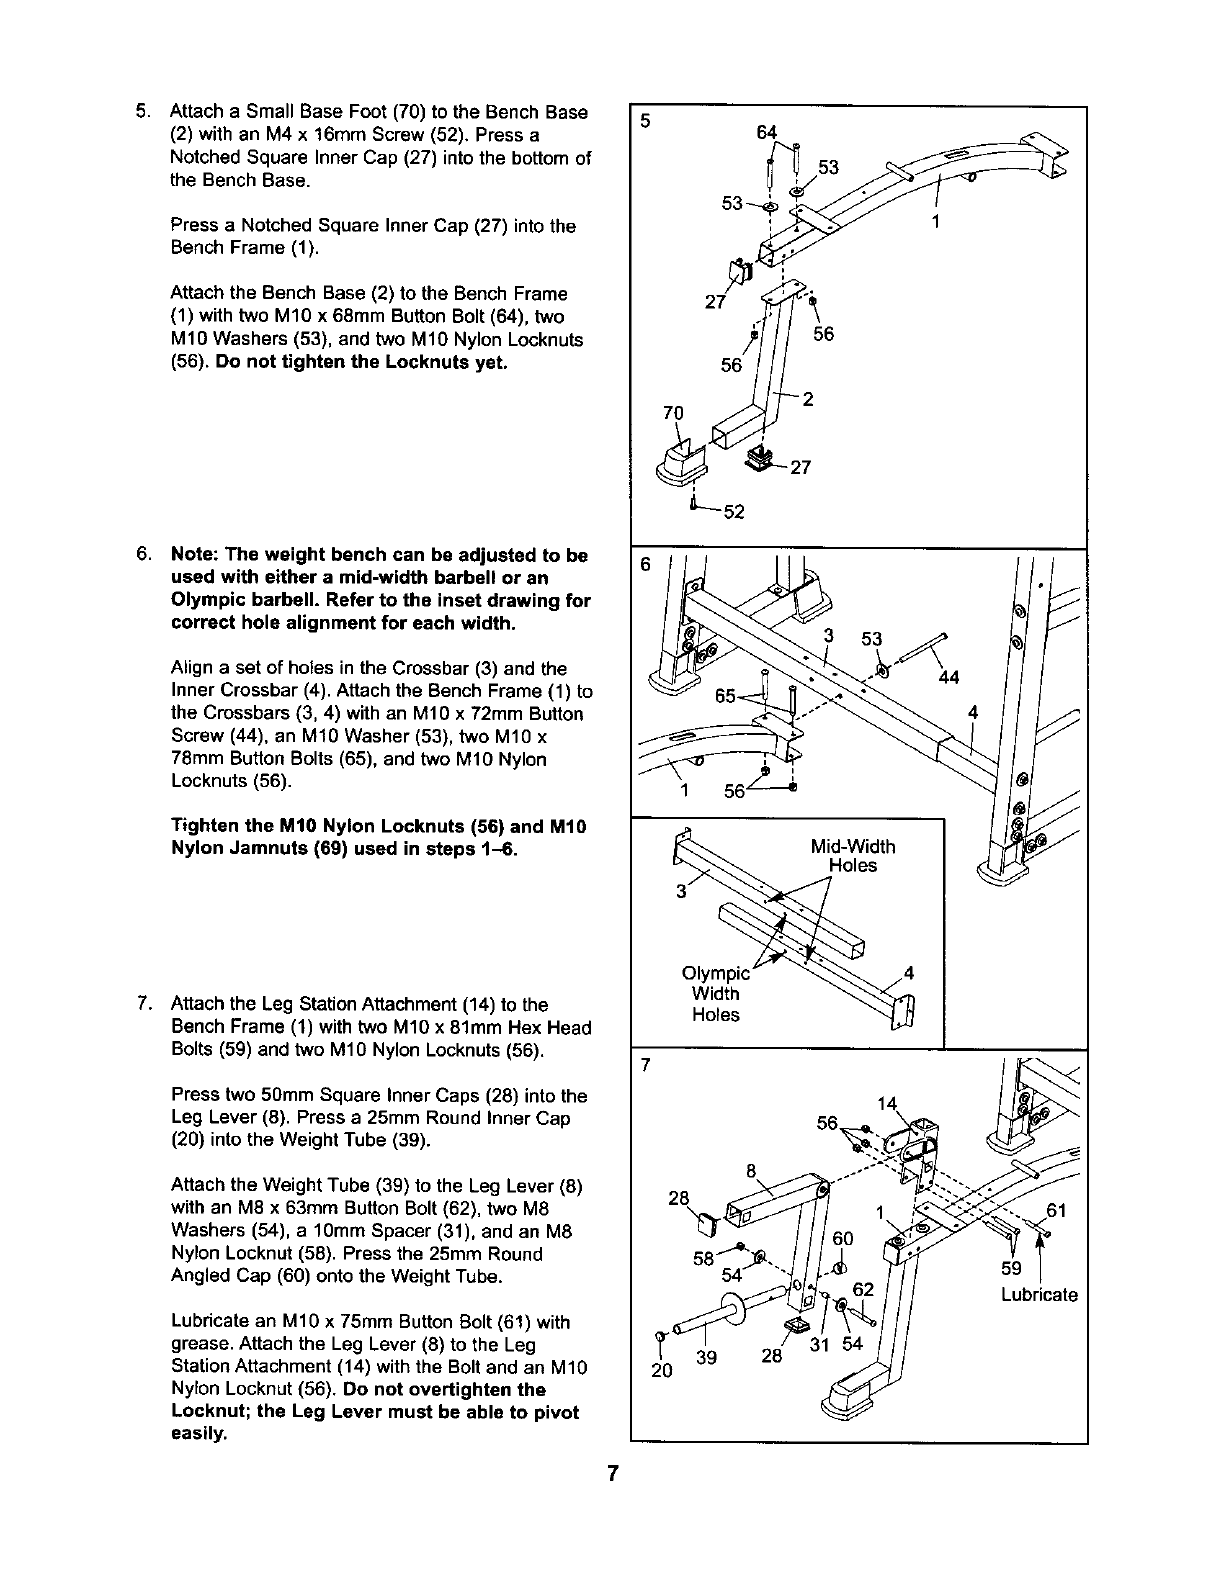
Attach a Small Base Foot (70) to the BenchBase
(2) with an M4 x 16mm Screw (52), Press a
Notched Square Inner Cap (27) intothe bottomof
the Bench Base.
Press a Notched Square Inner Cap (27) into the
Bench Frame (1).
Attach the Bench Base (2) to the Bench Frame
(1) with two M10 x 68mm Button Bolt(64), two
M10 Washers (53), and two M1O Nylon Locknuts
(56). Do not tighten the Locknuts yet.
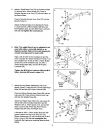
6. Note: The weight bench can be adjusted to be
used with either a mid-width barbell or an
Olympic barbell. Refer to the inset drawing for
correct hole alignment for each width.
Align a set of holes in the Crossbar (3) and the
Inner Crossbar (4). Attach the Bench Frame (1) to
the Crossbars(3, 4) withan M10 x 72mm Button
Screw (44), an M10 Washer (53), two M10 x
78ram ButtonBolts(65), and two M10 Nylon
Locknuts(56).
Tighten the M10 Nylon Locknuts (56) and M10
Nylon Jamnuts (69) used in steps 1-6.
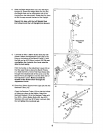
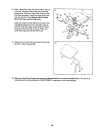
7. Attach the Leg Station Attachment (14) to the
BenchFrame (1) withtwo M10 x 81mm Hex Head
Bolts (59) and two M10 Nylon Locknuts (56).
Press two 50mm Square Inner Caps (28) into the
Leg Lever (8). Press a 25mm Round Inner Cap
(20) into the Weight Tube (39).
Attach the Weight Tube (39) to the Leg Lever (8)
with an M8 x 63ram ButtonBolt (62), two M8
Washers (54), a 10mm Spacer (31), and an M8
Nylon Locknut (58). Press the 25mm Round
Angled Cap (60) onto the Weight Tube.
Lubricate an M10 x 75mm Button Bolt (61) with
grease. Attach the Leg Lever (8) to the Leg
Station Attachment (14) with the Bolt and an M10
Nylon Locknut (56). Do not overtighten the
Locknut; the Leg Lever must be able to pivot
easily.
7O
7
27
i
L---52
Olympic
Width
Holes
28
39
53
56
-2
27
56,
8
28
53
44
59
Lubricate