


946i/932i Commercial Treadmill Assembly Guide 5
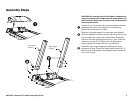
Before using the unit, make sure it is level. If adjustments are needed,
adjust one rear foot at a time. Do not raise the unit more than ¾ inch
(2 cm) from the floor.
1. Ask a capable assistant to lift the rear portion of the treadmill
(using proper lifting techniques).
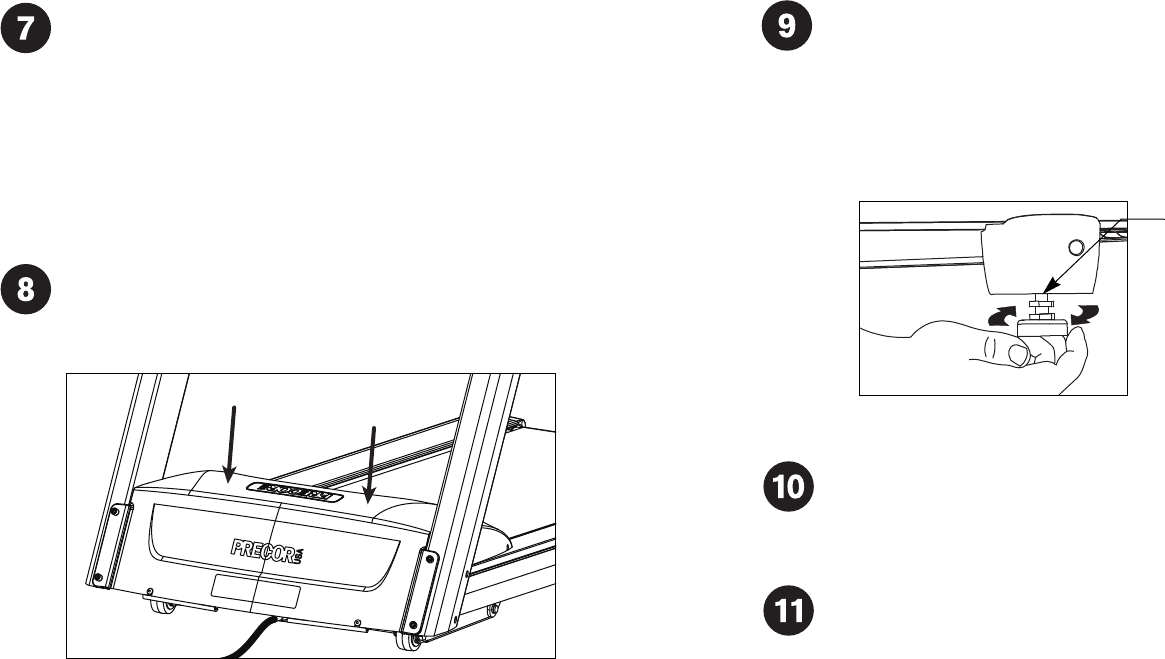
2. Loosen the upper lock nut with a crescent wrench and rotate the
rear feet as needed.
3. Retighten the lock nut and lower the treadmill to the floor.
Plug the power cord into an appropriate outlet.
Important: The treadmill requires a dedicated, grounded circuit. A
20-amp circuit is recommended. Refer to Grounding Instructions in
the Product Owner’s Manual.
Check the alignment and adjust the running belt. For instructions,
refer to Checking the Alignment and Adjusting the Running Belt. If
you wish to test the heart rate feature, refer to the owner’s manual.
Adjustable
rear foot
Tighten all mounting screws.
1. Start at the base and alternately tighten the eight fasteners that
secure the upright supports to the base assembly.
2. Wrench tighten the six screws that secure the display console to
the upright supports.
CAUTION: Be aware of the handrail extensions when you are
working around the front of the unit. It is easy to bump your head
or sustain other injuries if you ignore the location of the handrail
extensions.
Position the hood over the running belt so you can slide it through the
upright supports from the rear. Align the hood with its four fasteners. Use
the ³⁄₁₆-inch hex key to wrench tighten the two side fasteners before
wrench tightening the two fasteners that secure the front of the hood.