


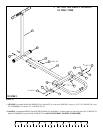
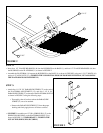
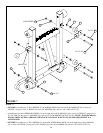
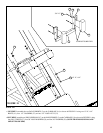
FIGURE 7
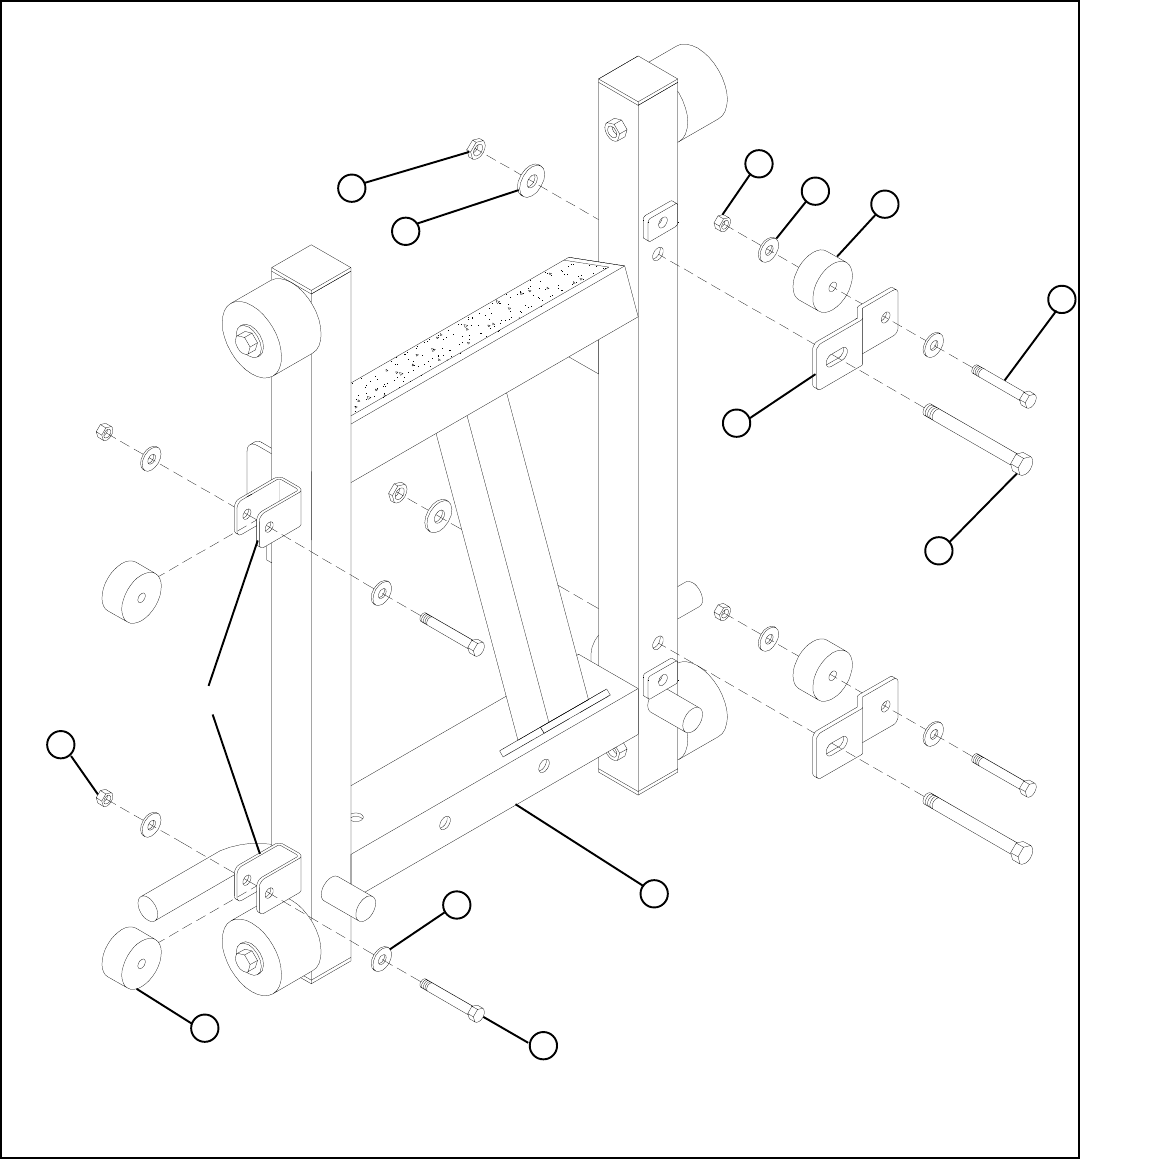
STEP 7:
11
• SECURELY assemble two 2” DIA. WHEELS (21) to the BRACKETS on the left side of the CARRIAGE (16) as shown in
FIGURE 7 using two 3/8 X 2” BOLTS (36), four 3/8” WASHERS (29), and two 3/8” LOCK NUTS (31).
• Assemble the two ADJ. WHEEL BRACKETS (14) to the right side of the CARRIAGE (16) as shown in FIGURE 7 using two 1/2
X 2-3/4” BOLTS (40), two 1/2” WASHERS (32), and two 1/2” LOW HEIGHT LOCK NUTS (34). (NOTE: TIGHTEN BRACK-
ETS SECURELY TO THE CARRIAGE, THEN BACK NUT OFF 1/2 TURN TO ALLOW FOR ADJUSTMENT IN A
LATTER STEP).
• SECURELY assemble two 2” DIA. WHEELS (21) to the ADJ. WHEEL BRACKETS (14) on the right side of the CARRIAGE
(16) as shown in FIGURE 7 using two 3/8 X 2” BOLTS (36), four 3/8” WASHERS (29), and two 3/8” LOCK NUTS (31).
29
36 3/8 X 2”
3/8 X 2” 36
LOW HEIGHT 34
32
14
21
29
31
16
21
31
1/2 X 2-3/4” 40
BRACKETS