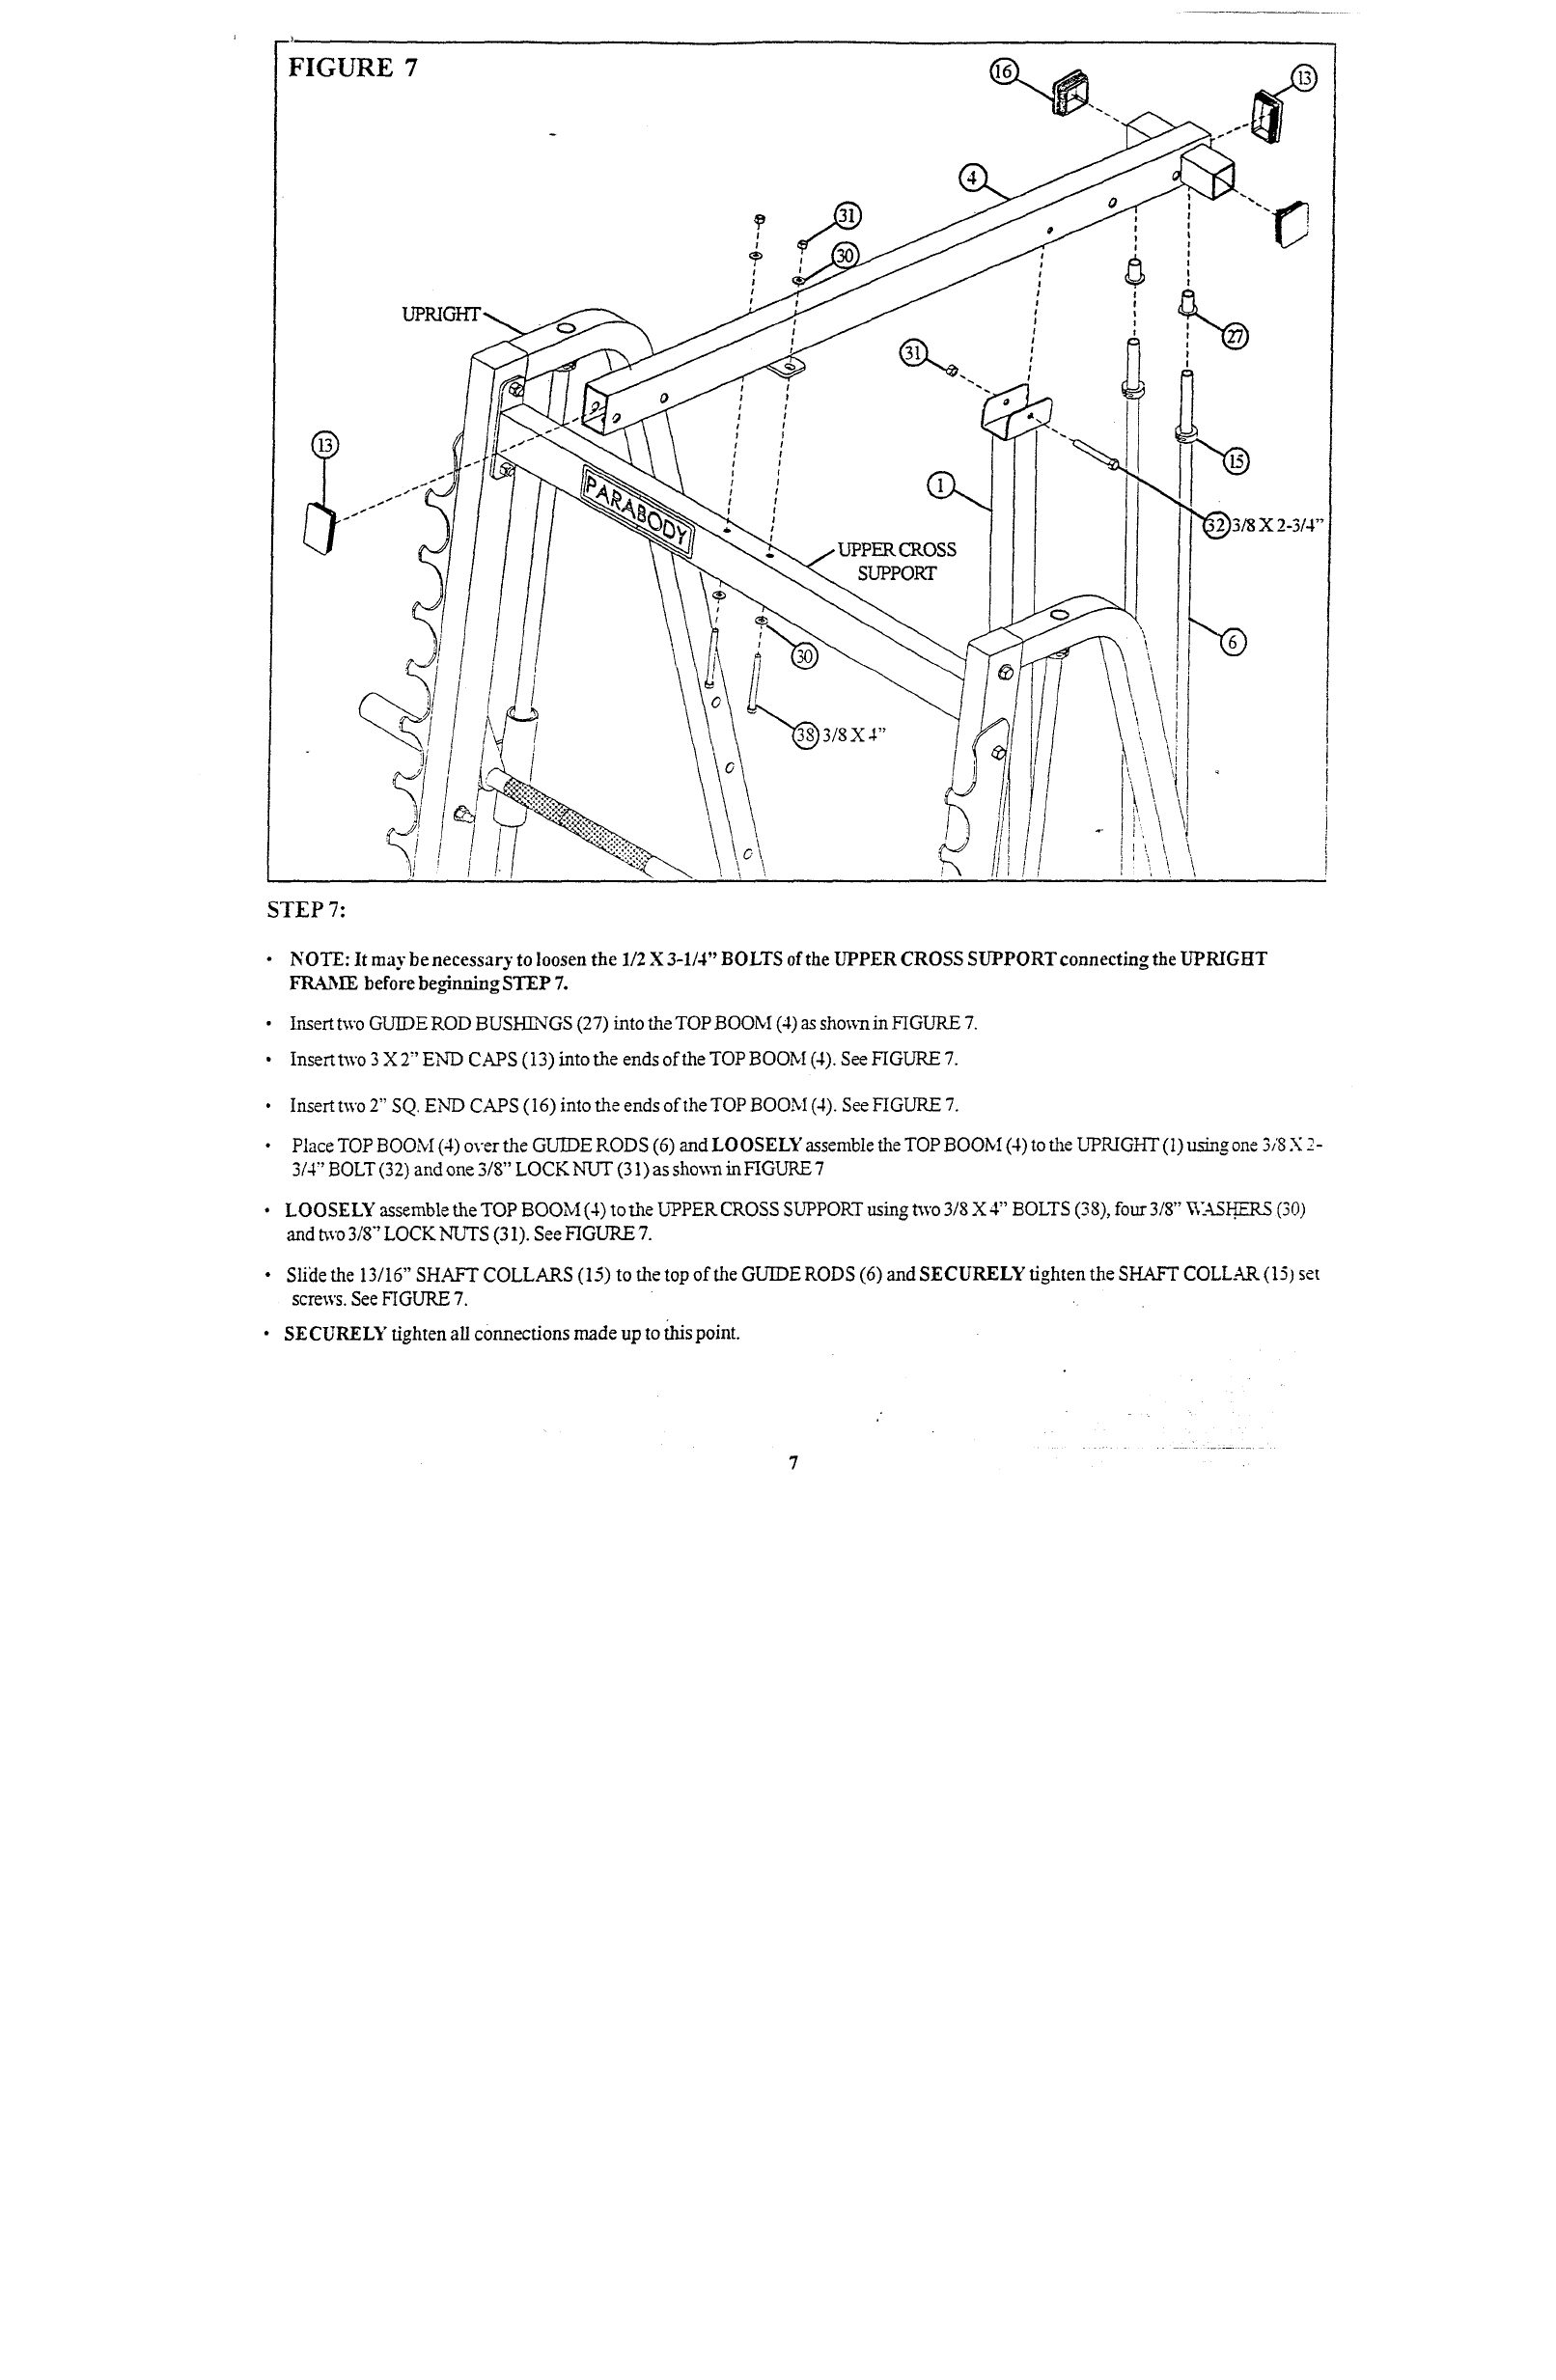
FIGURE 7
;
SUPPORT
3/8 X 2-3/4"
3/8 X 4"
STEP 7:
¯
NOTE: It may be necessary to loosen the 1/2 X 3-1/4" BOLTS of the UPPER CROSS SUPPORT connecting the UPRIGHT
FRA~IE before be~rming STEP 7.
Insert two GUIDE ROD BUSI-I~GS (27) into the TOP BOOM (4) as sho~:n in HGURE
Insert two 3 X 2" END CAPS (13) into the ends of the TOP BOOM (4). See FIGURE
Insert two 2" SQ. END CAPS (16) into the ends of the TOP BOOM (4). See FIGURE
Place TOP BOOM (4) over the GUIDE RODS (6) and LOOSELY assemble the TOP BOOM (4) to the LrpRIGHT (1) using one
3/4" BOLT (32) and one 3/8" LOCK NUT (31) as shown in FIGURE
LOOSELY assemble the TOP BOOM (4) to the UPPER CROSS SUPPORT using two 3/8 X 4" BOLTS (38), four 3/8" V,:-kS~
and two 3/8" LOCK NI51"S (31). See FIGURE
Slide the 13/16" SHAFT COLLARS (15) to the top of the GUIDE RODS (6) and SECURELY tighten the SHAFT COLLA.R (15)
screws. See FIGURE 7.
SECURELY tighten all connections made up to fl’tis point.
7


