


24
SCOOTER
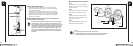
Handlebars
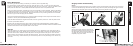
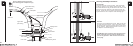
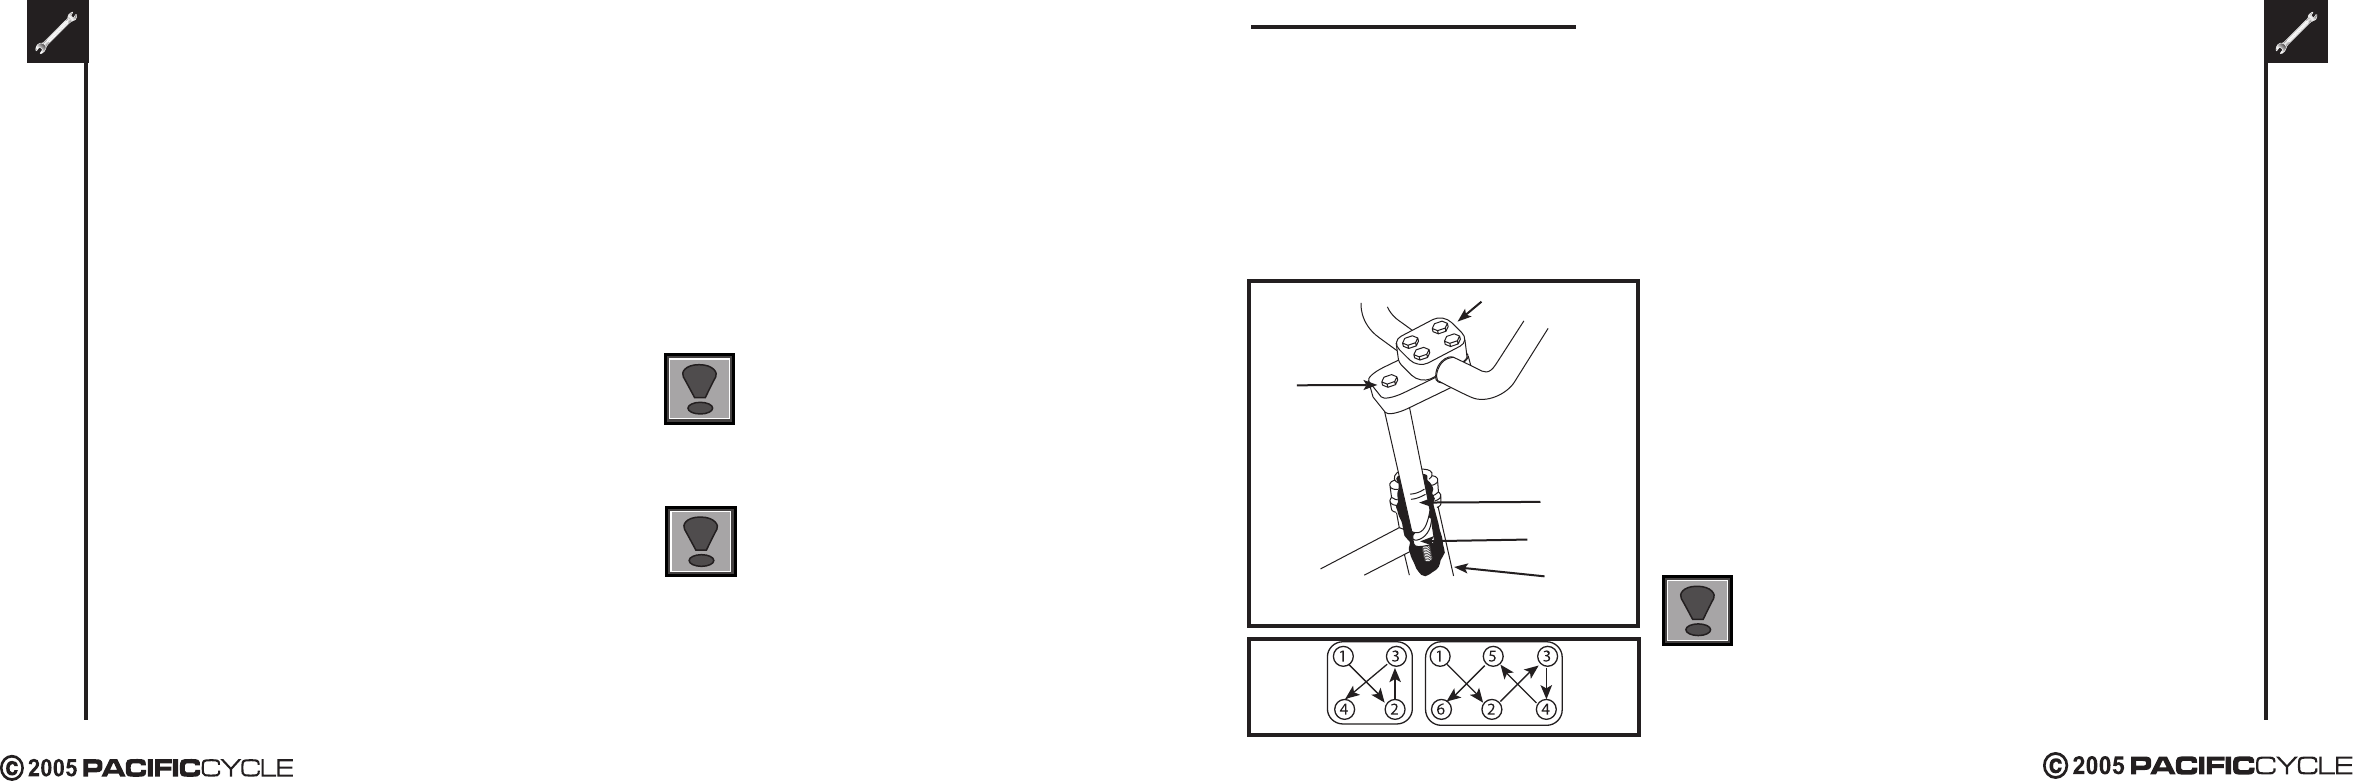
Remove the protective cap from the stem wedge and loosen the stem
bolt using the 6mm Allen key. Some models may use a 13mm
hexagonal bolt instead of an Allen key bolt. Place the handlebar stem
into the head tube, observing the minimum insertion mark on the
handlebar stem and ensuring that all cables are free of tangles. Check
that the fork and the handlebar are facing forward, and that they are
properly aligned with the front wheel. Tighten the stem bolt. Rotate the
handlebar to the desired position. Tighten stem cap bolt 1 (see picture)
two turns, tighten stem cap bolt 2 two turns and so on. Repeat until
handle bar is secure to the stem. See picture for a 4 or 6-bolt system.
Also check that the stem binder bolts are tightened equally and securely.
The handlebar must be inserted so that the minimum insertion
mark cannot be seen.
WARNING: Over tightening the stem
bolt or headset assembly may cause damage to the scooter and/
or injury to the rider.
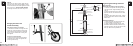
Stem
Bolt
Minimum
Insertion Mark
Head
Tube
Foreword: Assembling a scooter is an important responsibility. Proper assembly not only gives the rider more enjoyment
of the scooter; it also offers an important measure of safety.
Stem Cap Binder Bolts
Stem Wedge
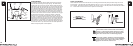
four bolt
face plate
six bolt face plate
Four Bolt
Face
Plate
Six Bolt
Face
Plate
Getting Started
Open the carton from the top and remove the scooter. Remove the straps and protective wrapping from the scooter.
Inspect the scooter and all accessories and parts for possible shortages. It is recom
mended that the threads and all moving
parts in the parts package be lubricated prior to installation. Do not discard packing materials until assembly is complete
to insure that no required parts are accidentally discarded. Assemble your scooter following the steps that pertain to
your model.
Note: Your scooter may be equipped with different style components than the ones illustrated.
23
Final Check
- If you encounter any problems, refer to the appropriate section
and make any necessary adjustments.
- Check the tire pressure and inflate each tube to the recom
mended
psi as stated on the sidewall of the tire.
- Check that the kickstand operates smoothly and the
kickstand bolt is secured tightly.
- Finally, examine the scooter. Make sure all accessories are
attached and all quick releases, nuts and bolts have been
tightened securely.
- Correct maintenance of your scooter will ensure many years
of happy riding. Service your scooter regularly by referring
to the relevant sections of this manual, OR take it to a
professional bicycle shop.
Remember: Always wear a helmet and obey all
traffic laws.
Never inflate a tire beyond the maximum
pressure marked on the tire’s sidewall.
Exceeding the recommended pressure
may blow the tire off the rim, which
could cause damage to the scooter and
injury to the rider and bystanders.
Tighten both rear wheel axle nuts or the
quick release mechanism securely. Failure
to do this may cause the rear wheel to
dislodge from the frame dropouts resulting
in serious damage or injury.